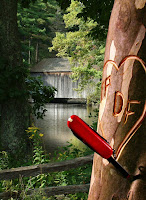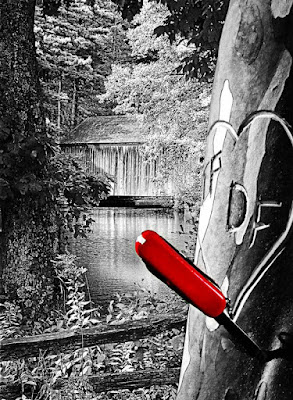
 Today we're revisiting an image we discussed back on July 1st. At that time the post talked about the impossible Depth of Field in the shot. What we're doing today is responding to a question asked about creating Pop in a shot by using spot color. Unfortunately, the question came without an accompanying image to work on. I went through some of the things we'd already looked at and decided the pocket knife in today's image could be made the center piece for using spot color. An additional reason for playing with a spot color situation was an offer for a tutorial and a Photoshop Action being sold online. The write up for the Action said it would take the complexity out of doing spot color. My question was "what complexity?". Lately I've seen things for sale as Actions or Plug-ins for PS that are as close to scams as I've ever seen. One was an "Action" being sold to give a "Rule of Thirds" grid on your image to check placement of points of interest. What's so hard that someone would spend money on that? Set your grid spacing to 33% (yep, you can call out percentage for grid spacing) and then use Ctrl comma to toggle your "Rule of Thirds" grid on and off. I can't see charging someone money for a setting. There's actually a secondary issue we'll tackle before we ever get to trying to make the knife sing. The plastic trim pieces on a knife like the one shown typically has a smooth finish. In the original image it appears to have a texture of some sort. We'll take less than one minute and "fix" that inconsistency. Hit the "read more" to fiinsh today's makeover.
Here's the quick fix to remove the false texture from the knife handle. On your base image, go to the Channels Panel, click on each channel (Red, Green and Blue) to determine where the noise (that's what the "texture" is after all) resides. It might be spread over all three channels or, as in the case of today's image, it may be in only one channel. The noise in the knife handle is only in the red channel. Select the Red Channel and then Filters/Blur/Surface Blur. Use the Radius (low value) and Threshold (typically a little higher value) sliders to reduce (eliminate) the noise. The advantage of using the Surface Blur filter is that it does very little to any edges or complex details. It works only on "surfaces" with some area to them. Repeat the process in each channel having a noise issue. HINT: Use the preview that come with the Surface Blur dialog box extensively to check on how much noise is being removed. Any more than the minimum required is unnecessary.)
Now, on to the focus of today's post, Spot Color. Make a copy of the base layer. Use the B&W Adjustment Layer to convert the entire image to B&W. (If you have older versions of Photoshop, use whatever you normally use to convert an image to B&W. Desaturate (bad idea), Channel Mixer (better), or Hue/Saturation (still better), or whatever you typically do to get to a B&W image. Then, just use the Brush tool with the foreground color set to black to paint back the handle to its original color. Done.
That was the shortest paragraph of today's entire discussion, and offered several options on how to get to the B&W portion of the image. Someone wants to "sell" an Action to accomplish that? Be careful of what's available to "easy the workload" in Photoshop. Most of what I've seen are things that Photoshop already does with a pretty bow put on them.


0 comments:
Post a Comment