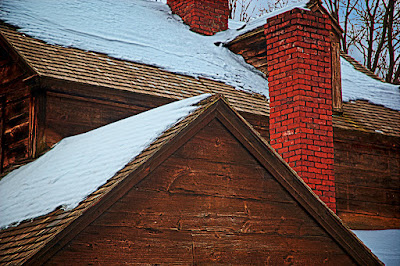
 It's been a heck of a winter around here. First it was snow by the foot and last weekend it was flooding rains, almost 4.5" in a 36 hour period. But, there were photo opportunities throughout. Okay, not so much during the monsoon rain, but, other than that one day there were shots to be found. Today's image is not only representative of what the area looked like, but is kind of interesting because of all the angles. Other than in the trees, it pretty tough to find any curved lines in the entire composition. The boards of the house, the shingles on the roof, the bricks of the chimneys, and the outline of the house itself are all straight lines. Pushing this image over the edge to a highly graphic design element would be an easy take. On the other hand, getting some detail in the snow was trickier than it might look. To find out how the detail was retained, hit the "read more".
Today's image started out in Adobe Photoshop Lightroom 3.3 as a single image. In LR3 two Virtual Copies were created (Photo/Create Virtual Copy) and Developed so they were two stops over and two stops under exposed. The three copies were set up to be combined in Photoshop Merge To HDR Pro. HDR Pro could see there were three of the same image, but didn't see any differences, making the Develop step unrequired. The dialog box came up and, basically, said "how are these images different?". It gives the options of doing something to either the F-stop, the Shutter Speed or the EV (Exposure Value). Unlike shooting three images for making an HDR composition, where using a changing Shutter Speed is important, here the choice is yours. Nothing can be done to change the Depth of Field that's already there, so changing the F-Stop value is as valid as changing the Shutter Speed. If you're familiar with how F-Stops and Shutter Speeds relate, it might be better to use the EV option. Just say you want copy #2 to be two EV over and copy #3 to be two EV under. Being sort of set in my ways, I mimicked what the camera would do in Aperture Priority Mode and changed the apparent Shutter Speeds. There's a dropdown, so it makes selecting the points pretty easy. After that PS CS5 will process the image using Merge to HDR Pro.
I wasn't interested in taking today's image to the far edge of HDR, but using HDR to give a little detail throughout the range. Red and Yellow were jacked up using Hue/Saturation Adjustment Layers and the color cast taken out of the snow using a Brightness/Contrast Adjustment Layer and clipping it to only the snow. That way the detail in the snow was maintained.
The sky looked pretty sad even for a winter's day, so a slightly better sky was put in place. Between using a Darker Color Blending Mode and the Alpha Channel Mask of the snow it popped that in. Using the Move Tool (V) the sky could be moved around to get the best look possible.
Normal finishing with a High Pass Filter (Filter/Other/High Pass) and a slight vignette using the Rectangular Marquee Tool (M) with a fairly large Feather (Shift F6) completing the processing of today's image.


0 comments:
Post a Comment