Monday, February 28, 2011

A Different Take On Infrared.

I've talked about infrared before (10/11/10, 10/8/10, 1/6/10, 8/24/09, 8/21/09, 7/8/09, and 6/1/09).  I revisited it this morning to see what other ways I could push infrared.  Today's image is a combination (more accurately it might be called an overlay) of a straight image and an infrared image of the same scene.  Some infrared snobs might be wondering how you might be able to take an infrared image with a converted camera and match the image with a camera that hasn't been modified.  I suppose you could have the same quick release base for your tripod on each camera and carefully switch between the two, but the chances of zero movement during the switch is close to 100%.  I've written about using a non modified camera to shoot infrared in past posts. It can be done.  The exposures are by guess and by golly, but once you dial in on the right exposure for the scene in front of you, you're in.  The way I do it is to use an unmodified camera.  The same camera I use on a daily basis.  I get bright white leaves in the trees and very dark skies.  As you can see from today's image, the detail in the branches of the trees is just as they would look out of an altered camera.  I'll put my camera on a solid tripod.  Setup the camera and adjust the framing to my liking and then screw on my Hoya R72 Infrared filter by just enough to get it to catch.  Probably a quarter to a half thread.  I'll take several exposures at increasing intervals to find the optimum.  Once that's done I'll shoot one infrared, carefully take off the filter, switch the camera to Aperture Priority, click the shutter again and repeat many times to get just the right pair.  One thing to remember is that the long infrared exposures will result in movement in the leaves.  It's true in any infrared photography.  But, today's post is more about the post processing than the physical snapping of the shutter.  To find out what was done to today's image, hit the "read more".

Read more!

Wednesday, February 23, 2011

Quick Use Of The Multiply And Screen Blend Modes

Take a look at today's image.  You can see the contrast range is pretty extreme.  We have bright sunlight and deep shadow.  The trick is to take control of the extremes and bring the shadows up and the highlights down.  There are many ways to accomplish the task, but there is a technique I use that gives all the control you can possibly ask for.  The first thing was to go to HDR Pro in Adobe Photoshop CS5 and make a reasonably natural looking HDR image.  That got us part of the way.  I wanted to keep the scene looking fairly straight, not the wild side of HDR.  The image was still contrasty.  It needed selective attention in at least three areas.  The first thing to do was to make a couple Alpha Channel Masks.  One of the group of people to the left of the pole.  Another for the umbrella canopies and a third getting the entire group.  A couple secondary masks were made for the woman on the left's chin and the Harley Davidson patch on the man's jacket.  To find out how each mask was used, hit the "read more".

Read more!

Friday, February 18, 2011

Eight Steps To Using A Complex Mask Tutorial

This is the image at the start of the process.
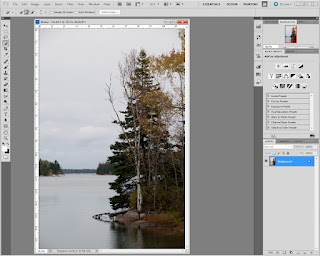
Adobe Photoshop CS5 has this great new tool called the Quick Selection Tool (W). There have been a lot of tutorials done showing how well it does, when used with the Refine Mask dialog box, to select wispy hair and other complex "solid" objects. One place I haven't had much luck with it is on complex objects that look like Swiss Cheese. Something with lots of open space within the outline of an object. Today we start out with an image that has possibilities, but a rather bland sky. The Quick Selection Tool - Refine Mask combination can't figure out the internal lattice of the trees. In order to make an accurate selection and come up with a Mask we'll take one step back to take two steps forward. The one step back is using the Calculations dialog box (Image/Calculations) to come up with a good Mask. The rest of this tutorial is all visual with captions to walk through the "two steps forward".


One of the things I like to see in tutorials is what's going on "behind the scene. So, each image will show the whole screen so you can follow along easier. " Hit the "read more" to follow the steps.
Read more!

Wednesday, February 16, 2011

HDR Without The HDR

HDR (High Dynamic Range) is the hot thing to do with shot this (and last) year.  But, like many things we can do "easily" today by pushing a buttom, "HDR" could be done before actual HDR programs and plug-ins came out.  Today's image recreates an image with the expanded tonal range of HDR using a series of Masks, Alpha Channels and Blend Modes.  The original image was bright in the case areas and pretty dark in the wood sections.  The bags of jerky on the right side (the red bags) and the bottles stacked on the floor were in deep shadow due to the falloff from the light source (the lit cases).  The wood is broken into two areas that were treated separately.  The floor and the ceiling above the rear case.  There was very little detail in the planks on the floor and even less on the higher wood.  There were ancillary problems that needed some attention because of the wide angle shot.  The floor at the rear and the top of the rear cases showed some convergence and the frames of the cases along the left side needed a little straightening.  That's not what today's post is about, not I may revisit that in another post.  Today it's more about getting an HDR look without using HDR software.  To find out what went into today's image, hit the "read more".
Read more!

Monday, February 14, 2011

Matching A Photo Filter Adjustment Layer with Reality

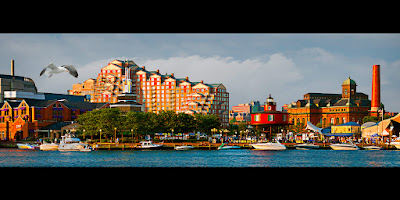
Today's image, like so many others posted here, didn't start out looking like what you see.  The sky comes from a 2009 trip and the harbor is about nine months later in the opposite direction.  The distance between the sky and harbor is somewhere near 700 miles.  Typically we take a trip along the Maine coast in October to shoot the foliage, the harbors and the lighthouses.  We'll also take a trip before the schools get out in June to avoid the crowds and explore somewhere we haven't been before.  Last June it was a loop trip that took in the Jersey shore (no, not that one - further down - Cape May), Chincoteague Island, Williamsburg, DC, Baltimore and central Pennsylvania.   The "scene" for today's image is part of the inner harbor in Baltimore.  A totally redone waterfront that is as far distant in time from Colonial Williamsburg as you can possibly get.  The pano was made in early evening, but nowhere near as close to sunset as it appears.  The dramatic sky was shot in Maine and was deep into sunset.   Are there flaws in today's image?  Sure, look at the building on the far left with the pyramid top.  The shadow is on the wrong side compared to the "rising" sun.  One of the Adjustment Layers that's not used too much was used to turn the blue water into, what seems to be, a reflection of the gathering morning light.  To find out what it was and what had to be done, hit the "read more".
Read more!

Friday, February 11, 2011

10 Minutes - Start to Finish - Nothing But Net

Okay, the "nothing but net" is an add on.  The title just reminded me of one of those commercials with the basketball players from a few years ago.  A friend of mine saw today's image and said something like "that must have taken you a long time".  I asked him for a estimate of how long he thought it would take to complete the image.  His reply was "oh, hours I'd guess".  I told him it was closer to ten minutes.  Also being named Thomas, he was a doubter and challenged me to produce a similar image.  Today's post is the result of that challenge.  I started from scratch, set a timer on my second screen and did a screen capture every one minute.  The entire process took far longer than the ten minutes, doing the screen capture, cropping it to show what was going on, saving it,  So, it was work for one minute, spend two minutes documenting what was done during the one minute, resetting the screen and going for the next minute.  The result is today's post.  To see what my screen looked like, minute by minute, hit the "read more".


Read more!

Wednesday, February 9, 2011

Everything New Is Old Again in Adobe Photoshop

Everybody has photos laying around from bygone film days.  I happen to be lucky enough to be the keeper of the family's record as told through old photos.  Many of them look like today's image.  They're faded and have turned sort of a sepia-ish brown.  They're probably a lot worse for wear than today's image, having been passed around so many times.  The edges are ripped, there's been drinks of almost any description spilled on several, but the tell the story of who we are.  Today's image "says" it's from September 1934.  The old prints used to say Kodak and have the date they were processed on them.  A little advertising to remind people who were the people to print "the moments of your life".  The thing is, today's image is not old, it wasn't pulled out of a shoebox tucked in the back of a closet or found in a musty attic.  It was found on my "K" drive and the image was shot in September 2010, not September 1934.  Some Adobe Photoshop CS5 technology was used to make it appear to be from many years ago.  To find out how this image was made and what cutting edge technology was used, hit the "read more".
Read more!

Tuesday, February 8, 2011

Make a Portrait A Little Different

Everybody tries to do something different with a senior portrait (little play on words, she actually is a "senior").  Today's image is a simple way to add a twist to any portrait.  It's a three step process that isn't without a hiccup or two.  One of the big things is "fair use".  The song is (was) copyrighted at the time it was written.  There's a notation in the lower right that says "do not photocopy".  The question comes from the purpose of making a photocopy.  It's a song.  The purpose of the sheet music is to allow people to play the music or sing the song.  As such, if I were the person or group using the sheet music to produce music is some way I'd agree that the orchestra shouldn't make fifty copies of the sheets and pass them around with either buying fifty sets or getting a license to use that says they can copy the sheets for the purpose stated in the license.  I agree with that 100%.  The way the sheet is used in today's image there is no way anyone could either sing the song or play the melody.  The background image is strictly a backdrop for the portrait.  It's an element of a photographic composition, not of any musical use at all.  Another thing I wouldn't do, although it would be extremely easy, is remove the "do not photocopy" caveat.  To do so could be perceived as an attempt to fool someone.  There are other things that could also be done.  The words could be stripped out, the lines of notes could be cut and pasted into a different order, the title could be replaced.   I don't believe anyone could come to the conclusion that, by using an image of the sheet music, I'm violating the intended purpose of copyrighting the material in the first place.  That said, to find out more about "how" the final image was made, hit the "read more".
Read more!

Friday, February 4, 2011

Playing With A Freebie Plug-in From Adobe

I must be veering off toward the dark side.  Here's a second post about a plug-in.  I typically don't use plug-ins, preferring to figure out what a plug-in is actually doing and duplicating the effect using straight Adobe Photoshop CS5 in all its glory.  Dave Cross, one of the Photoshop Guys over at NAPP, did a piece on a "new" (it was at the time) plug-in available on the Adobe Labs website. I downloaded it at the time and it sat, languishing at the bottom of the Filters dropdown is CS5.  I suppose I could get the same result by using the Mixer Brushes available in CS5, but that would take some artistic talent and I've proved over and over again that I don't have any.  I guess when they were handing out the part of brains for talent I thought they were giving out pains and said "no thanks".  (Old joke.)  After my exploration of Fractalius from Redfield Plug-ins on Wednesday I thought I give the only plug-in I have loaded in Photoshop a shot and see what it does.  Most of what I found added up to a zero as far as I'm concerned.  Most are a mishmash of algorithms for the sake of writing an algorithms.  I can't imagine what I'd use them for.  But one, called Oil Paint had possibilities.  For a link to the download site for the plug-in and a little about today's image, hit the "read more".
Read more!

Wednesday, February 2, 2011

Something A Little Different With A Plug-in

I was flipping through some of the galleries over at the NAPP (National Association of Photoshop Professionals) site the other day and came across a couple interesting images.  They looked like they had sparks coming off the tips of anything with a pointed edge and gave an heightened edge to any long sweeps.  The maker of the images said it was his first experiment with a plug-in he found and was loving the technique.  It did look kind of unique, I had only seen it a few other times and thought it was worth looking at.  I don't typically use a lot of plug-ins, preferring to figure out what a plug-in might be doing in Adobe Photoshop itself.  I don't know of too many things that plug-ins can do that can't be done in Photoshop, with enough blood, sweat and tears.  The function of plug-ins is to simplify tasks.  You can reduce noise without some of the popular plug-ins by using a Surface Blur (Filters/Blur/Surface Blur) on the individual Channels (Red, Green and Blue) in the Channels Panel.  You can create B&W images without using the popular plug-in by working the image with the tools available.  I have to admit, it is a lot easier to use a preset rather than do the work yourself, but it can be done.  The "sparkie" technique is one that is difficult to figure out and will need considerably more investigation before I figure out the steps needed to duplicate the same effect.  It's such a limited use technique that I don't even know if it's worth breaking it down, but it is still interesting enough to play with.  If you're interested in finding out what the plug-in is called and where to find it, hit the "read more".

Read more!