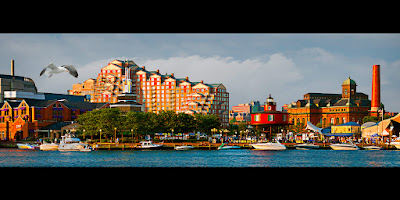
Okay, the "nothing but net" is an add on. The title just reminded me of one of those commercials with the basketball players from a few years ago. A friend of mine saw today's image and said something like "that must have taken you a long time". I asked him for a estimate of how long he thought it would take to complete the image. His reply was "oh, hours I'd guess". I told him it was closer to ten minutes. Also being named Thomas, he was a doubter and challenged me to produce a similar image. Today's post is the result of that challenge. I started from scratch, set a timer on my second screen and did a screen capture every one minute. The entire process took far longer than the ten minutes, doing the screen capture, cropping it to show what was going on, saving it, So, it was work for one minute, spend two minutes documenting what was done during the one minute, resetting the screen and going for the next minute. The result is today's post. To see what my screen looked like, minute by minute, hit the "read more".
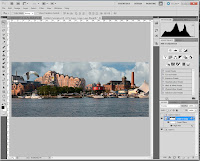 |
Minute eight. Image sharpened.
Mask applied to sky. |
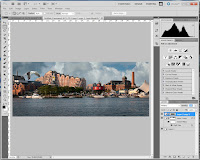 |
Minute nine. Vignette applied.
Image complete. |
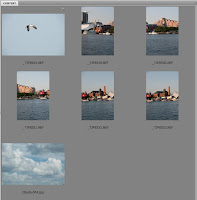 |
| Images in Adobe Bridge |
The process started from Adobe Bridge with image one. I have the images combined in one folder because I'll be using this process for a live class I'll be teaching. So, during the first minute I opened all the images in Adobe Photoshop CS5. The clouds (being a jpg) went directly while the other six opened in ACR (Adobe Camera Raw). I did a select all in ACR and had it Open Images into CS5. Once open in CS5 I went to File/Automate/Photomerge. I clicked on Add Open Files and all seven images opened into the dialog box. I clicked on the "cloud" image and hit remove. The shot of the bird wasn't in the same sequence as the five shots for the pano, so it was removed also. The dialog box was set to Auto and Blend Images Together. I hit okay and sat back while CS5 did it's thing.
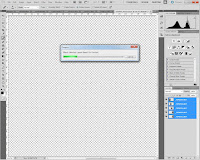 |
Screen shot after minute one,
5 images being blended. |
After the merge completed, the image was straightened using the Ruler Tool (i). The straight line used was the right edge of the center building. The five images making up the pano were converted to a Smart Object (right click on the stack and select Convert to Smart Object). The Crop Tool (C) was set without any constrained dimensions, at 150 pixels per inch and pulled out to create the portion of the image needed for the final print. The crop looks pretty severe, but the after crop size was still 40 MB. Plenty to make a good sized enlargement.
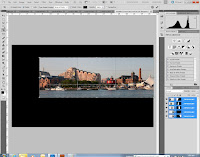 |
Screen shot at minute two.
Ready for cropping |
The next step was to make a Selection of the sky area using the Quick Selection Tool (W). After making the selection a little time was spent at reasonably high enlargement to go around and pickup any signification areas missed by the Quick Selection Tool. Once the Selection looked good I right clicked in the selected area and picked Save Selection to create an Alpha Channel.
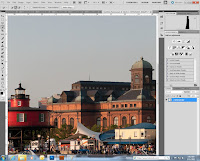 |
Minute three. Sky being selected
to create Alpha Channel |
Next the sky was brought into the scene. The Layer was duplicated (Ctrl J) and put into Free Transform (Ctrl T). A right click presented the Transform option and Flip Horizontal clicked. Using the Move Tool (V) the top Layer was slid to the left, overlapping the copy beneath by 20% or so. A Layer Mask was added and the seam between the image softened using the Brush Tool (B) on the Mask. The two sky Layers were Merged (Ctrl E) and put back into Free Transform (Ctrl T). In order not to have a mirror image of the sky the size of the sky Layer was increased and Rotated to give a different look across the scene.
 |
Minute four. An Alpha Channel
has been added to the
Channels Panel |
The Image of the bird was brought in and the bird selected using the Quick Selection Tool (W). Right clicking in the selection and choosing Save Selection produced an Alpha Channel of the bird. Adding a Layer Mask with the selection active dropped the sky around the bird out of the scene. The stack of Layers was selected (Click the top Layer and Shift Click the bottom Layer) and (using a Right Click) made into a Smart Object.
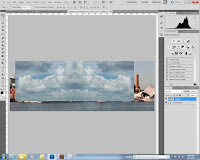 |
Minute 5. Clouds brought in,
duplicated, flipped & moved |
The Smart Object was copied twice (Ctrl J - Ctrl J), the lower Layer activated and the visibility of the upper image turned off. Sharpening was done using a High Pass Filter (Filters/Other/High Pass). Sharpening clouds is not a favorite of mine, so the Sky Alpha Channel (Channels Panel - Ctrl Click on the thumbnail) was selected. The Blend Mode was switched to Overlay. A New Layer Mask was applied with the Selection active, applying the Mask to the Sky area only/ Oops, Ctrl I (eye) Inverted the Mask, sharpening the scene and not the sky. The last step was to apply a vignette. The visibility of the top Layer was turned on (clicking on the eyeball icon). Using the Rectangular Marquee Tool (M) a Selection was made leaving a border around the entire scene. Shift F5 opened a Feather dialog box and the radius set to 200 pixels. A New Layer Mask was applied and the Blend Mode changed to Multiply.
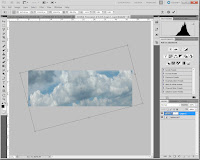 |
Minute six. Sky in Free Transform, enlarged and rotated. |
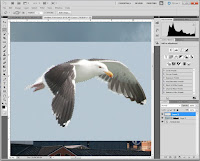 |
Minute seven. Bird brought in and
selected using Quick Mask |
That finished the image and left every part accessible to make possible improvements. As I said at the beginning, it took twice as long to capture and setup the images as it did to do the work. It then took more than six times as long to write it up. Fast Photoshopper, slow typist.


0 comments:
Post a Comment