Monday, January 31, 2011

A Simple Photoshop Blending Mode Tutorialreflections under the cup, just to the left of the plate.

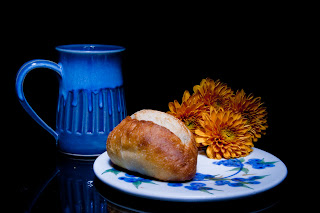
The shot of the cup, roll and flower needs a little explanation before we get into the tutorial.  One, there's too much image.  It needs some cropping, in from the right and left, down a little from the top.  We don't "need" to show the handle, the viewer will "know" that the cup has a handle somewhere.  The right edge of the plate can go also, it doesn't add needed information.  The exposure for this shot was about 20 seconds.  The light came from an LED flashlight played around the setup.  The "setup" was a plastic panel over a black mountboard.   Nothing was needed for the background since the falloff of light was enough to render the wall black.  The first thing to do (after cropping) is clean up any distractions.  There's a couple of reflections under the cup, just to the left of the plate.  The easiest way to fix them would be to create a new Layer and use the Spot Healing Brush (J) to quickly remove them and any other stray light in the lower left of the shot.  I can sit and tell you all day that the cup is full of hot coffee, but there's nothing to indicate that's the case.  There are images all over the web (such as in Flickr) of people playing with smoke.  Many come from taking shots of burning incense smoke.  Many are colored and manipulated into very interesting shapes and patterns.  To learn how a shot of incense smoke provides to "steam" coming from the coffee cup, hit the "read more".
Read more!

Friday, January 28, 2011

Adobe Photoshop's Secret Weapon

Here's a quickie for a Friday.  We'll take a look at an extremely under used tool available in Adobe Photoshop CS5 and several preceding generations.  To start with we have a well exposed shot of the moon and a shot of a church scene in late autumn.  If we were looking for a simple shot of the moon in the clear space of the sky we'd have a one click for that.  Just change the Blend Mode.  There's several options, such as using a Screen Blend Mode or a Lighter Color Blend Mode.  Either will do a pretty good job of dropping out the black of the moon Layer.  Our Background Layer would be the shot of the church and the upper Layer would be the moon.  That's all well and good, but it makes a rather uninteresting image.  More interesting would be the moon behind some of the branches of the tree.  If we were to simply move the moon over the branches with the straight Bland Mode switch the moon would appear in front of the branches.  That wouldn't fool a three year old.  The church with the branches is one image, yet we want to slide the moon behind the branches.  There's a hard way and there's an easy way.  To find out what the two methods are, hit the "read more".
Read more!

Wednesday, January 26, 2011

"Finishing" The Gas Pump From Monday's Tutorial

Here's where we left off on Monday.  It's a complete image, but it still needs some work.  The pump is sort of lifeless and can use a little spark.  The ominous clouds in the background do add some drama, but it would be better if the storm was just past and the pump had a little sunshine on it.  It's an old pump, so we can make the assumption that, other than the glass, it's all metal or some sort.  The bezel looks like a stamping and the crown of the body appears to be a casting.  Each would react to sun shining on it differently.  Getting the appearance of directional light is as hard as you might think.  Hit the "read more to find out how to "light" the pump.

Read more!

Monday, January 24, 2011

A New Step By Step Tutorial

Starting point for
today's tutorial.
Okay, before we get going, another confession. A buddy of mine, when he saw today's finished image asked, "why didn't you just take a picture of the whole pump?". I explained that I was being "artsy" when I snapped the shutter and didn't give a thought to wanting an image that showed the whole pump.


Today's "exercise" is going to be rebuilding the missing pieces of the pump. The upper and left tips of the star need a little help, obviously the bezel needs some major reconstruction and the left side of the pump body could use some sprucing up. The first step is to straighten up the pump (more artsy shooting). That way we have an axis to base all the work off of. With Adobe Photoshop CS5 where's an easy button you can push to Straighten and crop an image. Well, we really don't want to take more information away from the shot and have to rebuild that much more. CS5 does have a handy dandy modifier key to straighten and not crop a image. Just hole down the Alt key when you hit the Straighten Button and you get a straighten, full image with not cropping. Kind of like what you'll see as the first image once you hit the "read more".


Read more!

Friday, January 21, 2011

Part Two Of The Complete Baltimore Harbor Pano Tutorial

One caveat before we start with part two of the Baltimore Harbor tutorial.  I was so concentrated on making sure I had the individual JPG images of each set that I forgot to save the PSD file.  So, I had to rebuild it from scratch.  One of the things that surprised me was that it took less than ten minutes to not only get to where we were on Wednesday, but to complete the image completely.  This may look like a complex build of an image, but it's really not that many steps.
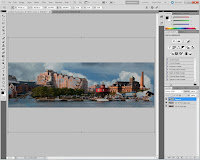
Here's the closest I found to our end point from Wednesday's "part one".  There's no gull in the image yet, no working of the "hot" areas, no sharpening and no vignette.  These will be the steps we'll go through today.   The first thing to do is add our friendly little gull.  Gulls, or any flying birds in range are another database I've built over time.  You need to thing in pieces of possible images.  Would birds look realistic in the scene you're trying to build.  Having sets of files of "pieces" comes in very handy.  The gull doesn't take up much of the original shot.  That's okay, we don't need the gull to be particularly big.  It's an accent, not a feature of the scene.  In the case of the gull I used the rectangular Marquee Tool (M) and isolated the bird.  I copied (Ctrl C) and pasted (Ctrl V) the selection into the scene.  Using the Move Tool (V) the gull was positioned in the approximate location I thought it would look good.  Using the Quick Selection Tool (W) the sky was selected.  Right clicking in the sky brought up a dialog box.  In the dialog box the Save Selection option was chosen.  It really doesn't matter if the Alpha Channel Mask is of the sky or of the gull.  Once it's used, the Mask can be flipped using CTRL I (eye) to get to the Mask needed.  You can either use Refine Edge as you make the selection or use Refine Mask once the selection is converted to the Alpha Channel Mask to clean up the edges.  Here's what we have with the gull inserted into the scene.

Read more!

Wednesday, January 19, 2011

A Full Blown Tutorial In Adobe Photoshop CS5

Got an email the other day from a reader saying they liked the tutorial portion of the posts, but could do without the anecdotal stories in the first paragraph.  So, we're going to try something new.  A highly expanded tutorial focus, with lots of pictures showing exactly what's going on in each step of building an image.  To kick it off I'm going to "rebuild" the scene of the Baltimore Inner Harbor and explain the thoughts behind each step.  To get to the end result may actually take a couple of posts, so hang in there.
These five shots will be used to make the final image.
We'll start with the general scene by taking the four vertical shots and making a panorama from them.  The shots were taken "hand held".  If you have enough light, a firm stance, a steady hand and a good eye, hand held panorama component shots aren't really a big problem.  Naturally, the lower the light the more the need to put the camera on a tripod.  I think most people's first thought about making a hand held pano is to stand in place and twist around you waist.  Actually, (I learned this after shooting this set of images) if you keep your eye in the viewfinder, composite your next shot and then shuffle your feet to get straighter toward the subject, you'll end up with a better series of images to use for the panorama.  You won't get as much of a bow to the final composite. 
Hit the "read more" to follow along with the building of the final image.
Read more!

Friday, January 14, 2011

We're Back And Thanks For Asking

At first glance it might seem to be a strange image on a day when it’s minus two degrees outside as I start this post, but this is a shot of where we’ve been for the past couple of weeks.  Today’s image is of part of the waterfront in Marigot, St. Maarten in the Caribbean.  We were down there last year also, but before we left I had put five postings “in the can”.  This year, things were too hectic to get a few ready and I just needed a break.  We were on a cruise with Norwegian Cruise Lines.  We’ve done a cruise in either January or February for about the last ten years.  While in St. Martin/St. Maarten we’ve snorkeled, done tours, walked the main shopping areas and just about anything else we could think of.  This year we rented a car for the day and did a pretty thorough tour of the island.  We knew that Marigot was our destination and wound our way around the island with the objective of getting to Marigot at lunchtime.  We timed it fairly well, but had a bit of a hike to get into town from where we parked the car.  To give you an idea, the car is around the corner, behind the hill you see in the shot.  The buildings you see in the shot appear to be hotels.  One is and one isn’t.  The building on the right is a shopping mall.  It’s about four floors of shops.  The entire town is shops and restaurants, but someone thought there needed to be a few more and went up when they couldn’t go out.  Today’s image is treated.  To find out how, hit the “read more”.
Read more!