skip to main |
skip to sidebar
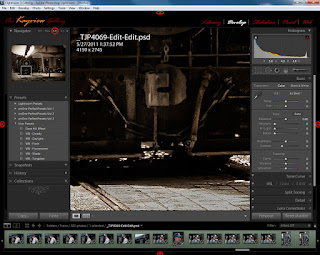
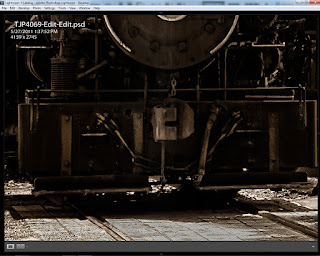 This seems to be the image that won't go away. After the last post I got several questions (feel free to send me an email with any questions) about how I got down to the fine detail level on the front of the train in the image. To see what sparked the questions, click here. To see the original post with the full image, click here. The email questions along with questions asked at a presentation I gave last week at a local camera club showed me that further explanation was necessary. Today we have two screen shots showing Adobe Photoshop Lightroom 3 in two configurations. The one on the left is as LR3 is presented when first opened (right out of the box) with an image open. The right side shows the screen as I work. All of the panels have been retracted using the arrows on the outside of each panel. (If you click on the images you'll see a larger view of each.) To understand my thinking about each of the panels, hit the "read more".
Read more!
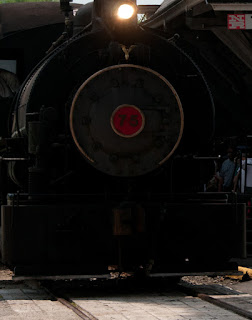
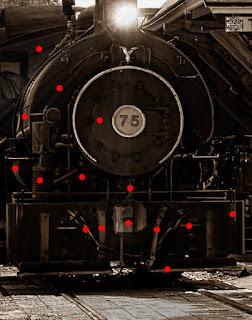 Last Friday I did a posting about "Revealing Detail Using Adobe Photoshop Lightroom 3". A couple people who saw the image basically said "I don't understand. What detail did you pull out of where?" I suppose that's a compliment, because it was done with a light touch and the image was "the star" and not the work. Today we have two images. The one to the right is what was recorded by the sensor. To the left is a "detail" of the finished image. I made sure they were both the same size and resolution to be able to do an apples to apples comparison. The left image has been toned as a sepia to give the impression of being an old print. The toning added nothing to the detail, but I thought I'd mention it before someone asked. The red "Pins" represent the individual Adjustment Brush areas that were worked. I'll save time for anyone curious enough to count the Pins and say that there are fifteen Pins. In the case of a matching left and right side, only one Pin was laid down to show the area being worked. As an example, the far right Pin is there to lighten a bracket of some sort. The same bracket, lightened the same amount, also appears on the left side of the locomotive. Since it was done using the same Pin, there was no reason to drop a Pin on the left side. That would only serve to run up the count. To find out about some of the other Pins, hit the "read more".
Read more!
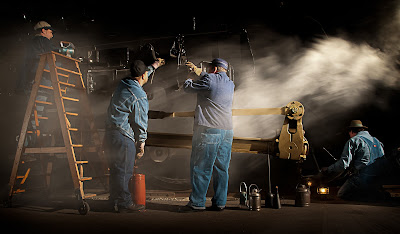 One of these days I'll get over my new interest in shooting trains, but I'm not sure when. Taking a raw (in several senses of the word), working it in Adobe Photoshop Lightroom 3 and going to Adobe Photoshop CS5 only to put it out for the web is, probably, the ideal way to treat a straight image. Photoshop is an amazing application, but 99% of what needs to be done to a straight image can be done in LR3. I'm going to have to play with the Export dialog box in Lightroom to see if it's as convenient as the Save For Web And Devices (in the File dropdown). My biggest issue is that LR3 doesn't give as much information as does CS5. In Lightroom you make the same basic decisions as is done in CS5, but there isn't a mechanism to see the effect of those decisions. The dialog box for the Save for Web and Devices in Photoshop (or Adobe Photoshop Elements 9) changes the other parameters depending on the change you make. Let's say you have a full size image (no cropping) and bring it into Save for W&D. It'll show you the dimensions in pixels, and probably tell you it exceeds what's typical. If you plan on entering it any competitions you probably want to have the horizontal size no more than 1024 pixels and the vertical size no more than 768. In CS5 you can see that changing the governing dimension changes the file size. If it doesn't fit the file size requirement, it can be adjusted using the numerical Quality number. Quality is given with a physical number, not just a slider. You can watch the file size go down as the Quality is lowered. In Lightroom, you can make all the same changes. You just can't tell what the effect of your decisions are. Something has to "float", and not knowing what's floating can lead to strange things happening. To find out about the non-strange things happening in today's image, hit the "read more".
Read more!
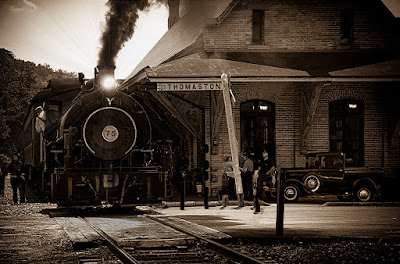 Take a look at the direction of the shadows in today's image. The easiest place is on the roof of the overhang. You can see that the sun is just about directly in front of me as I took the shot. Take a look at the front of the steam locomotive (don't call it a steam engine in front of a railroad enthusiast. They'll ask if you're referring to a teapot.). There's a lot of detail in the front. Take a look at the 1930 Ford sitting in the shadow of the building. You can see a lot of detail there too. A couple of things about today's image. 1) It is a five shot HDR. 2) The HDR was done to get maximum realism in the image, not to go to the extreme of HDR and make it look like an illustration. 3) The initial detail in the shadow wasn't visible. The locomotive and the truck still looked pretty much like black blobs. I'd say 90% of what was done to the image came out of Adobe Photoshop Lightroom 3. The other 10% was a quick trip over to Adobe Photoshop CS5. I needed to take it to CS5 because there was a second (legal) license plate on the radiator and a flyer in the window to the right. I also balanced out the lighting in the building by putting a light on in the right window. (Copy the base Layer, put a Layer Mask over the upper right window pane, detach the Mask from the Layer [click on the chain to "break" the link], and use the Move Tool (V) to slide the light to the masked area. [Sounds more complicated than it is.]). To find out how the detail was brought out in LR3, hit the "read more".
Read more!
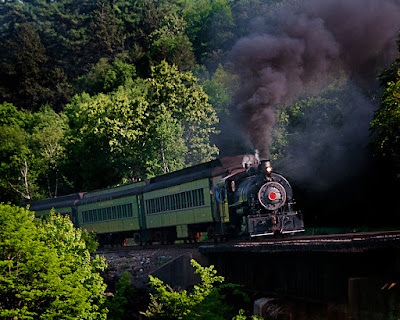 You have to start somewhere. How's that for a philosophical statement to start a discussion of today's image. A couple months ago a buddy and I saw a photo charter in Roanoke Virginia being run by Peter Lerro. The cost was great for the photo shoot. Something like $65.00 for two nights shooting setups of a couple trains. Being from Connecticut, and the shoot being in Virginia, the cost of the shoot was a minor piece of the expense. What it did was to pique our interest in a niche of the photographic world neither of us had wandered through before. Since then we've talked about the possibility of doing a nighttime shoot in the local railway museum. We also did a Google search about what sort of train "things" were going on in our area. Over this past weekend, the Railroad Museum of New England in Thomaston Connecticut had an event (it's also continuing this coming weekend) with Hank the Tank Engine. A couple things as words of advice would be: 1) if the excursion is an out and back, bring a lunch. 2) Checkout the route for possible shooting locations before the event. 3) Ask someone (the Conductor, the Engineer, the Station Master, anyone) what the plan is. So, we did the Roanoke trek, we've run up to do a quickie locally and now we're talking to the local train enthusiasts about doing a night shoot with them. That's all well and good, but to find out about today's image, hit the "read more".
Read more!
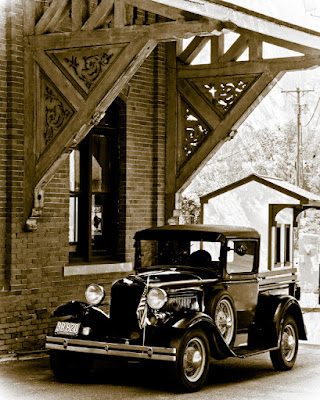 How many times have you talked to a fellow shooter and heard him/her say they needed to bring a shot into Adobe Photoshop CS5 from Adobe Photoshop Lightroom 3 to add detail. I typically try to bite my tongue and not ask "why?". As long as you have a "straight" shot it isn't really necessary to go to CS5 (or any CS for that matter). Today's image isn't quite a "straight shot". I wanted to make it look more like an old picture found in a shoebox in the back of the closet. While I was at the train station where today's shot was taken and saw a railroad tie laying all by itself. I shot it just for the texture and tossed a faded copy on the car shot. That's the only thing done is PS. Everything else is Lightroom. The basic "tone" of the image is just one of the presets that comes with LR3. It tinted the image and faded the edges. The card, at that point, was pretty black and lacked a lot of detail. To find out how more detail was brought out, hit the "read more".
Read more!
 Ricardo: I just wanted to thank you for your support. It appears you've been "spreading the word" about The Kayview Gallery in Brazil. Since you became a "follower" of the blog earlier this month I've seen a dramatic increase in readership in your city and country. I hope your photography brings you a lot of joy and I wish you and your family a good fall season.


 This seems to be the image that won't go away. After the last post I got several questions (feel free to send me an email with any questions) about how I got down to the fine detail level on the front of the train in the image. To see what sparked the questions, click here. To see the original post with the full image, click here. The email questions along with questions asked at a presentation I gave last week at a local camera club showed me that further explanation was necessary. Today we have two screen shots showing Adobe Photoshop Lightroom 3 in two configurations. The one on the left is as LR3 is presented when first opened (right out of the box) with an image open. The right side shows the screen as I work. All of the panels have been retracted using the arrows on the outside of each panel. (If you click on the images you'll see a larger view of each.) To understand my thinking about each of the panels, hit the "read more".





 Posts
Posts


