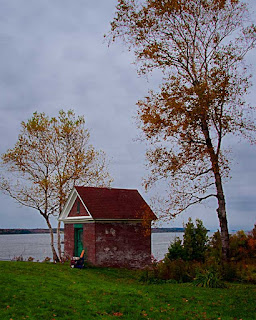
 There were a lot of searches bringing people to the blog this week asking various questions about Adobe Photoshop CS5 (and earlier) Calculations. But, before we get into it, the most interesting phrasing of a search was "Smart Object rubbish". I'm not quite sure if the searcher had some extraneous detail within a Smart Object or if he/she thought of Smart Objects as "rubbish". In either case, the landing page she/he wound up on was one of the several posts I've done about Smart Objects. Hope it helped. So what are Calculations in CS5? First let's get a handle on what it isn't. It's not CS5's version of a spreadsheet. Calculations were one of the "go to" methods of extracting a piece of an overall image from, typically, the background. If you're trying to do something like separate a headshot of a woman with long hair being blown by the wind (a fan) where a new tool that'll do that much easier. It's the Quick Selection Tool (W). The woman's head is a solid object and the flyaway hair is usually wispy strands. Between the Quick Selection Tool and the Refine Edge dialog box short work is made of that type of selection. The type of selection shown in today's image is a little trickier. There's a lot of internal structure that makes it more difficult for the Quick Selection/Refine Edge to make an accurate selection. To find out how Calculations comes to the rescue in this situation, hit the "read more".
Right up front, the Calculations dialog box is scary the first time you look at it. I've talked to several people that have turned and headed for the hills as soon as they opened it. It's that bad (at first). Within the dialog box you're presented with three sub-boxes. The first two simply ask what you want to base the calculations on. The first "question" is what is the initial source. Ninety nine percent of the time the answer the image you opened Calculations for. The second question is what Layer do you want to use. Most of the time I know that I'll be replacing whatever (the sky) is the problem area. The first time I want to do is make a Mask, so the "normal" answer is the Background. The third question in the first sub-box is what Channel is to be used. Flip through the Red, Green and Blue Channels to see what gives the best contrast. If you're trying to mask out the sky, chances are it'll be the Blue Channel.
The second sub-box asks the same questions all over again. The second sub-box is asking what do you want to manipulate the first data against. Once more the answers typically are: Source = the open image, Layer = background and Channel = Blue (if working on the sky).
The third sub-box is where the magic happens. What Blending Mode do you want to use? This is simply a case of highlighting the first item in the scroll box and tapping the Down Arrow Key to cycle through the choices. All you have to do is keep an eye on your image as you cycle through and look at the Blend Mode that gives you the best Blacks and the best Whites. You can also adjust the Opacity of the upper selection (never happens) and use a Mask if you want (also not happening). The image to the right in today's post is the Alpha Channel Mask that came out of the Calculations dialog box. It actually took you longer to read this post than it did to create the Mask.
Calculations are an extremely powerful method of making a Mask. My first choice is using the Quick Selection Tool/Refine Edge combination, but for things with a lot of complex internal structure (as in a tree), Calculation may be the faster, more accurate way to make the Mask.


0 comments:
Post a Comment