Monday, May 30, 2011

Adding Detail With Adobe Photoshop Lightroom 3

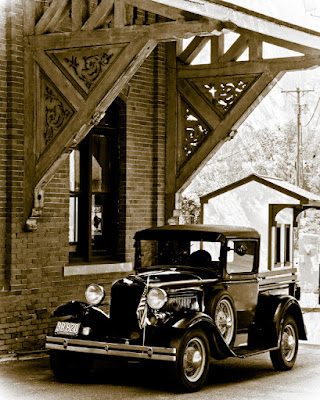
How many times have you talked to a fellow shooter and heard him/her say they needed to bring a shot into Adobe Photoshop CS5 from Adobe Photoshop Lightroom 3 to add detail.  I typically try to bite my tongue and not ask "why?".  As long as you have a "straight" shot it isn't really necessary to go to CS5 (or any CS for that matter).  Today's image isn't quite a "straight shot".  I wanted to make it look more like an old picture found in a shoebox in the back of the closet.  While I was at the train station where today's shot was taken and saw a railroad tie laying all by itself.  I shot it just for the texture and tossed a faded copy on the car shot.  That's the only thing done is PS.  Everything else is Lightroom.  The basic "tone" of the image is just one of the presets that comes with LR3.  It tinted the image and faded the edges.  The card, at that point, was pretty black and lacked a lot of detail.  To find out how more detail was brought out, hit the "read more".
Read more!

A Quick Shoutout to Ricardo Roehe

Ricardo: I just wanted to thank you for your support. It appears you've been "spreading the word" about The Kayview Gallery in Brazil. Since you became a "follower" of the blog earlier this month I've seen a dramatic increase in readership in your city and country. I hope your photography brings you a lot of joy and I wish you and your family a good fall season.
Read more!

Friday, May 27, 2011

Adobe Photoshop CS5 Is All About Me, Me, Me. Wrong!

Hubris!  What a difference a couple months make in the life of one's knowledge of Adobe Photoshop and Photoshop Elements.  In my December 8, 2010 post I said one of the short comings of PSE was the fact that Channels were not available.  Duh!  How can you have an RGB (Red, Green, Blue) image without having, at least, those three Channels.  Another thing that's available in Elements is Save Selection (Select/Save Selection).  Okay, if you can save a Selection, where do it go?  A saved selection is another name for an Alpha Channel.  Therefore, if we have color Channels and we have Alpha Channels, we have Channels.  If you go to Load Selection (Select/Load Selection) you'll see a dropdown that allows you to pick the "selection" (Alpha Channel) you'd like to load.  If there's a dropdown list with multiple choices, it's because you can save multiple Alpha Channels.  It's possible that there is a limit to the number of Alpha Channels you can have in PSE, but I haven't come across it.  To find out why this lapse in knowledge bugs me, hit the "read more".
Read more!

Wednesday, May 25, 2011

Back From Vacation - Lesson Learned From A Friend

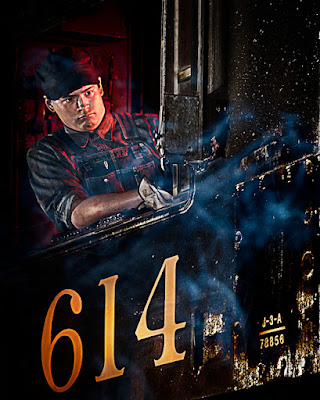
Recently, about six weeks ago, a couple friends and I ran down (some of us more than once) to Roanoke, Virginia to shoot night shots of trains at the Virginia Museum of Transportation.  It was a great opportunity to get a few images we wouldn't normally have.  If we were to compare the shots we got we could probably sit around saying things like "oh, I must have been about ten feet further down the track than you were for that shot".  So, we all had our own interpretations of the scenes in front of us.  I had a chance to see the finished shots of one of the photographers who is exceptionally talented and creative.  One of the images was her interpretation of today's image.  I had basically the same shot but hers was a far better rendering of the tableau.  Mine was way too red.  Rather than looking like the glow of the fire from the door of the stoking box of the steam engine it looked more like the cab was on fire.  Way too far over the top.  I asked what kind of technique she had used and she gave me a brief rundown of what she'd done.  I find out what the technique was and what my slant on it is, hit the "read more".
Read more!

Wednesday, May 11, 2011

Using Adobe Photoshop CS5 Calculations To Make Masks

Real quick.  I was going through today's image and know I wanted to pop up the reds.  A fair amount in the structure and a goodly amount in the flag.  I knew it would require a mask, so I went to the Channels Panel to find which (duh!) Channel had the most contrast.  It was the usual suspect of the Blue Channel.  Highlighted the Blue Channel and went immediately to Calculations (Image/Calculations).  I tagged the Blend Modes dropdown and cycled through (down arrow key) the choices looking for the maximum contrast.  Ideally, pure black and pure white.  As I was tapping through I saw one of the modes gave a very dramatic rendition of the clouds.  Lots of shades of grey all over the place.  I quickly saved that as a new Alpha Channel.  (All Masks are Alpha Channels, even in Adobe Photoshop Elements.)   I then went back to finish my original goal of finding a solid black and white Mask of the structure and flag.  I found one Blend mode (probably Hard Light or something similar) that dropped out the sky almost completely.  I used levels to take the sky up to about 90% white.  Then I used a tool that I dislike almost as much as I dislike the Eraser Tool (not even going to post the shortcut keystroke for that foul tool).  I used the Tragic (Magic) Wand Tool (W) to select the sky area.  The tool was set to Continuous being turned off.  It picked up the 90% of the white and I was able to add (Shift) to get the small amount left.  I then Inverted the Selection (Ctrl/Shift/I [eye]) giving me everything that wasn't sky.  A quick Fill with Black completed the Mask.  The finishing steps are outlined after the "read more".
 
Read more!

Monday, May 9, 2011

Making Something Out of One Poorly Exposed Shot Using HDR Pro

What happens when you have one shot that has some potential, but it's a little over exposed?  You know you can bring it back using Adobe Photoshop CS5's HDR Pro, but you still have only the one shot.  You can try CS5's HDR Toning, but that'll only take you so far.  If only you had three shots about three stops apart.  There's actually a pretty easy way to do it if you just happen to have Adobe Photoshop Lightroom 3.  (You can probably do it in LR 2, I don't remember if it was part of the first iteration.)  One of the things available to you in LR3 is the ability to make Virtual Copies.  Virtual Copies have several interesting uses.  The first that comes to mind is variations.  You can try out an image as a B&W, or High Contrast, or a Split Tone and the beauty is that it doesn't take up any disk space.  You can think of it as a family tree type structure, with the "real" image as the trunk.  You can make any number of first generation changes and then make changes to that generation and so on.  You can see how the "branches" would form a tree structure.  What happens is a set of "What-If" type statements.  Everything will point back to the original image.  The statement might be something like "what if I take this image and make it B&W (the first Virtual Copy) and then make a Virtual Copy of that and make it sepia toned and then make a Virtual Copy and do a Split Tone of the sepia and on and on.  The key is the Virtual Copy.  To learn more about how Virtual Copies made today's image possible, hit the "read more".
Read more!

Friday, May 6, 2011

Using Adobe Photoshop to Create a Lensbaby Effect

Seems like everywhere I look I'm seeing LensBaby photos.  In magazines, in advertisements, on websites, on Flickr, on Youtube, it's really becoming fairly mainstream.  A couple years ago it was a curiosity, now it seems like every photographer has at least one stashed in the camera bag "just in case".  The scene has to be one that's conducive to the effect.  I don't think anyone would use it as their goto lens.  It's fun, it's a diversion, it's something to play with.  B&H Photo has forty plus items listed under the heading of Lensbaby.  Okay, there are duplicates.  A Lensbaby Composer for a Canon mount, a Nikon mount, a Pentax mount, a Sony Alpha mount, etc.  There's twenty nine accessories you can buy for them.  What was a novelty three years ago has become an industry.  Just in case you haven't run across a Lensbaby, it a lens that produces a primarily out of focus image with a very specific area that's in focus.  In the simplest form you hold it similar to a normal lens, but you deflect the front by using your hands to torque the front element.  It's not difficult, because the center of the body of the lens is made of flexible material.  I looked at a few Lensbaby images and thought I might be able to do something similar in Adobe Photoshop.  I don't think it matters which "CS" version you have.  It'll probably work in any recent iteration.  If you might be interested in what I did to simulate the Lenbaby effect, hit the "read more".
Read more!

Wednesday, May 4, 2011

A Major Milestone Thanks To Adobe Photoshop 7, CS, CS2, CS3, CS4, & CS5

I guess I could also put Adobe Photoshop Lightroom 1, 2, and 3 in the title.  The "milestone" we're celebrating is the 300th post here on The Kayview Gallery" dealing with some information about the Adobe products we use.  Today's image is the one that started it all.  Is it up to snuff with how it would be done today?  Probably not, but (hopefully) that shows some growth in the past couple of years.  There's another checkpoint coming up next week.  May 12th is the date of the first post.  In the beginning I was happy if anyone gave the posts a click.  Now there a growing, loyal group of folks who read the posting on a regular basis.  I doubt if anyone has gone through the entire forty plus pages (seven first paragraphs per page) and that okay.  Some of the things I was espousing at the beginning I'm pretty much a crusader against these days.  I guess that means there has been a progression in the understanding of how to do things better and/or easier.  The image of the Layer stack shown along with today's image shows that at the time of the first posting I was fairly big into Adjustment Layers and Clipping Masks.  Today, using Smart Objects, the stack would look very different.   If you'd like to learn about the secret of today's image, hit the "read more".
Read more!

Tuesday, May 3, 2011

Using Adobe Photoshop Lightroom 3 To Find Lost Images

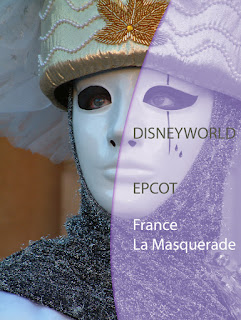
No, really, I've seen images today that I haven't seen for most of the last decade, including today's image.  It's not exactly rocket science to figure out what today's image is about.  It has to do with our trip to Disney World and Epcot.  Trick is that it happened eight years ago.  A little explanation:  I teach a Photoshop Elements class at the continuing education service in the next town over.  This week will start the third time I'll be teaching the class.  It's three sessions and I state at the beginning what I'd like to accomplish during each meeting.  The first is Getting the images onto the computer and making them accessible.  The second goes through the different editing modes available in PSE (Adobe Photoshop Elements) and the third is different outputting methods.  Putting the images on the web, printing, making cards, starting a scrapbook, anything to get the images back off the computer.  The class starts off easy enough, but within minutes anarchy reigns, someone asks how to develop some part of an image we go directly into the editing functions.  Usually the question is deep enough that we fly right over the Guided Edit and the Quick Edit and land in the Full Edit mode.  Now, these people have come to learn how to improve their pictures, not necessarily to become pixel jockeys.  Going to the Full Edit mode immediately is like throwing someone in the deep end of the pool at their first, beginner's swim class.  Full Edit mode in PSE 9 is not all that much easier than taking someone directly to Adobe Photoshop CS5 and saying here's where you start.  Full Edit doesn't have all the tricks you have in CS5, but most photographers, graphic artists or designers don't know anywhere near "all the tricks" either.   In my effort to make sure we have some semblance of order I decided to go with a specific outline of what to cover in each class.  In the process I learned of an attribute of Adobe Photoshop Lightroom shared with PSE that I had never used.  To find out about what I found, hit the "read more".
Read more!