Monday, June 30, 2014

What Did You Do To This Image?

Some friends ask me that all the time. They assume (naturally or not) that I must have messed with the original image in some way. Often they can see that I've done "something" because it's pretty darn obvious. Flip back through a few posts and you'll see several examples. But! Sometimes an image looks pretty straight and it's been worked to death. I get a kick out of those who say "I like to get it right in the camera". I like to get a well exposed digital negative. Today's digital negative is a digital positive, but what I'm getting at is that I like to get all the information I need on a properly exposed NEF file. (If I'm going for a straight image and not some HDR thing.) If you go to the "absolute" people who want the image to magically come out of the camera ready to go, do you know who you'd be eliminating? How about Ansel Adams? Bill Eppridge. Alfred Stieglitz. Any of the masters of film photography. Adams is quoted as saying "thee negative is comparable to the composer's score and the print to its performance. Each performance differs in subtle ways. Read more at http://www.brainyquote.com/quotes/quotes/a/anseladams110426.html#8dAkmOgKBFwVpJoy.99 . I was at a talk by Bill Eppridge (look him up) and he explained that he spent the entire day in the darkroom one time making print after print until he got the image he saw in his head. He wasn't just clicking the enlarger's light on and off. He was "creating" his final image by burning and dodging small areas of the print. He mapped out what tone should be in what exact tones he knew were there. There's more to today's image than there is in many of my more obvious manipulations. To find out more about today's image, hit the "Read More".


Read more!

Tuesday, June 24, 2014

Aim To The Right

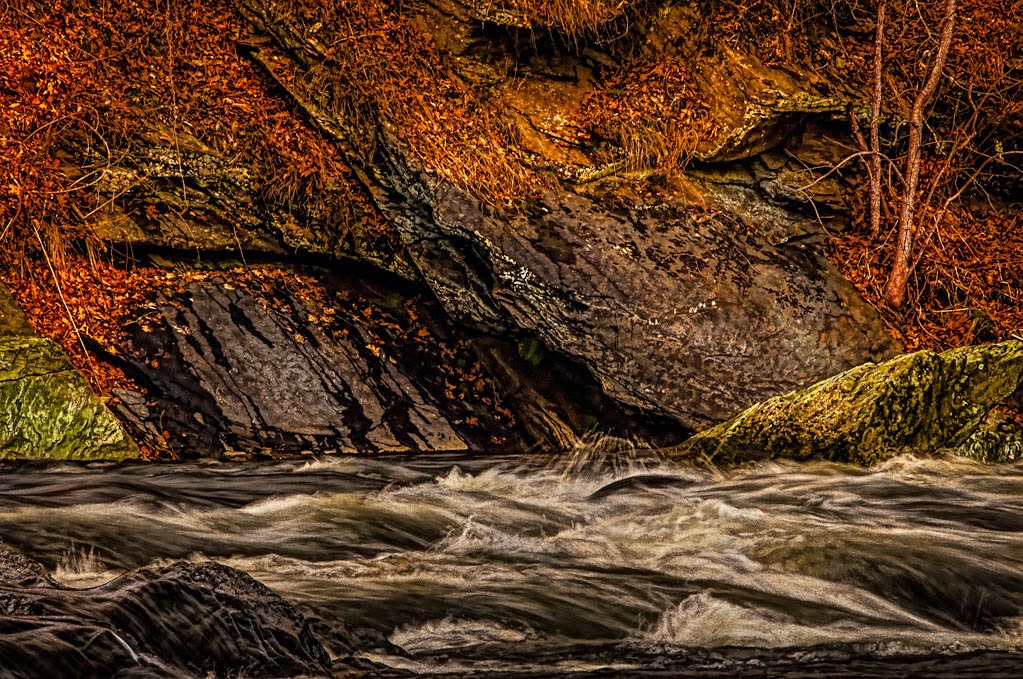
"Aim to the right"?  Sounds like I'm coaching somebody at a rifle range.  I typically use two methods when I'm out shooting (photographically) for my personal use.  If I see something that might make a good (interesting) HDR image I'll set the camera to take five, seven or nine shots one F-stop apart.  I "always" (99% of the time) have my camera set to -.3 EV (Exposure Value), so the images come out on 1/3 increments.  (-.3, -1.3, -2.3...)  That way I have choices as to what exposures to select.  If I'm shooting something that probably wouldn't lend itself to HDR I'll switch up the settings.  I'll go no more than five shots and set the F-stops to .3 separation.  That way I'll have one exposure that I think will give me the optimum density.  Today's image is one of those that probably would not be "enhanced" by HDR.  It was shot with option two, the .3 stop steps.  It was taken in bright sunlight at the absolute worst time of the day.  My choices were very dense, where I'd have to bring back the shadows or pretty light, where I'd have to tone down the wildly overexposed areas.  To find out which option I chose and why, hit the Read More.

Read more!

Thursday, June 5, 2014

How To Get More Interesting Images

Well, the easy answer is "go to more interesting places".  It's an old truism, but it is something that works.  About a month ago Doris (wife) said she wanted to go to the Lancaster Pennsylvania area over Memorial Day weekend.  Okay, Lancaster equals Amish.  Amish farms.  Amish buggies.  Flat brimmed straw hats.  Buttoned up (sometimes not) white (also sometimes not) shirts.  Beards and bonnets and horses along the highways (not the interstates).  Some things are contradictory.  The Amish won't ride a car or use a tractor to till the fields, but a weed whacker with a motor is okay.  There's no electricity to the house or farm, but that doesn't mean all the houses are old farm houses.  Some were absolutely modern in appearance.  Imagine a couple coming at you in a horse drawn buggy and the driver and passenger are wearing the latest in Oakley sunglasses.  One thing all these opposites do is mess up a "vintage" look images.  We noticed the thoroughly modern juxtaposed against the eighteenth century.  If nothing else, it was entertaining.


Read more!

Wednesday, May 7, 2014

Create A Background That Wasn't Really THere

I guess it's time to start getting "serious" about making some images.  Those who know me will understand why the word "serious" is in quotes.  Today's image is a result of a "Fun Trail Ride and Obstacle Course" at the 2nd Governor's Horse Guard in Newtown Connecticut over the past weekend.  I'm not sure if there was a fee for the riders, but "spectators" were welcomed and treated royally.  There was a Major in charge of the day and we were invited into the barn area to watch the unit's horses brought in after their workout and being brushed down and groomed.  Flashes were not allowed, so the I had to crank up the sensor sensitivity pretty far.  When we got back outside the trail riders were just getting back and starting the obstacle course.  Most riders used English style riding hat (helmets) and didn't give the look I was looking for.  Then came along the "Marlboro Man" in today's image.  So I had the right horse, the right guy and still had a pretty crappy background.  Possibly because of the cold spring or maybe just because it was the first weekend of May the trees in the background were just a bunch of sticks.  To me, my cowboy looked like he'd been out riding the range and had just come down from the mountains.  I decided that was the setting he "needed" to be in.  To check out how he got there, hit the "Read More".


Read more!

Thursday, April 17, 2014

500 Posts And Counting

It was five years ago (almost to the day [4/21/2009]) that The Kayview Gallery (TKG) had its initial post.  I looked back at some of the early images and, frankly, some of them gave me a giggle.  What the hell was I thinking?  There's a few I still like.  The very first post was about an image I took at one o'clock in the afternoon and turned it into a reasonable night shot.  A retired professional photographer, when looking at the print, wanted to know how, if it wasn't a night shot, did I get the interior to look right.  I think I remember telling him it was a very special trick I used.  Truth is, what looked like an interior was actually the reflection of the building across the street.  I changed the color of the panes of the window using the Color Blend Mode to give the appearance of warm tungsten light.  It was an exercise in the mind seeing what it wanted to see rather than what was reality.  Other things going back through the Blogger online database for TKG I'm reminded for the slow start we had.  The first post, to this day, has only seven total views.  Even today, TKG isn't exactly one of the big name photography blogs.  Just an eclectic few (hundred) who read it on a regular basis.  There are thousands who pass by, but I've come to recognize some of the frequent readers.  Some folks in Bozeman Montana check TKG about every day to see what's new.  According to Google Analytics there been twenty one different people from Bozeman stopping by almost three hundred times during the past year.  There's about 38,000 people in Bozeman.  If I could get that same ratio of readership from New York City that would be something over one hundred thousand reads (for one city) rather than a little less than one thousand.  Guy (or folks) in Bozeman?  I appreciate your support.  TKG has been one of the blogs featured in the Photoshop section of Alltop  .  We're selected as "Most Topular" often enough to make me smile.  Thanks to Alltop.  Thanks also to all who have mentioned TKG on their blogs and sites.  We've gotten nods from Planet Photoshop, Lightroom Killer Tips, MasterPhotoshop, Photoshop User and a bunch of others.  It is nice to know we're occasionally noticed by the heavy hitters. 

How about if we make post number 500 a record breaker.  Make it some sort of chain letter type of thing.  Send it to ten of your friends and ask them to send it to ten of theirs.  There won't be any sort of prize or payoff, but if the results are magical I'll report back on the next post.

So, thanks to all readers.  Those loyalists and those who are dropping by for the first time.  I appreciate your interest.  I hope you get a kick out of today's image.
Read more!

Tuesday, April 8, 2014

Bring Out The Details Using Photoshop

Today's image is an exploration in pulling details out of an image.  There's all sorts of areas that have been "worked on"  The jewelry, the hat, the shirt and the beard to name a few.  They've all been "souped up", but two used one technique and two used a totally different method.  The hat and the shirt "had" to be done in Adobe Photoshop (PS) [any version you might be using]  and the jewelry and beard were easily taken care of in Adobe Photoshop Lightroom (LR) [any version].  Before I see a flood of comments saying "watta mean 'had to be done' in PS".  I know, there's fifteen ways to do anything in PS and a dozen in LR.  I just wanted to do it in a time saving manner.  What are the techniques?  To find out, hit the "Read More".

Read more!

Thursday, April 3, 2014

NIght Photography Made Easy

Have you ever gotten the urge to grab your camera and go out and shoot in the middle of the night?  Photography at night is an adventure.  You stumble around, set up your tripod, guess at a starting exposure (not really), stumble around some more, probably freeze your butt off, take forty two shots of the moon, stumble around again and on and on.  You'd thing that Hollywood, making big time epics, would avoid all that stumbling at all costs.  Actually, they usually do.  Next time you're watching a movie where the hero (heroine) is out wandering around in the dark, take a closer look.  Chances are you'll see shadows cast by things like trees, street lights, buildings, anything that sticks up from the ground.  Wow, they must have been shooting that scene under a full moon. Not!  Movies have been using a trick for as long as movies have been made.  Still photographers used to use the same trick, but it either has been forgotten or today's "new" shooters have never learned it.  "Back in the day" photographers ran around with a stack of filters to fit various lenses and conditions.  If you had daylight film in the camera and you had to shoot an inside shot, you'd check on the lights and put on either a tungsten to daylight filter (an 85A) or a fluorescent to daylight filter (an FLD).  Same in reverse.  It you had tungsten light balanced film and had to run outside into the sunlight you'd slap on a daylight to whatever light you were coming from filter (an 80A for tungsten light).  To find out how this relates to today's image, hit the "Read More".

Read more!