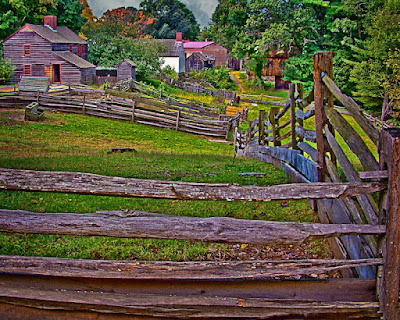
 Scott Kelby had a post about EDR (Extended Dynamic Range) developing of images, so I figured I'd try it. His interpretation of "where" to use this technique was more toward the portrait end of photography. Me? Being willing to push anything in different directions, I figured I'd try it on a landscape image and see where it would go. Let me know what you think, but I sort of like it. It gives an HDR (High Dynamic Range) feel to the final image, but doesn't use any of the HDR software that's available. No Photomatix, no Photoshop HDR blend, no Qtpfsgui, or Picturenaut 3, just either Lightroom or ACR (Adobe Camera Raw). One of the best things about this technique is that it's "real time" and just a couple of slider movements. First thing that happens is you make your image look really crappy and then, with one more slider, it comes to life. To find out more about the technique, and how easy it actually is, hit the "read more".
This is going to be quick. Another of those things I've explained that takes longer to read about than to do. Open the image in either Lightroom's Develop Module or the ACR module of Adobe Photoshop or Photoshop Elements. Both have the same basic programming, with LR having the advantage for cataloging and output. ACR has no cataloging or output functions. The only way to get something out of ACR is to bring it to another program (about any other program that will read the ACR raw format). The controls are all the same between the two programs, with only different placement of where you find a particular control.
.
Take the Recovery slider and bring it to 100%. Same with the Fill Light slider. Move the Clarity and Vibrance sliders to about +50. The image will now look pretty washed out. The magic happens when you start taking the Blacks slider up. You'll see the richness return to the image. For a landscape you can play around with the Contrast slider if you wish. The Blacks and Contrast sliders are like salt and pepper. Use both "to taste".
.
Once you have the image looking the way you like, bring it into Photoshop or Photoshop Elements and go through your normal workflow. In my case I use every step I've outlined in earlier posts. One way to think of this technique is like doing any prep work for developing your image. Just as you would do any dust removal, or blemish correction, or whatever you do before you start developing your image, this is a way to get an image "to" a starting point.
.


0 comments:
Post a Comment