Monday, November 30, 2009

Off Season Is No Reason To Give Up On Flowers

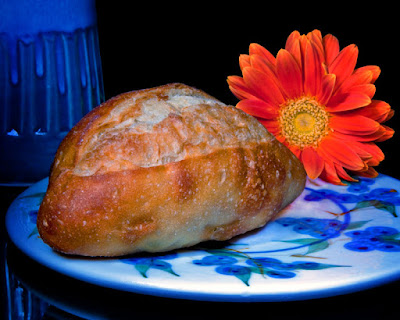
Some things are seasonal and some things can be year round opportunities. It's a wee bit tough to get good (or any) baseball shots at this time of the year. There's probably not a whole lot going on down at the old swimming hole either. Unless you're a lot further south than Connecticut there's not many leaves left of the trees to get lush shots of long vistas. That doesn't mean you have to give up on all the things you think of when you get that summer sort of feeling. Flowers are a good example of something that can be shot all year round. Rather than a walk out in the back yard, you might need a trip down to your local florist. There are good points to needing to buy flowers and bad points. The primary bad point is that summer flowers are free, winter flowers aren't. On the other hand, you get to select flowers at the flower shop and reject any that don't meet with your "standards". The florist has some level of control over what he/she gets in, so you have a minimum level of beauty to start with. Damaged flowers just are not accepted by the florist, so you can cancel that off your list of things to look for. You don't have to limited to the type of image you get by shooting in the comfort of your home. You can create realistic environments and have a whole different method of "taking the shot" from what's available with outdoor photography. A friend of mine used to take incredible shots of flower arrangements and didn't even use a camera. To find out how you can "take incredible shots" and not use a camera, hit the "read more".

Read more!

Friday, November 27, 2009

Simple Friday Tutorial - Adding Clouds To A Bald Sky

I either read or view a lot of tutorials online with the hope of picking up a new tidbit of information. If I could just learn one thing from each tutorial about Photoshop techniques I see, I'd be a PS genius. Instead, I'm a slightly better than typical fiddler with it. I do run into things that crack me up. Saw one the other day. I'm a sucker for tutorials about masks. If I could find, develop, figure out , or be some sort of alchemic sorcerer and come up with the ultimate mask technique I'd be a happy camper. Instead, I'm a searcher, seeking new and better ways to create masks. I've used masks in a couple of recent posts. In the October 26th post I show the mask used to enhance the tonal values of the sky. I used a mask in the November 16th tutorial about how to darken a weak sky. What happens if you have no sky? I've been asked this several times recently. The first piece of advice I'd give is, if you're stuck shooting on a day with a bald sky is "don't shoot the sky". That's about the easiest way I can think of to not have to deal with a bald sky. If the sky is dead bald, no detail at all, don't include it in the shot. If the sky is that flat you probably have great, even light that maximizes the saturation in almost anything on the ground. Point your camera down rather than up. Done! Let's face it, that's not always possible. I ran across a tutorial the other days and the "teacher" explained how to make an elaborate mask and replace the sky. After a long dissertation, in the last step of the sequence, he gave the one thing that he could have used (should have used) to eliminate the entire rest of the work. To find out what this magic step is, hit the "read more".

Read more!

Wednesday, November 25, 2009

Sometimes You Can Get There From Here

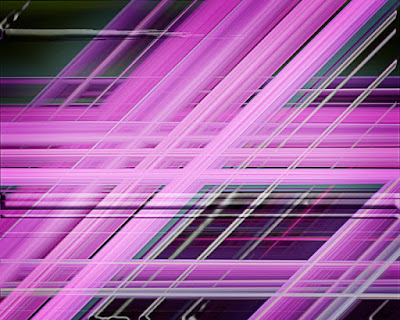
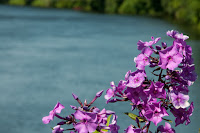
Sometimes you get some "unusual" assignments. Like design a wallpaper pattern that's bright, uses pink extensively and is very graphic. Now, being a photographer of sorts, that's sort of a weird request. I'm not an "artist", computer or otherwise, so what can I come up with to fulfill the requirement. There's, undoubtedly, images that have pink in them in the archives, but the "graphical" ones are probably of recognizable buildings or structures. I thought this assignment would have to involve some kind of OOB (Out Of Box) thinking. So, given the requirements of it being a graphic, being predominately pink, and having a repeatable pattern, what do we start with and where do we take it. To find out how today's image came out of the shot of the flowers on the river, hit the "read more".

Read more!

Monday, November 23, 2009

Riders On The Road

Every once a in a while you come across something that you think has some potential, so you shoot it. You file it away and come across it from time to time and think "where's something where", but you can't quite put your finger on it. It finally dawned on me what it reminded me of. An image made by famed photographer Eugene Smith of his children walking from a shaded path into a clearing. It's titled "The Walk to Paradise Garden". The tunnel like darkness and the people framed in the only bright area of the image. Now, I'm not saying one of my images is likely to wind up in MOMA, and I'm not saying today's image is of the same caliber as Smith's, but it does give me the same type of feeling. Just from looking at Smith's image, I'd say there's a lot of blood, sweat and toil that went into nudging the final print out of the negative. That I can also say that about today's image. It looks pretty straight forward but, at the time I made the image it took a lot more work than it would take today. To get an idea of what's changed in the past eighteen months or so, hit the "read more".

Read more!

Friday, November 20, 2009

Thirteen Speedlites And I Used A Flashlight, Go Figure.

I have all my flashes in pairs. One reason would be for backups, but who in the world needs redundancy that goes ten deep. NASA doesn't even have that many backup systems on the Space Shuttle. So, backups is probably not the reason for so many flashes. Okay, five do work with Nikon's CLS (Creative Lighting System), but that's broken into two distinct groups. Three are general purpose and are used with softboxes (bigger boxes than you might think), umbrellas, grids, snoots and all the usual suspects when it comes to light modifiers. The other two are part of the Nikon R1 Wireless Close-up Speedlight System. The November 6th post, with the pool balls, used all five Nikon lights. There's two 360 degree slaves, two mini slaves (for when you need just a little pop for a rim light), and two Sunpack FP-38 Flat Panel (great for situations where you'd like to use a softbox but can't). Best term I can come up with for justification is that they're for "situational lighting". A buddy of mine, after seeing my lighting store, said he was a purest and only shot with available light. I told him "me too, that why I have a whole bag of lights that are available". You have to be pretty darn lucky to be able to have every shot with the light God gives you. Okay, so why, if I have all these lights (and that's just the flash variety) did I use a Miraclebeam nine LED flashlight to make today's image? To find out, hit the "read more".

Read more!

Wednesday, November 18, 2009

Makeover Wednesday - Adding Pop With Spot Color

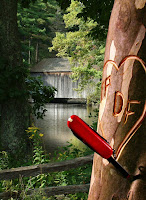
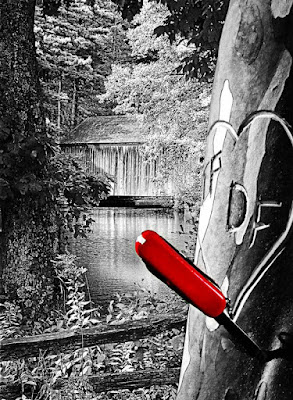
Today we're revisiting an image we discussed back on July 1st. At that time the post talked about the impossible Depth of Field in the shot. What we're doing today is responding to a question asked about creating Pop in a shot by using spot color. Unfortunately, the question came without an accompanying image to work on. I went through some of the things we'd already looked at and decided the pocket knife in today's image could be made the center piece for using spot color. An additional reason for playing with a spot color situation was an offer for a tutorial and a Photoshop Action being sold online. The write up for the Action said it would take the complexity out of doing spot color. My question was "what complexity?". Lately I've seen things for sale as Actions or Plug-ins for PS that are as close to scams as I've ever seen. One was an "Action" being sold to give a "Rule of Thirds" grid on your image to check placement of points of interest. What's so hard that someone would spend money on that? Set your grid spacing to 33% (yep, you can call out percentage for grid spacing) and then use Ctrl comma to toggle your "Rule of Thirds" grid on and off. I can't see charging someone money for a setting. There's actually a secondary issue we'll tackle before we ever get to trying to make the knife sing. The plastic trim pieces on a knife like the one shown typically has a smooth finish. In the original image it appears to have a texture of some sort. We'll take less than one minute and "fix" that inconsistency.   Hit the "read more" to fiinsh today's makeover.

Read more!

Monday, November 16, 2009

Tutorial Monday - Darkening the Sky


I've been asked for some help on how to darken the sky in an image without leaving a telltale halo in the area between the sky and whatever the scene might be. It's actually a reasonably easy fix. If you compare today's finished image (the larger image on the left) with the original (smaller in the middle) you can see that the sky in the end image has more detail and is considerably darker than what we started with. BTW: Clicking on any of the images (including the Layer Panel image) will provide you with a larger view of what we're talking about. There's actually three sections to the correction of this image and it's just about typical of what could be done to any shot. Section one would be to get the shot setup to work on. It's the first four lines of the panel (starting from the bottom). The second is making the color saturation adjustments to "develop" the image from the starting RAW file. The third is finishing the with sharpening and adding a vignette. To follow the sequence, hit the "read more".

Read more!

Saturday, November 14, 2009

The Season's Over

We've come to the turn of a season again. The leaves, for the most part, are off the trees in New England and we're headed into the cold, "sticks as trees" period of the year. That means the "vista" shots are winding down as we await the snow to put a fresh face on the landscape. That doesn't mean we hang up the camera and wait. There's a height adjustable table and some props, along with enough flash units to light up a cave is around the room wanting to be useful. They'll get their chance in the days to come. Lately we've taken a run up to Maine and went to specific "events" to shoot anything from lighthouses to commissioned assignments. We'll be headed to the Caribbean in a few weeks, bringing along enough camera gear so people will think there's a third person along with us. We've gone to the islands every year for the past fifteen years and I can honestly say we have some tourist pictures to show for it. The intent of the trips is vacation, not getting the next calendar shot or six shot travel article with a double truck opener. Lately the trips have been by boat, sailing out of New York City. The nice thing about going that way is the two days plus of sailing before you get anywhere. It's a great time to unwind before getting into the hustle of being in the islands. It used to be that we'd leave NYC at 4:00 PM and be in St. Thomas or San Juan at 9:00 AM a couple days later. Then it got to getting in at 1:00 PM and now it's 3:00 PM. Sounds like the cruise line is trying to find the optimum "gas mileage" speed. Oh well, guess they do have to maximize the use of every dollar they take in. What's this rambling got to do with today's image? Not much, but if you want to find out about the shot, hit the "read more".

Read more!

Wednesday, November 11, 2009

We're Starting A Course For Those New To Photoshop


We've been asked several times if the gallery could teach a course in Photoshop. The simplest way to do a class would be to do it online. So, that's what we're going to do. This will be a free class and will start with the most basic things to know about Photoshop. We'll try to make all the assignments "doable" in either Photoshop or Photoshop Elements. One of the better things we'll try to do is to make each post a complete tutorial on how to accomplish "something". We'll go through the tools that are important to understand to get something done. We'll go through the workarounds and pitfalls that a tool might present. When we discuss something like layer masks we'll explain how to do it in Photoshop and how to workaround masks in Elements. The classes will be once a week. We'll start next week, on Wednesday and continue once a week, every Wednesday. That way, anyone interested taking part will have some time to work through the assignment. Once you've finished you interpretation of the week's assignment you can email you solution as a PSD file. It's the old "show your work" thing we all went through in any number of math classes. Everyone will get an individual response and one solution will be featured in the discussion once the lesson is closed.


The first assignment is right here. Take three objects and make a collage. It can be three letters, as shown here, or three pictures, or three pieces of clip art. Any three objects. The premise is to make them overlap. Send your solutions (in the full PSD file format) to tom@kayviewgallery.com . This first assignment is only to gage the level of those interested in the class. Thanks, it should be fun. Read more!

Monday, November 9, 2009

Monochromatic Detail


When someone hears the word monochrome the thing that , typically, comes to mind is Black & White. It 'ain't necessarily so. Monochrome only means one color. Today's image is pretty much B&W. That would be Blue & White rather than Black & White. The only other color is a small hint of red in the helmet and along the legs. It's sort amazing what happens when you point a camera up into a crystal blue sky with a polarizer on it. The blueness of the sky is as it was when we were there. This is one of the few times when an aimless ramble resulted in a couple of good shots. We just happened to come across an intersection that looked somewhat familiar. Using that innate radar that is built in to each of us (some more than others) we turned to the north and within minutes spotted some parachutes. We were within punting distance of the field where I did my one and only jump. We stopped in, asked permission and started shooting. Within the first five minutes we ran into a problem. My shooting mate's (wife) camera died. A quick check showed that the battery was dead. The camera was fairly new at that time and she didn't have a backup battery (until an hour later). We watched two jumps and left to find a Best Buy with a proper battery. There's an expression about shooting fish in a barrel. Shooting skydivers under canopy is very similar. They just hang there and you can pop away. It's not like they can hide behind something. Just make sure their feet are pointing down compared to where you're standing and you've got a shot. There's not a whole lot to say about today's image, so there is nothing after the "read more". Have a good Monday.. Read more!

Friday, November 6, 2009

Bring Out The Bling


Bling doesn't have to mean gold. I think of it as bright colors or objects, like the billiard balls in today's image. It's a simple shot, right? Not quite. One, I don't have a pool table. Two, I had to go out and buy a set of billiard balls. The "felt" is a red blanket. That nice "catch light", looking like it comes from an umbrella or maybe a softbox, is about the only highlight that wasn't there. I actually needed five speedlites using Nikon's CLS (Creative Lighting System) to get enough light on all the balls at the aperture small enough (F 22) to be able to hold focus from front to back. The focus point was the number five on the center ball. I needed to take the hyperfocal focusing distance into consideration when deciding where to focus. A "rule of thumb" for focus is that "acceptably sharp focus" happens one third in front of the focus point and two thirds behind. That meant that the front of the five ball, at a very small aperture was about the right spot. I tried several variations on the shot. A couple with very short "selective focus, some with the long focus, a few from the top and side, and using glass rather than the felt. That takes care of the photography. If you'd like to know more about the post processing, hit the "read more".

Read more!

Wednesday, November 4, 2009

Getting In Close


Scott Kelby had Tyler Stableford as a quest blogger on his "Photoshop Insider" blog today. Tyler is putting his money where his mouth is and his eye where his art is. He's trying to do something for the Wide Horizons For Children program in Ethiopia. The gist of his post was that we, as photographers, can do more with our cameras than we could ever do with our wallets. We're in November now. In the U.S. it's the time when we have a holiday called Thanksgiving. It's based on being a time to have a feast to celebrate the harvest. The crops are in and this would be the time of the year when the larders were their fullest. Life was good and the settlers could kickback a little and get ready for the onslaught of winter. Stableford's message is that there is no such time in a country like Ethiopia. There are very few pantries that are stocked at any time of the year. It doesn't matter if you have a $6,000.00 D3s or a Canon 7D or a hundred dollar point and shoot. There are things that you can do with a camera pressed to your eye that can help the less fortunate. You also don't have to travel to find a noble cause. Don't get me wrong, I highly admire what Stableford has done. All I'm saying is that you can look anywhere and find a way to help. Money's good, deeds are better. What's this got to do with today's image? Only that Stableford said one of the key points someone told him was that people won't donate to sweeping landscapes. You have to get in close and show the character of someone in need. That's where the money comes from. To learn a little bit about today's image, hit the "read more".

Read more!

Monday, November 2, 2009

Motion Blur In Camera


One of the filters available in Photoshop (any semi-recent version) is Motion Blur. The typical use for the filter is to impart a sense of motion in a scene. If you've taken a set of shots at an automobile race in the bright sunlight it might be tricky it get good wheel spin and panning at the same time. If the shutter speed is high enough to stop the action you might as well have not gone to the race in the first place. You can get the same shot in a parking lot, next to that low barrier type fence. Cock the camera on a slightly jaunty angle, snap the shutter and head for the digital darkroom. Everything can be fixed in post. It "can be", but should you have to rely on Photoshop to create the excitement of the race? Probably not. Races should be exciting enough on their own. It's easy enough to fake something on the computer for racing. The car and driver should be pretty sharp. You'd want to put in "some" motion blur in the direction of travel. The background "should" have more blur in the same direction to give the impression of high speed. The wheel would be in need of a combination of motion and rotational blurs to have the viewer believe the car was going forward and the wheels were turning. No sweat, just a couple of tweaks in Photoshop and, instead of being in the parking lot at the mall, you're on the Autobahn, tearing up the road at 200 KPH (getting passed by someone doing 250). The image might be just as exciting (well, almost), but would the joy of getting the image be anywhere near is exciting? I doubt it. It's the old "no risk, no reward" thought. To figure out how that relates to today's image, hit the "read more".

Read more!