
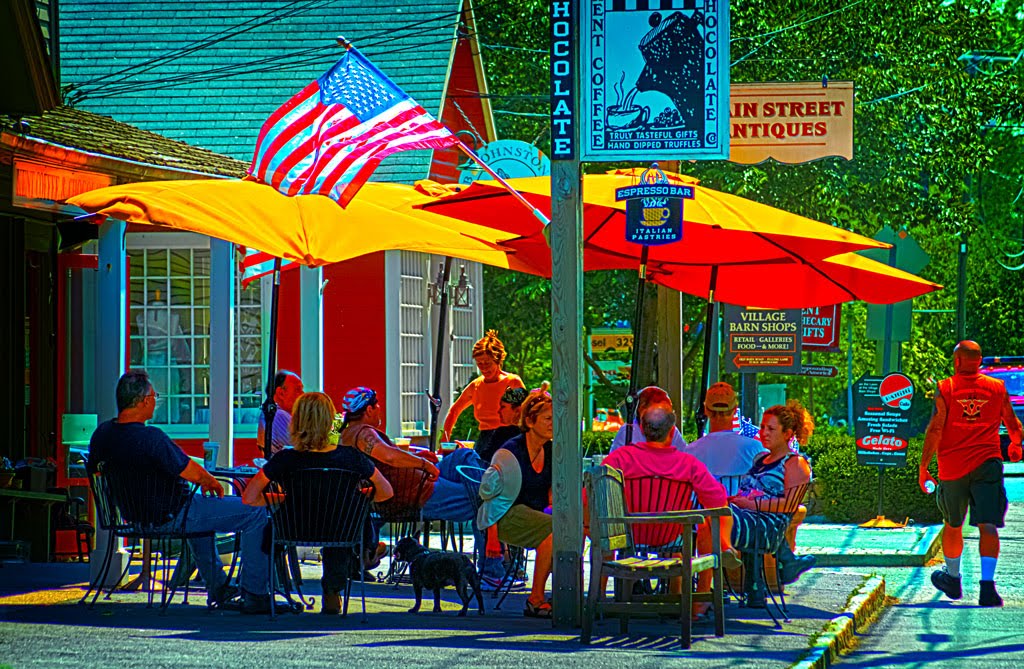
 After Monday’s tribute to Memorial Day I thought I’d lighten things up a little with another image from the weekend. I had just watched Kelby Training's newest set of videos, “A Day With Jay Maisel” where Scott Kelby spends a day walking the streets of New York City with Maisel. Jay Maisel is a big time photographer and the videos were fascinating to watch. One of the first things Scott noticed was that Jay was shooting in a high speed burst mode. Scott asked Jay if he was shooting bursts to ensure he was getting at least one sharp image, or possibly a subtle expression change. Jay replied that he was bracketing his exposure. He wasn’t sure if he’d want a little over or a little under exposure. How brilliant is that. Here’s a world class photographer hedging his bets by simply bracketing his exposure. Film’s cheap (free) today, so why not. The first thing I did when we got to the town of Kent, Connecticut on Monday was put the camera in the automatic exposure bracketing mode. I kept my “normal” -.3 EV as the standard exposure, so I wound up with exposures of -1.3, -.3 and +.7. Shot like that all day. Big thing to remember was to keep the finger held down. Being a bright sunny day the typical exposures were above 1/1000th second, so the duration wasn’t very long. All shots were hand held, but with the entire cycle being about a half second the changes in the scene were minimal. The three shot burst gives the photographer several options. One would be to have a selection of exposures to choose from. A second would be to have a starting point for playing with Photoshop CS5 HDR Pro and HDR Toning. Today’s image gives a sense of the excitement that can be found in Kent on any summer weekend. To find out more about today’s image and how it was created, hit the “read more”.
First step: All three of the burst shots were brought into Photoshop CS5’s HDR Pro from Lightroom. Since the exposure was only one stop above and below “normal” the HDR effect was a little on the weak side. Remove Ghosts was used to select one image to base the overall scene on, eliminating multiple versions of the man walking on the right from looking really bad. The Radius and Strength were brought up to the edge of producing halos.
Colors were Saturated using individual HUE/Saturation Adjustment Layers.
After making a composite image (Ctrl Alt Shift E) the Dodge and Burn Tools (O) were used to lighten up the faces and arms in the shade and to emphasize the folds of the clothing and the hat hanging on the chair.
The result was saved out as a PSD file and as a high quality JPEG.
The JPEG was brought back up into Photoshop CS5’s ACR (Adobe Camera Raw) processor for the purpose of removing any noise. The latest iteration of ACR does a remarkable job of removing unwanted noise.
The single layer, noiseless image was opened and HDR Toning applied. It’s at this point that the strong HDR effect came through. After gets what I was looking for to portray the “color” of the street scene the image was sharpened using a High Pass Filter Sharpening technique. A vignette was applied twice, with the second layer’s Opacity reduced by 50%.
If nothing else happened over the weekend in my shooting technique, I’m pretty sure that bracketing will be a standard part of my shooting (at least for the time being).


0 comments:
Post a Comment