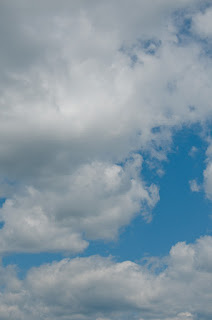
1. Replacing a bald sky. This sort of depends on your definition of a bald sky. If you run your cursor up through the sky and you have values in the Info Panel of 240 and above, you definitely have a bald sky. This is an easy one to fix. You don't have to make an intricate mask or do anything fancy. First thing to try is to change the Blend Mode to Darker Color. That may be the only thing needed. The first couple of times you try it you may bounce back in your seat at how well it works. There'll be no ghosting around the fine details of trees, bushes or buildings. If you do have very light parts of the primary image and the sky shows through (I've had one image like that), you may have to add a Layer Mask and paint out the sky showing through unwanted areas. It'll most likely be very minimal areas.
2. Well, the easiest way to create or improve a sky would be to get it in the camera. If you're going out to shoot landscapes, bring along a couple graduated neutral density filters. The Cokin P series (if you're using a DSLR) will cover -in almost any lens. You can get a screw-in adapter for each of your lenses and then get a filter holder and slide the filter in. Or, you can just hold the filter by the edge and put it, hand held, in front of the lens. Cokin filters are rectangular, so there's always a little piece that's out of the way of the circle of the lens. Holding it doesn't have to be rock steady, you're trying to blur the line between sky and land anyway, so a little movement is no problem. Typically you want to remove the lens hood and rest the filter on the ring of your protective filter.
If you take the shot without the graduated neutral density filter, all is not lost. Both Adobe Photoshop CS5 and Adobe Photoshop Lightroom 3 (and other versions) have graduated filters. They can't create the same separation between clouds and deep blue skies in the upper part of an image, but they can make a big difference in a so-so sky and a very decent sky. In LR3 the graduated filter is in the tool bar along with the spot removal, red eye and adjustment brush. It can be dragged in any direction. To pull straight, hold down the Shift key. In CS5 there are several ways to apply a GND filter. It can be used on a separate Layer with a dark blue as the foreground color and a lighter blue as the background color. Change the Blend Mode to either Overlay or Soft Light to apply the effect. Another method is to put a solid color on its own Layer and use a Layer Mask. Use the Black to White filter to control the amount of color showing through.
3. HDR skies! If you're a frequent reader of this blog you'll already know I'm not a huge fan of HDR skies. I'll typically make an HDR image and bring back the natural sky. Most (not all) of the HDR I do is of the enhanced, natural nature rather than what's become known as the "Harry Potter", more illustrative style. If you like the "in your face" style then cranking up the detail while making the HDR image should produce the type of sky you're looking for.
In any case, I'm a big advocate of having a folder of cloud images. Some of the more successful images I've created have had random skies put in to improve what was there when I took the shot. As long as you're creating art rather than shooting photojournalistic images, why not. Not all images fit neatly into a Cloud folder. I also use Keywords to be able to quickly find clouds.


0 comments:
Post a Comment