Adobe's getting kind or tricky. If you take a set of image in LR (version
5.2) and go to Merge To HDR Pro (Photo/Edit In/Merge To HDR Pro) and want
select the 32 bit option, it'll ask you if you want to Tone the composite in
ACR. One of the things you'll notice is
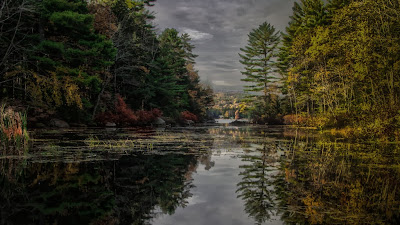
that there's no Crop Tool in the version of ACR that comes up. ??? Today's image isn't the typical 2 x 3,
out of the camera format. It's cropped
to 6 x 9. I was going to go for more of
a pano format but then decided to keep the entire reflection of the tree. I had to go over to PS to do the crop. One of the SYA (Save Your Ass) elements of
PSCC in the Crop Tool (C) is a check box that says Delete Cropped Pixels. By default it's unchecked. (IMHO, leave it unchecked, there shouldn't even be a question.) It SMA'd (similar to SYA) me on today's image. Because I changed my mind on the crop I was
able to go back and adjust the crop at a later time.
There was a lot of pushing and pulling on the image. The trees in the shadows on the left were Dodged in LR and the shoreline on the right was Burned. A couple of the trees on the left got hit with the Adjustment Brush (AB) to add more Clarity. The underbrush along the shore on the left were colored using the AB. Same with the reeds on the left and the pond scum in the water. The image was darkened down and the Contrast brought up.
There was a lot of pushing and pulling on the image. The trees in the shadows on the left were Dodged in LR and the shoreline on the right was Burned. A couple of the trees on the left got hit with the Adjustment Brush (AB) to add more Clarity. The underbrush along the shore on the left were colored using the AB. Same with the reeds on the left and the pond scum in the water. The image was darkened down and the Contrast brought up.
It's a reasonably straight image, especially for me. Just searching for that Currier & Ives
feel.


0 comments:
Post a Comment