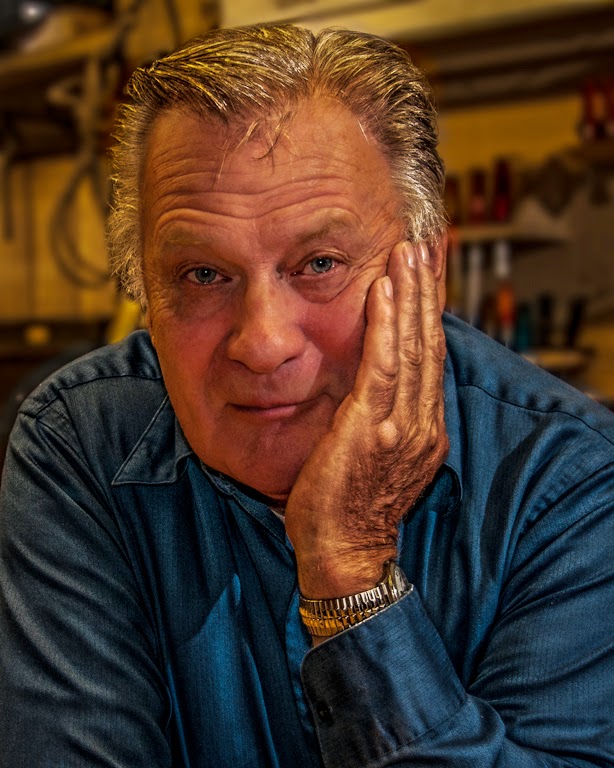
As it says in the Billy Joel song "John at the bar is a friend of mine". In this case the bar might be a bar of steel or aluminum. We sort of went for an environmental portrait in the shot. The head of a combined wood working and metal working shop asked me to take a few shots of some of the fellows. For most it was a case of lighting the person against a green screen and shooting the shop totally separate from the person. John was the exception. The shot is pretty straight forward. I'd set up three speedlights around his playground. The metal working portion of the shop. The plan was the same as other places, but this just popped into the viewfinder. John is what's known as a raconteur, a storyteller, a conversationalist, a wit. He was just there, holding court, with me sitting across his bench. I'd just set up three lights, gave them a quick glance and thought "we might have something here". I (and others) think it's a pretty good likeness of a fine character. The "trick" to today's image is what happened after the shutter clicked (oh good, now I sound like I'm channeling Joe McNally). To find out about the finishing of today's image, hit the "Read More".
First would be the Glyn Dewis part of the finishing. He demonstrates a technique where he drags the Highlight Slider in Adobe Photoshop Lightroom (LR) to a maximum negative (-100) and the Shadow Slider to the maximum positive number (+100). It starts to give Glyn's "signature" cartoonish look. Glyn takes it a lot further, but I thought it gave John's face a good, solid look. His hand, resting on the side of his face, needed to be just a bit off. Something to produce a little tension and show where the shadow was coming from. With the LR Adjustment Brush I bumped the Color Temperature up just a tad. Enough to create some separation.
The blue of his shirt dominates the image. It's the old "if you can't beat 'em, join 'em" type of deal. I couldn't eliminate the shirt and toning it down would look a bit negative, so why not celebrate it. This is the Joel Grimes piece of the puzzle. He puts a lot of emphasis into his images through dodging and burning. That's what went on here, only using a technique espoused by Scott Kelby. It goes like this:
Make two Curves Adjustment Layers in Adobe Photoshop (PS). Pull one up about a quarter of the way in from the right (highlights). Drag the curve way up, until the image is pretty well blown out. Invert the Mask (CTRL I [eye]) making it Black. Pull the other Adjustment Layer way down in the dark edge of the shadow area. Invert that Mask. Get the Brush Tool (B) and set the size to ten, the hardness to ninety five and the Foreground Color to White.
With the dark (Shadow) curve, trace a line over every fold and crease where a shadow (even a slight shadow) appears. Do the same with the light (Highlight) curve. Following the line of every high spot on the shirt. You should end up with a dark line next to every light line. It might even be a light, dark, light combo or the reverse (dark, light, dark). Once all the lines are drawn, blur the Mask for each side of the equation. In today's image the setting was about twenty. Don't worry about the specific number. Every image will be different. When the hard line disappears, flip the Visibility Icon (the eyeball) on and off from each Adjustment Layer. To see the whole effect, hold down the ALT key while flipping off and on the Visibility Icon of the Background Layer.
As you can see, it gives the shirt some "weight" without it distracting from John, the subject of the piece.
Monday, September 8, 2014
Subscribe to:
Post Comments (Atom)


0 comments:
Post a Comment