
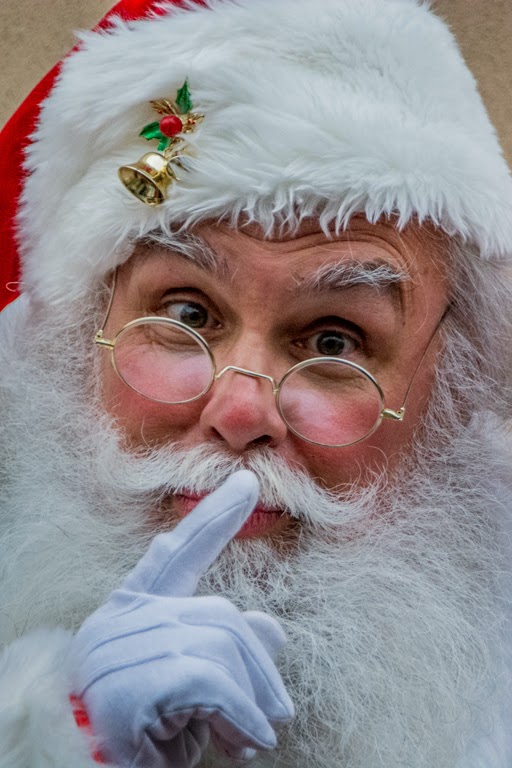
 This Saturday past there was an interesting event down in Stamford (Connecticut). They had a pre-parade Helium balloon filling "party", with street performers, musicians, and "characters" of all stripes. Some were there as part of the entertainment. Others, not so much, but still quite amusing. The subject of today's image showed up just as dusk was settling in. Because of the changing light it was easier to use the expensive computer (the camera) as a shoe box (shoot in manual mode) and not trust the camera to make any decisions. I'm big on using the technology available whenever possible. Typically, I make the decisions and let the camera do the heavy lifting of figuring out how to execute my vision. Sometimes, rather than arguing with the machine, its easier to do the decision making and setting the parameters of the shot. To get an idea of the thinking behind today's image and see how it was finished, hit the "Read More".
The first decision was to shoot wide open. As I said, dusk was falling so I wanted to gather as much light as possible. Next was a dance between shutter speed and ISO setting. It happens that today's image was shot at 1/250th of a second at a sensor sensitivity (ISO) of 3200. Plenty fast enough to freeze any "action" in this image. Other shots at the event went as high as 1/1250 at 6400 (some things happened faster than Santa touching his finger to his lips). The image you see is pretty much what came out of the camera.
Finishing tweaks were done in Adobe Photoshop Lightroom (LR) primarily using the Gradient Tool to bring up the detail in the beard and "fur" on the hat. There was plenty of detail in the whites that just needed to be brought out. Each side of the beard was given a little negative exposure, a little reduction of Highlights and a small amount of positive Clarity. Once that was done I right clicked on the Pin and chose Duplicate. Two things were done with the Duplicates. One was to leave the Duplicate right where it was and double the settings on that side of the beard. The second was to drag another Duplicate to the other side of the beard, turn it to match the angle and then Duplicate that. (Again to double the "impact" of the settings.)
Another Duplicate was moved, spun, applied to the fur of the hat and the image was finished. All that was left was a little Sharpening in the Detail Panel. Take a look at the enlargement of the image. Checkout the fine hairs in the beard and fur. Detail in the whites is the key to today's image.


0 comments:
Post a Comment