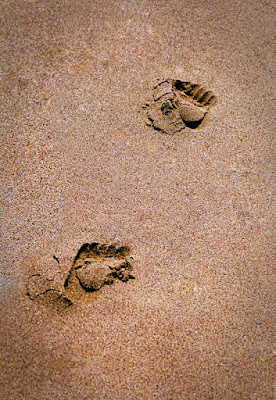
 Too often I see images where the photographer "finishing" the shot forgets one step. The image is left for the viewer's eye to fall off the edges of what's presented to them. Today's shot is extremely simple in it's composition. A diagonal line from lower left to upper right. Two foot prints, yet it tells a story. Someone was the first person of the day to walk on this portion of the beach. I tend to refer to this type of image as a "wandering" image. One that takes the mind on a flight of fancy. It could be anywhere (well, anywhere warm enough to have someone walking on a beach). It could be anyone. A Robinson Crusoe, along on a barren island. Maybe the person is out in the morning, running to be first in the water. Is the shot taken close to the ground and the feet are very small, or taken from a height and the feet big? The one thing that keeps you "in the picture" is the slight vignette holding you, directing your gaze, not allowing your eye to fall out of the frame.
The "frame" of an image doesn't have to be a piece of wood or metal surrounding the paper the image is printed on. It can (and should) be an integral part of the "finishing" of a print. The eye should be held in the shot by something other than a physical frame. It should also be subtle. There, typically, isn't a reason to beat someone over the head with the vignetting. Occasionally it'll work, but that would be a very rare occasion. If it gets that bad, you might as well put flashing arrows saying "look here". The only thing the viewer should be thinking is the he/she doesn't want to leave the subject of the shot. Anywhere looked at should delicately redirect the person viewing the print back to the area the photographer wants.
Putting a vignette on an image (in Photoshop) couldn't be much simpler. If you have many layers (more than one) affecting the image, first make sure the upper most layer is selected. Get a composite of the completed image by clicking on (get this one) Crtl, Shift, Alt, E. This will put a flattened copy of your image at the top of the stack. Select the Marquee tool and set the "feather" to a reasonably high amount (about 15% of the image's width). The reason for not suggesting a specific number is that we haven't discussed the resolution of the image. If you have a very high resolution image it would be one number, a lower resolution would be a very different number of pixels. Create a marquee, centered, leaving somewhere around 20% of the image around the outside. On a 16" x 20" I'd start at the 2" x 3" point and drag the marquee to about the 2" x 17" point and pull the "marching ants" out to the same dimensions on the right side of the image. Once you have the marquee set, click the delete key. Looking at the thumbnail you should see the the center has been punched out. Change the "Blend Mode" to Multiply. You'll see a fairly dark outer edge of the image has been produced. Use the "Opacity" slider to give you infinite adjustment over just how dark the vignette area is. This is, by no means, an absolute. You may want your vignette to be off centered to draw the eye to the main subject. If that's the case, an offset vignette would be called for.
Remember, finish the image. Don't allow the person viewing the print to decide where to look. Direct the viewer's eye to the place in the shot where you want them to focus.


0 comments:
Post a Comment