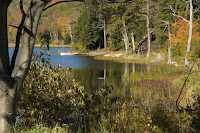
 First things first. Before starting to saturate colors in an image the colorcast needs to be eliminated. Beginning with neutral image, with no shift in color in one direction or another is an essential step when optimizing a picture. It's easier than you might think. It follows a formula and determines what's black, what's white and what's medium grey. Once you're there the colors can be manipulated in any direction. That would be the case in today's image.
 .
The absolute first step is to determine what is the final image you're looking for. Therefore, we'd crop to the aspect ratio of the finished print. That out of the way, it's time to apply the formula for zeroing out any colorcast. This isn't something developed here at the gallery. I first saw it written up by Dave Cross (of Photoshop Guys fame). It absolutely works great and is probably faster to do than it will be to read in this post.
.
First, get a Threshold Adjustment Layer. (The Adjustment layer icon is the B&W "Cookie" at the bottom of the Layers Panel.) This produces a strictly black & white representation of the shot. Drag the slider all the way to the left. This results in a completely white image. Start bringing the slider back to the right until a small piece of black appears in an important area of the image. (If there is something like a night sky in the picture it's going to remain black. Move on to something critical to the image.) In the Tools Panel, select the eyedropper (the Color Sampler Tool The eyedropper with the target). Place a sample point on the piece of (important) black. Second, move the slider all the way to the right. This produces a completely black image. Bring the slider back to the left until the histogram indicates the first "important" area that goes white. With a large enough sample revealed, place a second sample point. (Large enough is governed by what your sample size is set to. 1 x 1, 3 x 3 or 5 x 5 pixels.) We now have the maximum black point and the maximum white point of the image. Place a new layer under the Threshold Adjustment layer. CTRL click the "New Layer" icon to put the layer under the Threshold Adjustment layer. Change the "Blend Mode" to "Difference". What this does is fold the distribution of tonal values back on itself at the 128 level point. Click back on the Threshold Adjustment layer. You'll see that the max value is now 128. Slide the slider back over to the extreme left. Middle gray will be at the far left. As soon as you see a useful black area appear in the image on the histogram, place a third color sample point on that spot. Now we have black, white and gray.
.
At this point either eliminate the gray layer and the Threshold Adjustment layer, or turn off their visibility. You'll see your original image with the three sample points. Occasionally it's tough to spot one or more of the sample points. You may have to look for it. Select a Levels or Curves Adjustment layer for the actual colorcast removal. Up to this point it's all been prep work. You'll see a set of eye droppers on either Adjustment Panel. There will be a black, a white, and a gray eyedropper. Amazing. Select the black eye dropper and click on the #1 sample point. This will set your black point. Select the white eye dropper and click on the #2 sample point. This will set your white point. I'm pretty sure I can leave it up to your imagination what to do with the gray eye dropper.
.
Tada!!! You image is now color neutral. Any colorcast has been removed. Now you can "start" modifying the colors to deliver the punch you're looking for in your shot. Like I said at the start, it took you longer to read this than it will to do it. Give it a try. Some images need very little correction and others need major adjustments. Be willing to play.


0 comments:
Post a Comment