 The other day I said I had to deviate from my "standard" workflow to take care of some noise that had come from shooting at an ISO 800 level. I've had several questions about how I wound up at 800 and what my "standard" workflow is. As far as the nice, even number of ISO 800 goes, it just falls back on being an old school film photographer. I shoot with a Nikon D300. The "normal" ISO is 200. Here's one place that the decisions the camera might make aren't wrong, but they drive me nuts. I've tried Auto ISO, but when I see things like ISO 631 I can't help but wonder what the camera was "thinking". Why not 650, or 635, or 599. Just in case you're not familiar with how ISO works I'll take a moment and explain. ISO, shutter speed and F-stop are all tied in together. Double or half any of them and you've changed the exposure by one exposure value. That sounds a little strange because primary F-stops are 1.4, 2, 2.4, 4, 5.6, 8, 11, 16, 22, 32. It appears that doubling the F-stop number (2 to 4 as an example) would be a two EV steps. Close, but you have to think of the physics of how the opening works. It's called the inverse square law, and it is a "law" of physics. Basically it means you have to square the F-stop number to actually see what's happening. If we do we end up with 2, 4, 8, 16, 32, 64, 128 (close - it would really be 121), etc. Therefore, every F-stop number changes the exposure by one EV. Sooo, the difference between an ISO of 631 and 635 or 650 is so slight that (while instruments would be able to measure it) it becomes meaningless. That's why I elect to make the decision and change ISO values by complete exposure values. 200, 400, 800, 1600, etc. The camera will adapt and split hairs using either shutter speed or aperture. Just a quirk.
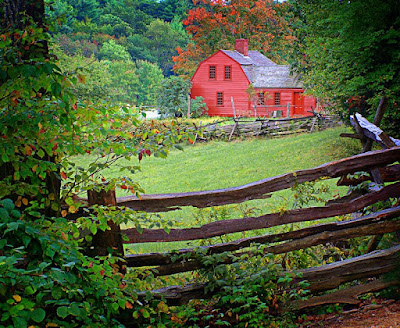
The image of the layer panel is the base line for every image I work on. From the bottom, the first couple layers zero out any color cast. The next set are put into a group and are to adjust individual colors and saturate the image. Notice, in this particular example there are two Red Adjustment Layers. The house and the leaves need different amounts of red. One AL could be used and shades of grey could be used to get the different shading, but individual ALs gives more flexibility going back in to make minor twicks.
.
After making all the color adjustments necessary I'll commit (but not lose) them, using the "left side of the keyboard" plus E. That gives a composite of everything below the top (if that's what is highlighted) layer. For this discussion I showed that layer and the sharpening layer. Typically those are one and the same. Before sharpening I'll copy the composite layer to have a layer for the vignette. The sharpening I use is a High Pass sharpening and the vignetting is a feathered marquee with the center deleted and the blend mode change to Multiply.
Like I said, this is the start point of each image I work on. This part of the workflow tales a couple of minutes and then any creative work starts. Hope this gives a glimpse of my prep work.


0 comments:
Post a Comment