Friday, October 29, 2010

Falls Last Gasp In Connecticut

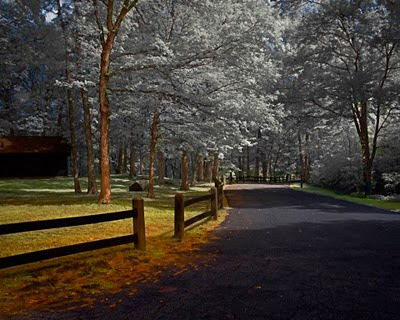
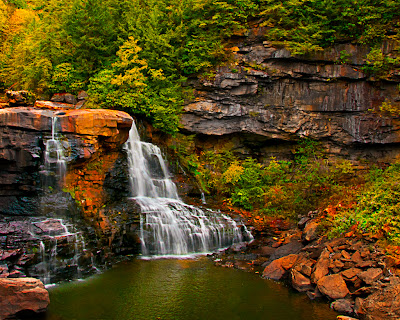
It just keeps going on and on.  Yesterday was another spectacular autumn day in Connecticut.  Same spots are just maintaining their leaves and giving a show that ranks right up there with some of the best leave peeping seasons in recent memory.  Today’s image was shot yesterday, just after the sun had gone down past the hill to the west.  It’s strictly lit by the afterglow of the gathering twilight.  It was shot as a part of a nine shot sequence with the idea of playing with Adobe Photoshop CS5’s HDR Pro.  Nine shots were done at .3 stop intervals, so it gave me everything from -1.3 to +1.3 off the camera’s metered exposure.  Kind of minimal brackets for attempting any HDR.  But, it does give me another option by doing it this way.  If one exposure is just too good to pass up, I end up with a great start point to develop a straight image.  That’s what we have today.  I could have expanded the range a bit by changing the bracket from .3 stops per click to .5 stops per click.  This option is available in the menus of a Nikon D300.  So, it is possible to shoot a nine shot sequence that goes two up and two down.  Today’s image has to be one of the straightest shots ever to appear on the gallery.  To find out just how straight, hot the “read more”.
Read more!

Wednesday, October 27, 2010

Sometimes The On Camera Flash Works

Everyone says your little popup flash on your camera is about the most useless piece of gear.  In general, when used at full tilt with it firing at the start of the exposure, “they” are typically right.  There are ways to improve the results of that ridiculous point source, on axis blast of light.  Today’s image is an example of what “could be” the result of a couple of simple adjustments done in camera and some new finishing techniques available in Adobe Photoshop CS5.  The pup with the intent look on his face was sitting in the front seat of a car in Litchfield Connecticut last Saturday.  The window was open and the day was a beautiful, warm (not hot) fall afternoon.  He had his head just above the sill of the window and appeared to be looked for his master.  We had been walking around town with a couple of friends, shooting general interest shots and waiting for the sun to go down and the moon to rise.  As it happened, the two conditions were just about in sync with each other.  Sunset was a couple of minutes before 6:00 PM and moonrise was about 6:03 PM.  We spotted this little guy being as patient as could be as we were killing some time.  To get an idea what the camera settings were and what the “new” finishing technique is, hit the “read more”.
Read more!

Monday, October 25, 2010

Make Things Easy With Adobe Photoshop CS5

Some things are a little tough to do in any photo editing application.  Some things just appear to be hard to do.  Today’s image is one of the later.  It starts out as two separate images and ends up as a composite.  It would be easy to add the moon to the image of the church in any of several different ways.  You could use the Erase Tool (E) [yuck].  You could make a Mask and Mask out the moon.  Readers can probably come up with another twelve methods of getting the image of the moon onto the main image.  The rub comes when you try to put the moon into the image “and” behind the branches of the tree.  I can’t imagine the Eraser Tool (E) being successful.  I could go along with using a mask, but you’d probably be stuck with the moon in one spot.  It you decided you wanted to move the moon you’d unlock the Mask from the image Layer and have limited ability to shift the moon.  There is a method that’s incredibly easy that’s overlooked (or unknown) by 99% of Photoshop users.  It’s not available in Adobe Photoshop Elements of any version.  If you’re interested in finding out about this little used secret weapon, hit the “read more”.
Read more!

Friday, October 22, 2010

This Weekend Is The Max For Autumn Color Around Here

The calendar says it, the weather forecasters proclaim it as though it was the first day, the nip is in the air and the photographers are ready.  Today’s image comes from last week’s ride to northwestern Connecticut and Kent Falls State Park.  Today’s image is of a single tree along the walk up to the base of the falls.  As I crossed the covered foot bridge and started up the path, this tree wasn’t even on the radar.  Half way to the falls it emerged out of the early morning mist.  I didn’t have a choice, I had to stop and shoot the tree before the gathering light ruined the mood.  I plunked down the tripod and shot a couple dozen frames.  In order to get the optimum exposure I bracketed the exposure at one stop steps, two stops in either direction of what the camera thought was correct.  This also gives me the potential to do some Adobe Photoshop CS5 HDR Pro magic if the spirit strikes me.  Today’s image is one exposure, but it did benefit from a slight bump from CS5’s HDR Toning.  The dark area surrounding the tree is actually the mountainside (a Connecticut level “mountain”, not a real mountain) behind.  A daylight shot, with the fog burned off, would have revealed the hillside with no problem.  As it was, the F Stop really didn’t matter.  F 22 wouldn’t have provided more detail in the background.  Everything was sucked up by the mist.  If you’d like to know the surprising details of the finishing of today’s image, hit the “read more”.
Read more!

Wednesday, October 20, 2010

Soup To Nuts With Adobe Photoshop CS5


For the past 200+ posts there’s been an image accompanying the story.  A month or two ago I received an email saying would you “show your work”.  Made me think of two things.  One, that I was back in some primary school math class and the other was “yea, I should do that more often”.  Today’s image wound up with kind of an interesting Layers Panel and used more Alpha Channels than typical for a simple image.  So, what we have today is the original RAW file, the Layers and Channels Panels and the finished image.  I’ll take it step by step and explain what was done and why it was done.  Seeing as the images take up so much of the header of this post, we get right into it.  Clicking on each image will enlarge it so detail (in the Panels) can be seen.  To follow along, hit the “read more”.
Read more!

Monday, October 18, 2010

The Last Step With Adobe Photoshop CS5

It was a pretty good weekend, photographically.  With the fall colors at just about peak we had to maximize what we had, so I shot Saturday, early Sunday morning and Sunday afternoon.  One of the reasons for the urgency was the high winds for the entire weekend.  For anyone who doesn’t live in a place with the wonderful change of seasons we get in Connecticut, let me tell you how it goes.  The leaves turn and just hang on the trees.  Without a fairly heavy rain storm or some wind they’ll sit there for a couple weeks.  It’s the times when the weather is calm that you get the spectacular colors you see in magazines and on calendars.  Once the wind comes, it’s done.  One day the trees are a riot of color and the next they’re bare.  It’s as quick as that.  It’s a metaphor for life.  Here today, gone tomorrow.  So, every fall there’s a mutiny by those couch potatoes who’d rather sit and watch a game on the weekend and the roads near any vantage point become as thick as molasses with car after car slowing to get a few seconds of autumn’s glory.  There’s an adage about those not learning from history being doomed to repeat it, and we’re no different.  Seems like every five years or so we get an irresistible urge to take a ride along the Mohawk Trail through western Massachusetts.  It’s actually Route 2 and follows the hills and ridgelines of the Berkshire Hills.  Every time we get suckered in.  Thinking, as we start out along the trail, that “this isn’t too bad” and wandering along for the first thirty miles unencumbered.  We scoff at those traveling in the opposite direction because we see the traffic jam at the exit point, stretching for miles.  Because we’re there to capture the wonder of one of nature’s greatest displays we tarry and end up at the terminus (it really doesn’t matter which end) after dark, sitting in a ten mile long chain of headlights.  I’m sure from the air it must look lovely.  From ground level, not so much.  Today’s image comes from a different, equally evocative, tourist spot at a completely different time.  To find out where and what “makes” today’s image, hit the “read more”.
Read more!

Friday, October 15, 2010

Adobe Photoshop CS5 And The Pristine Firetruck

Wouldn’t it be nice if every fire company kept up their equipment in as good shape as the one from today’s image?  That statement is particularly true considering the truck is an antique from the 1940s.  The paint is flawless, the knobs and controls look like they just came out of the box.  They’re not!  It’s Adobe Photoshop CS5 to the rescue.  Things done to today’s image can be done with any relatively new version of Photoshop.  Almost naturally, the basis for the image is a mask.  For anyone starting out with Photoshop, or Adobe Photoshop Elements 9,   the first thing to learn is the use of Layers.  The second thing should be the use of masks.  Either Layer Masks or the masks that come along with Adjustment Layers.  I haven’t looked at PSE 9 yet, and I don’t know if it has Channels to go along with Masks in this version, but Masks without Channels is kind of like an iPOD without speakers (or earbuds) if you’re into music.  There are things you can do.  As an example, I have very few songs on my Apple iPod Touch and haven’t the foggiest idea where the earbuds are.  My use for the thing doesn’t focus on music.  So, Masks in PSE 9 can be used for something, but you can’t get the maximum benefit from them without Channels.  Obviously, the main point of today’s post is about Masks.  To learn how today’s Mask was developed and how that “paint job” got so smooth, hit the “read more”.
Read more!

Wednesday, October 13, 2010

How About A Pastel HDR Treatment

Today’s image is a little different, for me at least.  I went for sort of a pastel treatment of an HDR image.  I’ve had a couple other scenes from one of our favorite places to see people at sidewalk cafes, Kent, Connecticut.  Just in case anyone is interested and happens to be in northwestern Connecticut when it’s warm enough to sit outside, stop by Kent.  Great place to grab a bite to eat and an even greater place to do some people photography.  The Villager is just up the street from where my last three street scenes come from.  (Here, here and here)  Rather than going for deep red umbrellas, umbrellas with dark blue panels and an almost black shirt on the fellow, I went for pink umbrellas, light blue panels and a rich blue shirt.  As a bonus, the fellow in the background has a purple shirt.  Where the previous images were brooding and dark, this one has a light airy feel to it.  There’s a couple things that needed to be addressed today, so let’s get right to it.  Find out what twists and turns had to be done to today’s image by hitting the “read more”.


Read more!

Monday, October 11, 2010

A Followup On The Color Infrared Technique Alluded To On Friday

It’s not unusual to use some part of one image to enhance another image.  Putting clouds into a dull white sky, switching a tarred road for a rutted dirt road or adding just about any element you can think of are all part of the game when using Photoshop.  On Friday, with the straight B&W Infrared image, I talked about shooting both B&W Infrared and color images in sequence for possibly combining them at some later point.  I received several questions asking for more details on “how” to do it and “what” it looks like.  Just as a quick experiment this morning I tried taken an Infrared image and its companion color image and did a Merge to HDR Pro (Tools/Photoshop/Merge to HDR Pro) out of Adobe Photoshop Bridge.  Let’s leave it to say it’s a totally different technique than we’ll be discussing today.  It wound up being a more pastel rendering of the scene and the Infrared effect really couldn’t be seen.  Today’s image comes from way back in the archives.  All the way back to last year.  My thought is that if you haven’t learned anything in Adobe Photoshop CS5 (or whatever version you’re currently using) in the past year, you really aren’t trying.  Every time I look at the program, or see some technique described or shown on the web, or view a class, or attend a seminar I pick up something new.  You have to be shark with Photoshop.  You just keep swimming and eating up knowledge about some new tidbit that you hadn’t looked at before.  I was at a seminar a couple weeks ago where the lecturer said: 1) he started with Photoshop in 1993 and 2) you must learn the Pen Tool (P).  What that said to me was that he started with Photoshop in 1993 and stopped learning new techniques in about 1995.  The guy makes a pretty good living using Photoshop, but could be quicker at making that money if he knew more current techniques, like the Quick Selection Tool (W) and the Refine Edge controls found in CS5.  Poke at the buttons, click on something you haven’t used yet just to see what it does.  Play, play, play.  To find out how to do something like today’s image, hit the “read more”.

Read more!

Friday, October 8, 2010

I Read Another Article That Was Wrong About Infrared.

I just saw another article about infrared photography where the author said the first thing you “must” do is have you DSLR converted to be able to do infrared work.  Rubbish, balderdash, phooey, and baloney.  I won’t go so far as to say it’s a scam, but removing the filter covering the sensor isn’t necessary.  It’s convenient, it makes hand held infrared possible and creates grab and go possibilities for the work, but your “normal” camera should be able to do infrared if you have a tripod and some patience.  Today’s image is a straight B&W infrared shot.  As originally shot it had a decidedly red cast to it.  There’s a reason for that.  It’s that Hoya R72 Infrared filter on the front of the lens.  It’s like looking through a welders mask.  You can’t see a darn thing through it.  An alternate use for it might be watching solar eclipses.  It’s dark enough to lower you light gathering power by about 3.5 Stops .  The reason I can be that specific is that I was shooting both Infrared and color shots of the same scene.  The technique is fairly simple.  To find out more about how to shoot both and why you’d want to shoot both, hot the “read more”.
Read more!

Wednesday, October 6, 2010

It's Fall Foliage Times For Sure This Time

Boy, what a year, or rather season.  I searched all the sites for information and finally talked the better half into changing her vacation time from mid October to the end of September.  All the sites said the last week of September would be optimum foliage time in northeastern West Virginia.  Due to the warmer than usual weather lately, when we got there it looked like midsummer.    Green, green, green!  Okay, that was a bust.  Last weekend I was shooting with a friend in northwestern Connecticut where the color should have been spectacular.  (See Monday’s post.)  Were the colors spectacular?  No, they were green, green, green.  This warm weather this year has driven the foliage season back at least a couple of weeks.  We may be having great foliage colors in the first week of November around here.  But, there is good news.  Color has come to upper Maine, New Hampshire and Vermont.  Today’s image comes from a RV trip we took through New Hampshire and Vermont a couple years ago.  As you can see, in the lower left hand corner there’s a rock wall.  Yep, the image is a small panorama taken from a “scenic overlook” on the side of a road.  The trip was pre-GPS, so unless I just happen to stumble on the road again, I haven’t the foggiest idea where this “scenic overlook” might be.  I don’t even know which state it’s in.  Anyway, to find out what makes today’s image kind of special, hit the “read more”.
Read more!

Monday, October 4, 2010

Something You Don't See Everyday

I’m not talking about a little race car, or the fact that the car is in sharp focus, with proper speed lines due to panning, but a shot straight out of the camera.  The only thing done in Adobe Photoshop Lightroom 3 was a crop to give just a little more impact.  That’s right, zero processing, nadda, nil, not even sharpening and a vignette.  The reason for such a naked image is to start a discussion about shooting single shots and shooting in continuous high speed shutter mode.  A friend invited me out for a day of shooting for the sake of shooting.  He had a friend driving at beautiful Limerock Race Track in the northwest hills of Connecticut and asked me to come along.  We started shooting and the first time he heard the rattatat staccato of my camera running at seven frames pre second he said, “oh, you shoot in high speed.  I don’t like doing that.  I shoot single shots”.  Over the course (bad pun) of the day I shot about twelve GB of images, somewhere about six hundred images, in five to seven shot bursts.  He was shooting at about the same click rate, so I’m guessing he has somewhere near one hundred images on his memory card.  There’s a couple things you should know about this image.  To find out what, hit the “read more”.

Read more!

Friday, October 1, 2010

What My Workspace Looks Like

 Adobe Photoshop CS5, or any version of Photoshop or Adobe Photoshop Elements, or just about any Adobe application is a two handed program.  Most people don’t think twice about Microsoft Word being two handed, even us two finger typists.  (I’m not a hunt and pecker, just a two fingered typist.)  Along with today’s image I’m showing a screen shot of what my screen looks like.  The right hand screen is color corrected and the left one is close, but not electronically accurate down to the nubs.  The reason for the double screen setup is that I like to check some things and be reminded of others.  I find having things like the Info Panel visible is very handy.  On something like today’s image I’ll refer to it often.  I’ll grab the Move Tool (V) and roll over the brighter areas to make sure I’m not bumping up near 255, 255, 255 (pure white).  There are a couple reasons for using the Move Tool (V) to do this type of survey.  First, it’s a point source.  Second, it’s probably the most non-destructive tool in the group.  The only thing you can do is move something around.  Having the Layers Panel and the History Panel handy is, well …. Handy.  I’m always flipping back and forth in the Layers Panel and being able to go back to the start of a sequence (such as twenty brush strokes) in one click is a real time saver.  Here’s an example:  you just went through some dodging and burning that involved thirty strokes (my History Panel is set to fifty steps rather than the default of twenty).  Rather than hitting Ctrl/Alt/Z thirty times, a simple move of the slider and a single click at the beginning of the string is much easier.  The Swatches Panel was just a throw in and I thought I wouldn’t use it very much at all, but, having it instantly available has made it a go-to panel.  To learn more about which panels are on my second screen and how they’re used in today’s image, hit the “read more”.
Read more!