Wednesday, December 4, 2013

How To Easily Restore A Photograph

Take a look at the image on the left, down in the lower right hand corner.  There you'll see the words "Circa 1887".  Now think about how careful you'd have to be if someone handed you a 126 year old photograph and asked if you could restore a family heirloom, a piece of history, the only known shot of great great granddad.  The paper would be as stiff as an overly starched shirt and would flake tiny pieces off with just about any movement.  As you can see, the photo, at some point was folded and probably stuffed into someone's pocket or wallet.  Putting the photograph into a flatbed scanner would probably do more harm than good.  I don't know if shooting it on a copy stand would give enough detail to resurrect a usable starting point.  How one image became the other is actually easier than you might think.  To find out what was done to convert one image into the other, hit the "Read More".

Read more!

Monday, November 18, 2013

A Friend Has That Currier & Ives Look Down Pat

I never begrudge anything anyone can do in Adobe Photoshop or Adobe Photoshop Lightroom.  I'm always either trying to learn new things or figure out how someone did something.  I recently saw a couple images by a friend and frequent reader of these posts (Hi Ed).  He's come up with an old timey, Currier & Ives type look to some of his landscapes.  Very, very interesting look.  He asked me for some pointers on how to extract objects from images.  I think we need to trade tips.  Today's image is an attempt to take a shot at going for the old time feeling.  It works, just not as good as Ed's.  Couple of things.  It is an HDR image with quite a bit of post processing in both PS and LR/ACR (Adobe Camera Raw).  With the Creative Cloud version of PS (PSCC) you can use ACR as a filter.  As long as you make the Layer a Smart Object you can pop back and forth into and out of ACR as often as you'd like.  Great for tweaking things as you go.  You doing something "straight" to an image, jump over to ACR.  Doing anything that needs a Mask, bounce back to PS.  Compositing images, use PS.  Just remember where your base image came from, 'cause that's where it'll go back to when you eventually do a Save and Close.  (Notice I said Save and not Save As.)  If you use LR as a DAM tool (Digital Asset Management) and you go to PS to do something that requires PS you should probably use "Copy With Lightroom Adjustments" (CTRL E to get to the dialog box and then use the top option).  That eliminates the need to do the old fashioned "make a copy of your Background Layer just in case" thing.  People used to do that to protect their original image.  If you "use a copy" you're not touching the original, so you don't need that copy of the Background Layer.  When it's time to Save your creation it'll be put back right beside the original images (or set of images in the case of HDR or panoramas.  But, what's up with today's image.  To find out, hit the "Read More".
Read more!

Wednesday, November 13, 2013

Wednesday Q & A: Where The Hell Have I Been

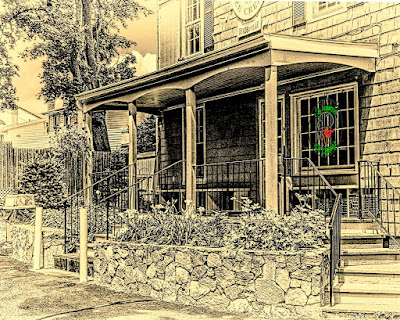
It really hasn't been too much of question in the real world, but for people who are readers of The Kayview Gallery it got some attention.  The gallery is featured on Alltop.com under the Photoshop section.  One of the things that happens there is that you sort of slide down the pecking order unless you post frequently.  After a couple weeks you tend to drop off the bottom of the page.  When I recently posted the shot of a Santa Claus looking guy (my brother-in-law), the gallery was back to being included on Alltop.  That's where a couple of notes came from asking what had happened.  What happened was that we moved.  Now, that shouldn't explain a four month sabbatical, but that was it.  Our explanation of why we were selling was that we had an eight room house and we used three.  The kitchen, the bedroom and the playroom/den/tv room, whatever.  The boys are gone, the excess rooms were either dust or junk collectors, we aren't (never have been) into liking yardwork or snow shoveling, so what was the point of staying.  Today's image is a cell phone shot of the front of our nice new (to us) condo.  Now instead of eight rooms and using three, we have four rooms and use three.  The condo actually has more room than the house had before the addition.  The master bedroom suite is smaller than we had at the house (but then again most master bedroom suites [in "normal" houses] are less than 650 sq. ft.).  The living room/dining room is larger, the kitchen is about a wash and the second bedroom now (for the moment) collects dust and junk (er, useful items used for photography).  To find out why it's taken almost four months to get back to some resemblance of order, hit the "Read More".


Read more!

Friday, November 8, 2013

Guess Who My Brother-In-Law Is?

Yeah, that's my brother-in-law.  My wife's "little" brother.  We were over and he'd asked me to find something online for him.  I'd found something I thought might fit the bill, so I handed him my iPad.  That's the "main" lighting for today's image.  He was sitting "Archie Bunker like" in his favorite chair.  I knew the light was dim and cranked up the ISO on a Nikon D300 to 3000.  (Far above what "should be" a reasonable sensitivity setting to avoid noise.)  The shutter speed was 1/15 sec, hand held.  It should have been a mess of a shot, but, with a little work, came out okay.  There's a couple other things I should "confess" to.  The background was his dining room, his shirt was blue and he's actually eighteen years old (no, that last piece is not true).  To find out what became of the dining room and the blue shirt, hit the "Read More".


Read more!

Wednesday, July 17, 2013

Wednesday Q&A: Photoshop Smart Objects - Try This Test


Adobe Photoshop Smart Objects are still the number one query that brings readers to The Kayview Gallery.  We've had a dozen difference posts (check out the archive list in the right hand column) discussing Smart Objects covering a period from 2011 through today’s post.  Today’s “image” is a little test I’ve created that you can replicate to prove to yourself that CTRL-ALT-SHIFT-E doesn’t work and Smart Objects do.  Once you’ve done the four finger salute to the left side of your keyboard, you’re stuck.  Sure, you can go back under the red line you see in the middle Layers Panel in today’s image.  You can make all sorts of changes to the Layers below.  Only problem is that they won’t be reflected back to the Layer above the red line.  The red line is “a line in the sand”.  You can’t cross it.  Take the test.  Set up a couple Layers that look like the Panel captioned “This is the basic layout for our discussion”.  You don’t have to follow it exactly.  Do whatever you’d like to set up a test.  Follow along with what you’ll find by hitting the “Read More”.
Read more!

Wednesday, July 10, 2013

Wednesday Q&A: A Tip For Shooting Sports


What!  The title says “A Tip For Shooting Sports” and today’s image is a couple of flowers.  Trust me, it’s only there to illustrate a point.  Doris has her pet orchid.  She tends that little plant zealously.  She has a special place it has to sit.  It’s sort of like Sheldon (The Big Bang Theory – US television) explaining why he has a designated place to sit on the couch.  Just the right amount of sunlight (we’re back to discussing the orchid), not so much as to overheat the plant but enough so it can thrive.  At the right height and distance from the window to maximize the rays.  A slight breeze from walking into and out of the bedroom.  A reasonably constant temperature in all seasons.  Just the ideal (or as close as you can get in our house) spot for its needs.  I stole the sucker.  I wanted to play with an 85mm macro.  Only problem was the tripod was in the trunk of Doris’ car.  Oops!  Oh well.  Shoot hand held and see what happens.  One thing that comes to mind is that the depth of field is going to be severely limited due to the large aperture needed to let in enough light.  To see how these flowers relate to sports photography, hit the “Read More”.
Read more!

Tuesday, June 25, 2013

Using Photoshop Alpha Channels To Control Composition

Today’s image demonstrates what happens when you screw around with an image too much.  I was trying to get rid of the people in the background but give a hint of people “in the stands”.  The fact that it didn’t work out well doesn’t subtract from the point of today’s discussion.  Typically when I do something like today’s image the mask is one big thing with all the elements selected.  The ball, the batter and the catcher picked out as one Alpha Channel.  Today’s image has four separate Alpha Channels.  In this case, an Alpha Channel is a Saved Selection.  The Selection process is not important.  Make your Selections any way you’re comfortable with.  If you’re reading this and using Adobe Photoshop Elements, keep reading.  PSE has the ability to save Alpha Channels.  The big difference between Adobe Photoshop whatever and PSE is the fact that PS gives you access to the Alpha Channels and PSE doesn’t.  The question would be: “do you really need to have that access?”  Hit the “Read More” to find my thoughts on the subject.
Read more!

Tuesday, June 18, 2013

Just A Quick Phone Camera Shot

Yesterday we were down in NYC.  On the way home we heard on the radio that there were thunder storms on the southern shore of Long Island.  As the crow flies it couldn’t have been more than eight or ten miles from where we were on the West Side Highway.  Above us there was nothing but blue sky.  The radio was talking about torrential rains, lightening and high winds.  We were headed north, so we looked over our shoulders and in the mirrors.  Nothing.  We live about sixty miles north of the city, in Connecticut.  For the entire drive the sky was clear, until the last mile north.  We made the turn onto Route 84 going into our home state.  To the north of us were serious clouds.  South of the highway, clear skies.  It wasn’t like going from clear, to overcast, to cloudy, to serious clouds.  Today’s image is off my phone’s camera.  The white’s are blown out, but it gives a fair interpretation of what we saw.  What appears to be a right angle is actually a right angle.  You can see the clear blue sky with a distinct edge. 

I just thought you might get a kick out of an interesting weather phenomenon.  Have a good day.
Read more!

Wednesday, June 12, 2013

Wednesday Q &A: Privacy? Are You Kidding?

Frequent readers of the blog know I’m retired from a little west coast startup named Intel.  (Yea, that Intel.)  All this flap over privacy cracks me up.  Let’s go back to “the old days” of 1999.  Intel had just come up with a great technology for the “new” Pentium III processor.  Each chip would have (basically) a serial number.  This would be a great boon to large companies for the management of computer assets.  The IT Department could do all sorts of things to keep the TCO (Total Cost of Ownership) down, manage the software on each computer, target updates to specific machines and streamline troubleshooting problems.  Only problem was that every chip, not just the ones in large companies, would have the serial number (identifier).  Conspiracy theorists went nuts and claimed “Big Brother” had arrived and everything you did would be subject to being tracked.  Intel backed away from including the ID'r code.  Scott McNealy, then CEO of Sun Microsystems, was asked by a reporter (Stephen Manes) to weigh in about the noise.  His quote was (and remember this was 1999) “You have zero privacy anyway.  Get over it.”  Things haven’t changed.  You have zero privacy.  Every time you make a phone call, send an email, tweet what you had for lunch, post an instagram, or use a credit card, someone is gathering information.  To see an example of what can be done and why you have no privacy, hit the “Read More”.
Read more!

Thursday, June 6, 2013

Wednesday Q & A: Does LR4 Have Alpha Channel Masks?


The easy answer to today question?  No.  The harder answer would be yes.  The first thing that needs to be discussed would be what is an Alpha Channel, and the second would be how are they used.  I did a post a while back about a similar topic.  It was about Alpha Channels in Adobe Photoshop Elements.  The answer is very close to the answer to today’s question.  Full blown Adobe Photoshop CS XX (whatever) definitely has Alpha Channel.  The big difference between PS CS and PSE and I’d think LR5B is that you have access to Alpha Channels in PS CS.  If you have the default Layers Panel open, take a look at the tabs.  It goes Layers/Channels/Paths.  A Channels Panel is available to you.  The first thing you see (if you’re working is an RGB mode) is four “Layers”.  RGB/Red/Green/Blue.  RGB is the composite of the other three.  The Red Channel is a B&W (there’s also an option to see it in color) representation of everything that contains even a little bit of red in the RGB image.  If you click on only the Red Layer you’d see a B&W image.  Full Blacks, full Whites and shades of gray.  Same thing happens when you click of the Green and Blue Layers in the Channel Panel.  As you click through, the B&W representations will change.  If you think of it as a painter would view his/her paints, you see which colors and what amounts the painter would have to mix her/his colors in to get the desired end color.  If you were to put a big old X (make one leg Black and one leg White) across the Red Channel (any Channel you choose) and then look at the RGB Layer you’d see a rainbow of colors.  What’s going on?  You’ve changed to amount of Black and the amount of White in the Alpha Channel.  To find out what happens in PSE and LR, hit the “Read More”.
Read more!

Monday, June 3, 2013

105 Shots Of A Stick And One Bird

How much of your camera do you actually use?  I’ve had my Nikon D300 for five or six years now and I’m still finding new things it do to play with it.  I’ve played with Auto Bracketing for years to create HDR images.  I have multiple Nikon speedlights so I can use Nikon’s CLS (Creative Lighting System).  My latest thing to play with is the built in Interval Timer.  We put a bird feeder out in back of the master bathroom over the winter.  (It wound up being much more of a squirrel feeder rather than a bird feeder.)  It was about four feet away from a window, just slightly above the level of the upper pane when opened.  We set up a stick for birds alit on before dropping down to the perch on the feeder.  All was set.  I put the camera on a tripod on the counter and focused on the stick.  With the focus set to manual I knew it wasn’t going to “hunt” and would stay on the stick.  With the Interval Timer on the D300 I could set the number of shots, the time between shots and when I wanted the sequence to start.  Well, I wanted the sequence to start immediately (and that’s an option), so I clicked the shutter and walked away to do other things.  What happened to all those shots?  Hit the "Read More" to find out.

Read more!

Friday, May 31, 2013

HDR in Photoshop or Good Lighting In Camera?


There’s a difference in the two shots that make up today’s image.  One is right out of the camera and the other is a five shot HDR image.  The one out of the camera is a RAW image with nothing (nothing) done to it.  The other, like I said, is a fully developed HDR image.  Can you see the difference?  Sure.  With a little work, can I make the OOC (out of Camera) shot look just like the HDR image?  Yep!  A couple of slider moves in Adobe Photoshop Lightroom 5 Beta (or LR 4 or LR3) and you wouldn’t be able to tell the difference between the two.  Does the OOC RAW image have some special lighting applied that the HDR image doesn’t have?  Nope.  The RAW shot is one of the brackets used to make the HDR image, so the lighting is exactly the same.  The images are of a steam locomotive at Steamtown in Scranton Pennsylvania.  It’s on the shadow side, on a bright sunny afternoon.  So where’d the light come from?  To find out, hit the “Read More”.
Read more!

Wednesday, May 29, 2013

The Passing Of A Really Great Photographer

Does he look familiar?  Do you know any of his work?  Probably not.  His name is Bob Devine and he died over the weekend.  Today’s image is from somewhere near 1974-1975.  The young boy with him is our oldest son, who would have been 43 this year.  The shot is typical Bob.  He was a teacher to anyone he’d go shooting with.  It didn’t matter if he was with peers, kids, interested “newbies” or just friends. 

The last time I saw Bob was last year at a local camera club.  He just happened to stop down and gave the club’s president some medals the club had won back in the 60’s and 70’s.  I didn’t recognize him and asked him for his name.  He said “I’m Bob Devine”.  I replied “I’ve got your lights”.  The message didn’t connect and he couldn’t figure out what I was talking about.  He said “what?”.  I again told him I had his lights.  His retort was “who the hell are you?”  I told him I was Tom Peterson.  He cracked a smile and said if I didn’t get the lights back to him pretty soon, he wouldn’t loan them to me again.  I borrowed them back in the 70’s, so I’d guess him hadn’t missed them that much.  They were pretty much the thing back in the 70’s.  Hot lights with daylight balanced tungsten bulbs and 10” reflectors.  That’s what passed for “studio lights” at the time.  As an aside, I called my wife over.  Bob took one look at her and said "Doris, why haven't you aged at all?"  The guy was smooth.

We used to travel together to shoot and judge camera club competitions.  The two of us and our “third amigo” (Ernie Stonebraker [real name]) would go off for the weekend and blow a boat load of film.  One trip to Maine, between the three of us, we had something like 120 36 exposure rolls of film.  Typically it was either slide film or Tri X B&W film.  We used to scare the hell out of camera clubs when we’d walk in to judge a competition.  We’d ask what the scoring range they used was and then tell them we would be using the entire range.  Back in the 70’s the range was usually three through nine. 

Bob mentioned, when pushed, that he had driven stock cars “back in the day”.  I read his obit. today and found out he was the USAR champion a couple times.  The stuff you never knew. 

Well, he was a buddy.  As far as I’m concerned, you don’t have to see someone on a weekly basis to be a friend.  People I call friends come dear to me.  I have all sorts of acquaintances, but the number I call friends are very few.  Bob was one of the best.  Peace to you my friend.
Read more!

Tuesday, May 28, 2013

Testing Topaz Labs' New Clarity Pull-in


It’s new, it’s on sale (until 5/30/2013), the demos look good, but is it all it’s cracked up to be?  Today’s image is of one of the twenty-two named waterfalls in Ricketts Glen State Park in Pennsylvania.  We went there over the Memorial Day weekend specifically to shoot some of the falls.  As you may have guessed from the color of the reflections in the water, today’s image isn’t from that trip.  The falls in today’s image is probably as close to the road as you can find.  When we first “discovered” Ricketts Glen we had the place to ourselves.  Over this past weekend, we didn’t.  The parking lot for this falls was full, full, full.  The parking place for the next set was also chock-a-block full of cars, vans, SVUs, pickup trucks and campers.  We drove to what we thought were the undiscovered gems that were basically pull-offs on the side of the road, that gave access to a couple of interesting spots.  Nope, jammed packed.  That’s why I pulled up a shot from a fall trip we took in 2011.  Had to try something to test Topaz Labs’ Clarity.  To see what I found, hit the “Read More”.
Read more!

Friday, May 17, 2013

Making Your Own Brushes In Photoshop

A friend was checking out a few of my recent images and asked how the backgrounds were made.  Just flip down through the last couple of posts (you might have to dig down four or five) to see what he was looking at.  I explained that the backgrounds came from Brushes made from shots of clouds I had taken.   To get the effect you see in the images, cloud brushes are just about the ideal thing to use.  Clouds aren’t solid.  Clouds have texture.  Clouds are readily available.  If there aren’t any today, look out the window tomorrow.  Sooner or later you find some interesting clouds.  I keep Folders of clouds.  I Keyword every cloud image so I can pull them up quickly in Adobe Photoshop Lightroom (any version).  I pop them into scenes that have bald skies and I use them to make Brushes for creative backgrounds.  Clouds are useful little suckers.  Today’s (main) image is a Brush I made this morning to be able to capture the steps to make a cloud Brush.  To follow along, hit the “Read More”.
Read more!

Wednesday, May 15, 2013

Wednesday Q&A: Is It Time To Put The Kelby Group On The Shelf?

Based on the title you may think this post will be a rant about Kelby Media, Photoshop TV, Kelby Training, and The Grid and their support of Adobe Photoshop CC (PSCC).  It’s not.  They make a lot of good points about who will benefit from PSCC, who might want to think twice about it and who should probably stay away.  No, it’s about the fact that even the esteemed folks working with Kelby are beginning to show their age as far as Photoshop goes.  One thing that bugs me is how they’re missing the point on Smart Objects.  They say ‘oh, I open all my images in PS as Smart Objects’.  They’ll do a couple things and then say that their next step is to use the antiquated CTRL/ALT(OPT)/SHIFT/E salute to put a composite on the top of the stack before going on to other steps.  Doing the C/A/S/E thing breaks the link between the Smart Object and the original RAW image.  I don’t understand why they think that’s the way they should go.  Drives me nuts.  To find out how it makes me crazy, hit the “Read More”.
Read more!

Monday, May 13, 2013

Using Photoshop As A Planning Tool


Today’s image is more of a “my thoughts” type of thing, rather than some sort of wonder art.  It show how I approach an image in the develop process.  You only see one “markup” on the left.  There were more as the image was “developed”.  Why?  How?  The “why” is easy.  It’s to create a plan for the image and give a set of “attack” plans.  The “how” is equally easy.  Even though all the work of the image was done using Adobe Photoshop Lightroom 5 Beta (LR5B), the planning is done with Adobe Photoshop CS6 (any version of PSCS or PSE could have been used).  The only reason for using an application with a Layers function is to be able to put separate thoughts on separate Layers.  Each Layer was “assigned” a different color for its Pencil Tool (B).  The Pencil function in PS or PSE is found grouped with the Brush Tool (B).  Using separate Layers lets each set of thoughts stand only or they can be seen as a whole (as in the markup).  To check out the sequence of thoughts, hit the “Read More”.
Read more!

Wednesday, May 8, 2013

Wednesday Q&A: Photoshop CC - Yes, Or Kick It To The Curb

Today’s image is another that’s just eye candy.  I might offer a paragraph at the end, but the news out there about Adobe Photoshop CC is far more important.  So, Adobe’s going subscription for either the whole shebang (all [almost all] Adobe applications) for $49.95 per month or $19.95 on a per application basis.  I use Adobe Photoshop CS6 and (at the moment) Adobe Photoshop Lightroom 5 Beta.  I’ve kept up with all the updates since Adobe Photoshop 7.  I don’t use any of the other Adobe applications.  No In Design, no Illustrator, no Premier, Muse, etc.  I understand that LR will continue to be a consumer product, not subscription (at this time).  It’s come down to being available for $79.00 at most outlets in the USA.  Version updates (CS3 to CS4, CS4 to CS5, etc) have been about every 18 to 24 months and have cost $199.00 for each version.  That works out to somewhere between $8.00 and $11.00 per month.  Adobe has a one year “special offer” for those who are up to date (using CS6) for $10.00.  That works out right in the ballpark of what we’ve been paying for the past ten years or so.  If they make that a permanent subscription price for plain old PS (not an Extended Version), I’d sign up today and happily pay by the month.  I’ve never used 3D, I don’t believe I need 3D.  If I had it available to me I might find it to be a wonderful thing, but I don’t think so.  Hopefully Adobe will figure out a slightly more tiered pricing structure during this first year.  I do have a couple thoughts on what I “might” do if I would have to go up to $19.95 a month for PS CC only.  Hit the “Read more” to find out what my thoughts are.
Read more!

Monday, April 29, 2013

When Can't You Snap The Shutter?


I was giving my sister-in-law a ride down to one of the New York airports this morning and she was telling me this story about how she had gotten in trouble taking some pictures over at the local mall.  Now, mind you, she was taking pictures of the swans swimming around in the retention ponds outside the mall, beyond the parking lots.  A security guard (???) went over to her and said she couldn’t take pictures, it was against the law.  Yeah, right.  Today’s image presents sort of the two sides to that story.  It is a photograph, taken with a digital camera and “photoshopped” to look like a sketch.  The house is the Mark Twain House at Nook Farm in Hartford Connecticut.  It’s on private property as is the mall in this discussion.  If today’s image were a “real” sketch, the artist could have sat at the same spot, put up an easel and sketched away.  (Would have been a really nice pencil sketch, but you can probably find a hundred artists who could do it justice.)  At times, the (whatever it is) Nook Farm Association or Mark Twain Society or something invites/sponsors/encourages artists to do “en plein air” work in the yards.  I don’t know that the mall does the same type of thing, but it’s certainly something they “could” do.  So, the question is:  Canvas? Yes. Camera? No.  Hit the “Read More” to find out what’s up. 

Read more!

Friday, April 26, 2013

A Rant On Using Manual Exposure Mode On Your Camera

Raw images are notoriously dull.  Straight out of the camera there’s no sharpening, no contrast or color adjustment, no here’s Nikon’s (or Canon or Sony or whoever) best guess as to what the finished image should look like.  Take a look at this past Monday’s post.  It has a before (right out of the camera) and after (the lead image) and demonstrates where an image can be taken to by developing a RAW image.  Typically photographers fall into a few categories.  Those who shoot exclusively RAW and will develop an image.  Those who shoot exclusively JPG and let the camera make the decisions.  Those who consider what they’re shooting and why and decide either to shoot RAW or JPG.  If they’re shooting personal stuff that might become a portfolio piece, they shoot RAW.  If they’re shooting a local high school baseball game, they shoot JPGs to get the shots to the newspaper or school without needing to do additional work.  Then there’s another, rather odd duck, sort of shooter.  He/she will shoot everything in RAW.  If the images will be developed or printed as is, they still shoot RAW.  It’s rather bizarre.  Another case would be something that I came across the other night.  I was out doing some test shooting with some friends.  We have a night shoot coming up and were trying to get the parameters down.  Somehow the subject came up and one of the women said she only shoots in Manual mode.  She was very proud of that fact.  Now, she has one of the more expensive cameras out there.  I don’t understand why someone would buy an expensive computer (the camera) and then use it as if it was a shoebox.  Knowing her, she’s just not that capable enough to determine exposure just by looking at a scene.  It appears she’ll take a shot, say “oops, it’s too dark (or light)”, fiddle with the settings, try another shot and keep going.  Again, another bizarre thing to do to get an image.  I understand why she doesn’t shoot sports.  As we were shooting she would make comments like “I was at F10, but it was too dark.  I’ll switch to F 9 and try again”.  Really, was she so close to a great exposure that she was changing by 1/3 stops to get the absolute perfect exposure?  No, she was closed to 3 stops off than 1/3 of a stop.  I suggested she change it by a full stop.  She said she had, from F 10 to F9.  Where’s a rim shot when you need it?  (Music term, not photography.)  To find out my thoughts on using manual settings on a camera, hit the “Read More”.
Read more!

Wednesday, April 24, 2013

Wednesday Q&A: Import Issue In Lightroom For A Friend

I was out with a group of photographers last night and a friend asked me a question about importing images into Adobe Photoshop Lightroom 4. (I believe he said he hadn’t gone up to LR5 Beta yet.)  His file system is a date system, where the first level folder is the year.  The next level down is the month.  He said he was very faithful to Keywording.  If you’re absolutely on top of Keywording you could dump all your images into one giant folder and depend on Keywords to find any images you want.  Trick is you’d have to be 100% true to Keywording every image.  Naturally you can do it by the batch.  Highlight everything that has to do with the same subject and add the keywords to all of them at once.  You can also use the Paint spray can found at the bottom of the Grid View to apply Keywords just by “spraying” over images.  As with almost anything coming from Adobe, there’s a dozen different ways to accomplish a task.  The issue this friend had was ending up with a duplicate year folder filled with the same thing he puts in the folder he created.  To learn what the problem might be, hit the “Read More”.
Read more!

Monday, April 22, 2013

Using Lightroom 5 Beta Radial Filter All Over The Place

How do you get two weeks ahead in three plus hours?  You drive back from Cooperstown New York to Connecticut.  The foliage was two weeks behind up there.  We had snow (just a little) on the car as we were leaving Sunday morning and the temperature was just above freezing.  Brrr, for April 20th.  We went to Cooperstown, home of the Baseball Hall of Fame.  You’d think that was the reason for our visit.  Nope.  Cooperstown is also the home of the Farmer’s Museum.  We’re not farmers by any stretch of the imagine.  In fact, we don’t even like doing yard work, let alone farm something.  Today’s image was taken in the blacksmith’s shop at the museum.  Needless to say, it was pretty dark in there.  You can see the building next door through the window.  You can also see there’s another window off to the left.  Today’s image “could have been done” without Adobe Photoshop Lightroom 5 Beta, but it would have been harder to control.  The Adjustment Brush could have been used.  The nice thing about the Radial Filter in LR5B is the control it offers.  Once you get to the second paragraph of today’s post you’ll see how many times the Radial Filter was used on today’s image.  Go ahead, hit the “Read More” and check it out.
Read more!

Friday, April 19, 2013

Antiquing With Photoshop & Lightroom & Nik & Topaz, Oh My

Can today’s image pass as an old photograph?  Perhaps a pencil sketch?  I don’t see why not.  It’s neither.  It’s a typical image, shot with a digital camera.  I don’t have a GPS fix on the location, but I’ve been past it often enough that I know exactly where it is.  It’s at the last crossroad going north on the Taconic Parkway in New York.  You can’t miss it.  There’s a gas station and a diner on the east side and this barn on the west side.  The funny thing about today’s image is that it took a lot of “high tech” work to get it to look old and pencil sketchy.  There must be a half dozen modified copies in Adobe Photoshop Lightroom 5 Beta from where I took a copy over to Adobe Photoshop CS6, messed with it and did a File/Save – File Close back to LR5B.  With every iteration something was done in each program.  To find out what a couple of the flip-flops entailed, hit the “Read More”.

Read more!

Wednesday, April 17, 2013

Wednesday Q&A Adobe Lightroom 5 Best Guesses


A friend just bought Adobe Photoshop Lightroom 4 less than a month ago.  When the public Beta of Lightroom 5 was announced the other day I sent him an email with a link to a sneak preview and a review.  I was on the fence as to if I was going to download the Beta or wait for the RTM (release to manufacturing) version.  It took me two days to decide I needed/wanted the features of LR5.  Today’s image doesn’t look like it would have much to do with LR5, but it wouldn’t be possible without it.  At least not easily.  It’s not that today’s image didn’t take a couple trips over to Adobe Photoshop CS6, it certainly did.  It’s a partial digital painting.  I been slightly fixated on making photographic images look like painting/photograph hybrid.  Today it was taken to a wee bit of an extreme.  To find out was due to LR5 and what was because of CS6, Hit the “Read More”
Read more!

Monday, April 15, 2013

Photoshop Brushes And Hue/Saturation Adjustment Layers

Face blurred because I don't have parental permission yet.
I was almost set with today’s image and was giving it a once over to make sure I was happy with the way it came out.  I wasn’t.  I didn’t particularly like the background colors in several Layers.  They just didn’t add any spark to the image.  I could have tossed the offending Layers, but that would mean redoing just about the entire background.  Luckily, each form and each color were on different Layers.  Layers are one of Adobe Photoshop’s magical things to work with.  (Layers have been around since Photoshop 3 [Not CS3.  Plain old 3].)  One of the things I do when attempting to “create” a “work of art” is label each of the Layers.  Not with some general title, but adding some detail.  A typical Layer might be something like: “green from turf – abstract 237 – opacity”.  That way, if I want to go back and add more Brush strokes or make changes I know what I’m looking for.  I know where to sample the color.  Will it be an exact match?  Maybe not, but it’ll be something above 95% the same color.  Close enough.  I’m be able what set of Brushes it came from.  Was it a cloud, a paint stroke, an abstract, a star field or a splatter?  I can get in the right area and I’ll know I played with the Opacity of either the Layer or the Brush.  Seeing as its one color and one shape on one Layer, it really (in this case) doesn’t matter which Opacity I change.  To understand the color changes that can be made, hit the “Read More”.
Read more!

Friday, April 12, 2013

Would Rockwell Use Photoshop To Do His Stockbridge Main Street?

 
Norman Rockwell was (is) one of America’s greatest visual story tellers.  A flat out statement.  That’s my opinion of his value to the interpretation of American life in the twentieth century.  One of his most famous works is titled “Home for Christmas” or, alternately “Stockbridge Main Street at Christmas”.  There are several differences between today’s image and Rockwell’s masterpiece.  The most obvious is probably the fact that his truly is a “masterpiece” and mine is not.  Take a look at today’s image and Rockwell’s painting and you will see the same buildings.  They’re really there (at least they’re somewhere) along Main Street in Stockbridge Massachusetts.  Today’s image doesn’t carry as far down the street and doesn’t include the venerable Red Lion Inn, but it captures (I think) the spirit of his painting.  There is one thing the two do have in common.  You can’t see the scene as presented in either the painting or today’s image.  The backdrop of Main Street Stockbridge is the neighborhood behind the stores, not a vista of the hills to the south.  Basically, there are no hills behind the buildings.  It just falls off looking like many Main Streets.  In the image you’re looking south.  The hills (they ain’t mountains by any stretch of the imagination) run north south, with one set not too far to the east and the western set being a good distance away.  To learn where those mountains are and how they got into today’s image, hit the “Read More”.
Read more!

Wednesday, April 10, 2013

Wednesday Q & A: When To Use Photoshop's Eraser Tool --- Never!


I look through a lot of tutorials.  Some have some interesting tricks that I’ll incorporate into my workflow.  But!  I’ll tell you where I lose my curiosity.  As soon as the mention of the Adobe Photoshop CS6 (and before)’s Eraser Tool (E) comes up, I’m out of there.  I might flip through to see how the tutorialist (hey, somebody has to make up new words) gets to their finished product, but as far as thinking I might learn a trick or two, no thanks.  I haven’t used the Eraser Tool in at least a half dozen years.  As far as I’m concerned, there’s just no use for it.  My recommendation, for anyone trying to learn something from internet tutorials, is to have a red flag/fireworks/a distress signal of any stripe go off at the point where the “educator” first mentions the Erase Tool.  Take a look at today’s image.  Obviously I’m not trying to impress anyone with a wonderful work of art.  It’s strictly there as a means of explaining my advice to anyone using the Eraser Tool in Photoshop.  It’s a one word suggestion/recommendation/nudge/command/shout/warning.  STOP.  TO see my explanation and why I’m saying it, hit the “Read More”.

Read more!

Wednesday, April 3, 2013

Wednesday Q&A: How Do You Reset "Color" In The Lightroom Adjustment Brush?


Today’s image is just eye candy.  It has nothing to do with the question at hand.  I’ve been asked this same question twice in the past two weeks and have recently seen erroneous answers to it from (of all people) “The Photoshop Guys”.  Specifically, both Scott Kelby and Matt Kloskowski.  Today’s post is going to be one of the shortest ever.  Don’t even bother hitting the “Read More” down at the bottom of the post.  There won’t be anything more to read.  For the proper answer (and I know there are a dozen different ways to do something in Lightroom or Photoshop), let’s make it a little bit of a quiz.  Or maybe it’s better stated as an exercise in deduction.  Let’s go.

·         If you have the Adjustment Brush selected in Adobe Lightroom 4 and the Exposure is set to some increased value, how can you reset it to exactly zero?  Answer:  Double click on the word Exposure.

·         Still using the Adjustment Brush, how might you reset the Clarity slider to zero?  Answer:  Double click on the word Clarity.

·         Here it comes!!!  Even still with the Adjustment Brush active, what might you do to zero out the Color Picker?  Hmmm, let me think about that one.  Ya wanna guess what you would do to reset the Color to a zero value.  You guessed it.  Double click on the word Color.

Now that wasn’t so hard to deduce, was it?  (Apologies to Scott and Matt for picking on them.)
Read more!

Monday, April 1, 2013

My Thoughts On Windows 8


Today’s image is just a different take on a vintage baseball shot I did a few weeks ago. Rather than color I went for a sepia tone and put a texture on the image.  But, today’s post is my thoughts and opinions about my experience with Microsoft Windows 8.  Daily I have people visiting the Gallery from Microsoft.  It started as a trickle (visits from Microsoft in Hialeah, Florida) and has grown so there are now visits from Microsofties  from coast to coast and as far away as Japan.  I’m happy for the support, love to see you “guys” taking an interest in The Kayview Gallery and hope you’re enjoying what you’ve been reading.  Something tells me you won’t be quite as enamored with my experience with MS Windows 8.  Hit the “Read More” to checkout my opinions of Win 8 "on my machine".

Read more!

Friday, March 29, 2013

Playing With The Nik Software Suite


As most of you know, Google has had a sweet Suite deal for the complete Nik Software Suite this week. I used to have a copy of Nik Color Efex Pro 2, but I never really used it. I’d sort of lusted after Silver Efex Pro but, seeing as I don’t do a lot of B&W, I couldn’t justify the expense. When Google offered the entire suite for $149.00 US I could resist. I looked for an email saying I had registered the Color Efex recently enough to qualify for upgrading to the suite for free, but didn’t find anything along those lines in my email history. Oh well. Today’s image has been pushed and pulled in almost every piece of the software. Just checking what each one does and where it might be useful. I finally stopped fiddling with today’s image because it reminded me of a lot of images found in church bulletins. It might be a truer B&W and printed on a parchment colored paper to get the sepia effect, but today’s image is pretty close to what you’d see. To see the gyrations done to today’s image, hit the “Read More”.
Read more!

Wednesday, March 27, 2013

Wednesday Q&A: Is Photoshop's Pen Tool Dead?


I was out with some friends last night and one of my “buddies” said he had recently "discovered" the Adobe Photoshop Pen Tool (P).  His sidekick asked if I used the Pen Tool.  My response was that no one has used the Pen Tool in the past decade.  He insisted that it was a new “wonder tool” they’ve both added to their arsenal of “ease of use” tools lately.  I asked if he had also just upgraded his auto sound system to an eight track player.  He said, having been practicing a little, he could now create a Path around an object in less than five or six minutes.  I shook my head and rolled my eyes.  I resigned myself to the fact that I wasn’t going to convince either one that they were “going down a rabbit hole”.  Once home I got to thinking about what they were trying to do and where using the Pen Tool might be a good thing.  Today’s image is just a shot I was playing with a couple years ago to look at some lighting.  Once I finished playing with it I “put a ring on it”.  I put a Stroke (Edit/Stroke) on it just to show the Selection I’d made.  To find out about my thoughts on the Pen Tool (P) (pro or con) hit the “Read More”.

Read more!

Wednesday, March 20, 2013

Wednesday Q & A: How Not To Use Photoshop Smart Objects

I just saw something the other day that made me nuts.  I subscribe to Kelby Training and watch most of the video classes they put up.  Joel Grimes is a particular favorite of mine and I've watched every single video they've had by Joel.  I like his style.  I like his photography techniques.  I like his compositing.  His desaturated colors.  Everything.  But, his latest class made me cringe.  He said he always opens his images as Smart Objects in Adobe Photoshop CS6.  That's great.  Everyone should as far as I'm concerned.  It just my opinion and I've seen enough questions bringing people to the Gallery to know Smart Objects make people crazy.  They shouldn't.  They're the greatest thing since sliced bread.  I was with Joel up to a point.  To find out how Joel Grimes starts out using Smart Objects and where I think he goes wrong, hit the "Read More".
 
Read more!

Friday, March 15, 2013

The Skinny About My Photoshop Portraits

Enough with the philosophy of Smart Objects.  Today we'll get back to just a plain old "How To".  Today's image is a "file photo" from a trip to Key West we took a couple years ago (ten years ago actually) that has been portraitized (hey, a new word.  Somebody has to make 'em up).  Obviously there is no abandoning the Adobe Photoshop CS6 Smart Objects.  It's just that they won't be the focus of what's going on.  You'll see, after the "Read More", an image of the Layers Panel for today's image.  We can do that because there aren't a lot of Layers to do one of these.  Rather than go through a lot of blah, blah blah, let's get right to it.  Go ahead and hot the "Read More".

The way I work is to select the "hero shot" in Adobe Photoshop Lightroom 4, do whatever touchup needed there and bring the complete (head and shoulder and background) shot over to CS6.  Next I'll resize the canvas to the anticipated output size. (Usually 16 x 20 or 20 x 24.)  I'll make a "canvas Layer" under the hero shot, turn off the visibility of the head shot and start working on the clouds.
Read more!

Wednesday, March 13, 2013

Wednesday Q & A: Photoshop Smart Objects In The Real World

For the past month or so in the Wednesday Q & As I've been talking about Adobe Photoshop CS6 Smart Objects.  If you go back through the posts you'll see the What, the Why, and the How of using Smart Objects.  In my opinion it's the number one most powerful feature of CS6 (and CS5).  But what would be a "real world" use of a Smart Object that wouldn't be totally abstract in the explanation?  Well, over the weekend our Granddaughter called and said her high school science project had been selected to complete in the state science fair.  All the work on the project was done and she needed to produce a "project board" .  An ~4' x 3.5' three fold board that described what she had done, her methodology and the results.  Her idea was to lay the whole thing out in Photoshop CS4 (her current version), print it out and mount it to the store bought presentation board.  I have a wide carriage printer, but not that wide.  The three sections were 11", 22" and 11" wide.  She brought the finished layout over on a USB drive.  To learn how Photoshop Smart Objects helped immensely, hit the "Read More".
Read more!

Monday, March 11, 2013

The Secret To Photoshop Digital Image Paintings

Today's image is another "digital image painting".  The reason I'm using that term is that they start is a capture from a digital camera.  I wouldn't want to call it a "digital painting" because that would diminish the work by the crazy good digital artists out there.  I've never been able to pick up a pencil or a stylus and make something interesting on a piece of paper or screen.  It's just not something I was given the natural talent to do.  So, I take image that I've taken with a digital camera and change them.  Sometimes for the better and some people think sometimes not so much for the better.  The key to the DIPs (digital image paintings) I've been featuring lately is have a "hero" image as the central (both figuratively and literally) focal point of the composition.  If you had only a set of small images scattered around "the canvas" it wouldn't be something that was saleable.  A "commission work" similar to today's image would have to have a premium to the pricing.  The TAM (Total Available Market) for something like today's image is one, maybe two.  It's not something you'd be able to sell in the dozens or hundreds of copies.  Maybe the subject, his kids, his mom, his favorite uncle.  It has a limited market potential.  Therefore it demands a premium price.  If the image were of a famous athlete or actor (and you have a model release) you'd be able to, possibly, make thousands of dollars selling $25.00 posters.  That isn't the case with a personal commission.  Taking into consideration your time to do the shoot, your post production time, your marketing time, your production costs and whatever else you can think of to throw in there, you're probably talking of a selling price for a 20 x 24 framed print would probably run in the many hundreds of dollars range.  To find the key to making this type of digital image painting, hit the "Read More".
Read more!

Friday, March 8, 2013

Sports Montages With Photoshop

I'm kind of getting into these sports montages using Adobe Photoshop CS6 (CS6).  Today's image is a continuation of the discussion from Wednesday's post.  One of the biggest comments I can make to start with is that the past few montages/digital painting cannot be sold.  For this one in particular I was a guess of the team photographer and shooting for pleasure.  Something fun to do after a day's work.  It's always better to be shooting rather than shooting products shots or photoshopping something.   At least being out in the field you get to stand, stretch, move and not become a lump in a chair staring into a box.  The reason this image can't be sold is that I didn't get a model release.  I can do whatever I want for my own pleasure.  I can post it on the blog because I'm using it to demonstrate a concept.  I can toss it onto my iPAD to be able to show it to friends.  I can show it to clients to give them an idea what it is that I do.  What I can't do with it is make money off it.  Without that model release the only way I might be able to make a buck off the image is to sell it to the guy in the image.  He**, I'd probably give him a copy just to get the model release.  I wouldn't do it as a routine matter, but if I thought I could make some change selling additional copies, it might be worth the "investment".  I don't know how many "fans" this guy has, and the fee they'd be willing to pay probably isn't very high.  With a model release the image is worth about $300.00 - $400.00.  Without it, a cup of coffee.  Just goes to demonstrate the old axiom that, if you're a serious photographer, trying to make a living, you should always have model releases in your gear bag.  And don't be afraid to ask to get them signed.  In fact, with the motocross images I did a couple weeks ago the plan would be to have samples of the work at the track and charge a "sitting" fee at the track, before agreeing to shoot the rider.  With the advent of smart phone based transactions (Square for example) it would be easy to charge a fee, get a model release signed, and leave the track with cash (charged fees) in hand.  Well, this is a photography blog, not one dedicated to how to make money.  So, to find out about today's image, hit the "Read More".

Read more!