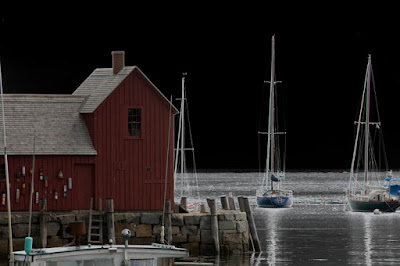
 Thirty five years ago, the image with this post would have been a sign of a photographer who likes to add "something" to a slide to make it just a little different. Today, the first thing someone would say is "that's obviously Photoshopped". It was a little trickier back in the film/slide days. It involved buying a very specialized type of film called Kodalith. A slide would be sandwiched with the unexposed Kodalith film, then exposed under an enlarger light and developed. Once dry, the Kodalith image would again be sandwiched with the original and put into a slide mount. It was thought to be "oh so artsy". "Motif #1" shown in a new and different way. The reason for the Kodalith was typically to salvage a slide with some blown out areas. The exposure on the building is fine, the rock wharf looks good, but the sky and the water had, basically, no detail.
Today, a similar effect can be done in less than thirty seconds. The image of "Motif #1" was brought up in Photoshop. Holding the ALT key and double clicking in the layer representation made the "Background" into "Layer 0". Holding the CTRL key and clicking on the new layer icon produces a new layer (layer 1) under the original. Press the "D" key to set the foreground and background color to their black and white defaults. Holding the ALT key, press the Backspace key to fill "layer 1" with Black. Select layer "0" (the original image) and double click in its layer stripe. Toward the bottom of the dialog box will be the "Blend If" sliders. The top slider says "This layer". Move the white (right side) slider to the left to bring the black up through the blown out sky. If necessary, hold the ALT key and "split" the slider by clicking and dragging the left hand side of the slider pointer. Adjust until you get the desired effect. It actually took you longer to read this posting than it'll take you to make a pseudo "Kodalith".


0 comments:
Post a Comment