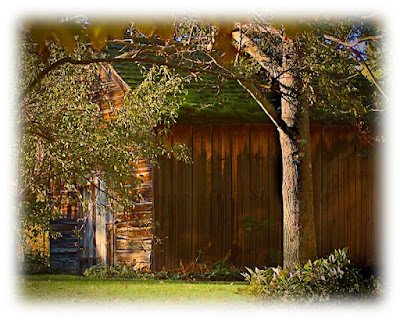
 In the wet darkroom, to adjust colors to get maximum saturation, there are (were) either sets of filters or a set a dials to adjust to get the color you were looking for. In today's dry darkroom we have the same ability to individually adjust colors to get the most, least , best or artistic saturation we're looking for. The image accompanying this post has some serious saturation. If we try to get the saturation in one shot we'll have to compromise. By breaking the colors down we can control what's going on in the computer.
What we're going to do is use (strangely enough) Hue/Saturation adjustment layers. Note that the previous sentence says "layers". When the Hue/Saturation adjustment layer is first opened (in Photoshop) it's set to "Master". Forget about "Master". The drop down gives you access to the individual color pallet. Red, Yellow, Green, Cyan, Blue and Magenta. You'll want to create an separate adjustment layer for each color. There's a reason for doing it this way. Adjustment layer one should be the red and it's reasonably important to label it as such, just to be able to keep track of which layer is what. The reason for the half dozen individual Adj. layers is because you get a layer mask with each one.
Determine what area of the photo is the most important for the color you're working on. Slide the Saturation slider to 100%. Don't mess with the Hue or Lightness sliders. Make sure the numeric value is 100%. Whatever color you're working with at the time probably looking about neon at 100%. Highlight the value (the +100). Hold down the Shift Key and tap the down arrow on your keyboard. This will reduce the saturation value down in 10 point increments (going down one point at a time gives too little variation to notice from point to point). When you get the "important area" to where you like it, stop. If other areas of the picture are still too brightly colored, use the Adjustment Layer's built-in mask and paint out the too bright area. Repeat this for each color. You'll end up with masks for each color.
Other things you can do is reduce the "blackness" of your brush to moderate the level of increased color you're applying to specific areas. Also, nothing says you can't have multiple Adjustment Layers for the same color and work specific areas of the image. Once you've got as many Adjustment Layers as you need, highlight all the Hue/Saturation layers and hit CTRL G (on a Windows machine). This will group the highlighted layers into a group and keep the number of layers visible from getting out of hand. Give it a try. I think you'll get a kick out of the amount of control you have over the saturation of the colors in your photo.


0 comments:
Post a Comment