Friday, December 28, 2012

Making Fancy Paper With Photoshop CSS

Have you ever received (or sent) an end of the year recap to friends and relatives?  We get several each year.  Some from folks we like to keep up with and others from people who we'd just as soon not keep up with, but we get it anyway.  You probably know the type.  You casually know the adults, but they detail the goings on of each child (who you've never met) and every time they've stepped out the door to either go on vacation or to the grocery store.  Many come snail mail and a few are now arriving in our inboxes.  In most cases they look pretty drab, setting the mood for what's to come.  The other evening I watched the +NAPP NAPP NAPP-A-Thon and saw +Scott Kelby  (the head Photoshop Guy) do a neat trick using Adobe Photoshop CS6's new Iris Blur filter.  He used it to produce some Bokeh that could be used as a background in a composited image.  It got me to thinking about where else someone could use the technique and today's image is one of the things I came up with.  To find out where the the background comes from and my take on Mr. Kelby's method of producing it, hit the "Read More".

Read more!

Wednesday, December 5, 2012

Wednesday Q & A: How to get Lightroom 4 Effects In CS6

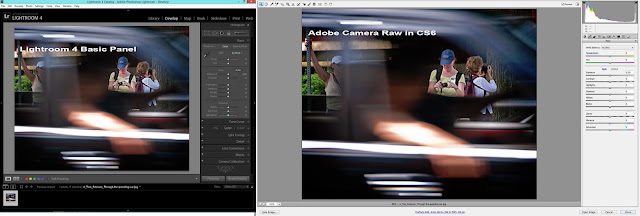
Comparison of Lightroom 4 Develop Module  and Adobe Camera Raw Basic panel.

I saw today's search query come through bringing someone to The Gallery.  At first I just passed right over it.  By the time I finished checking out the list, that one search item stuck in my mind.  My initial thought was "what could this person mean?"  I seems to be sort of a crisscross type of question.  I'm sure the intent wasn't the database functions, where Adobe Photoshop Lightroom 4 (and before) far outstrips the speed of Adobe Bridge (that comes with Adobe Photoshop CS Number) .  So, I believe the questioner was talking about getting the type of adjustments you can get in LR4 Development Panel while using CS6 (or 5).  Before Lightroom was introduced, I (and everyone else) did everything in Photoshop.  There wasn't another Adobe choice.  Since Lightroom was introduced the pendulum has swung the other way.  Now, I do everything I can in LR4 and only go to CS6 to do what can't be done in LR4.  So, to get the answer to today's question, hit the "Read More".

Read more!

Monday, December 3, 2012

Do's And Don'ts For Shooting Pemaquid Light

s

I did a post last week (or so) saying when you're shooting Pemaquid Lighthouse in New Harbor Maine to make sure you turn around and shoot the crashing waves.  It seems like a good idea, but, at the same time it might be a bad idea, but one that can be easily corrected.  Not in Adobe Photoshop CS6 or Adobe Photoshop Lightroom 4 or "in the camera".  This "fix" is in the camera bag.  To find out what the "fix" is, hit the "Read More".
Read more!

Monday, November 26, 2012

Controlling Blur In Camera, Not In Photoshop

So, what's the big deal.  If you have a shot where the background is too in focus and the image would look better with the background out of focus, no problem.  That's what Adobe Photoshop (CS6 or before) is for.  That's a hell of an excuse for not knowing what the camera will be doing before you press the shutter.  Today's image is pretty (really) straight for a shot by me.  Just a little touchup in Adobe Photoshop Lightroom 4 (LR4) and it never needed to go to CS6.  A friend and I were out shooting a vintage baseball game during this past summer.  He was using a 80 - 200 F2.8 lens and I was using some 70 - 300 F4.5 - 5.6 glass.  Before the game we did some informal portraits while the visiting team was warming up.  He took a couple shots and said "I can't throw the background far enough out of focus to make things interesting".  Duh!  He had the faster glass and he couldn't get some nice blur????  I turned around to see what he was shooting.  He was about twenty five feet from his subject.  I asked what F-stop he was on.  2.8  Again.  Duh!  What focal length?  200  Double duh!  I looked at his screen and just shook my head.  He had a little blur, but not enough to get that soft background you'd want for a informal portrait.  What was the difference between his shot and mine?  Hit the "Read More" to find out.
Read more!

Friday, November 23, 2012

Turn Around - Lightroom Works Both Ways


Today's image shows what happens when you turn around when you're shooting an iconic scene.  While we were in Maine last month we stayed at the Hotel Pemaquid in New HarborMaine.  The thing that makes this hotel somewhat unique is that it's (according to the website) 150 yards (meters) from Pemaquid Light.  Pemaquid Light is the lighthouse found on the US Quarter (25 cent piece) featuring the State of Maine.  It's, at least, as iconic as is Portland Head Light.  Another interesting fact is that the room rates are very reasonable.  I'd guess that comes from the fact that it's not likely that the hotel is someplace you'd just happen to pass.  It's not like it's on a main road.  But, the rooms have been newly "restored" to their past glory.  From what the receptionist said, the Carriage House across the street from the main building was (in part) "restored" through the work of the owner's friend, Norm Abram of This Old House fame.  The place is actually a pretty great place to spend the night.  Planning is necessary.  There are only two restaurants within fifteen miles or so and they close by 8:00 PM.  Convenience stores?  You must be kidding.  The hotel and light are about a half hour south of Damariscotta, Maine.  If you like a drink or a bag of chips as a snack in the evening, you'd better get them before leaving Route 1.  But, this isn't a travel blog.  It's a photography blog.  So, to find out what happens when you turnaround at an iconic spot, hit the "Read More".
Read more!

Monday, November 19, 2012

Hand Painting With Photoshop


There's all sorts of methods to jack up colors using Adobe Photoshop CS6 (CS6) and Adobe Photoshop Lightroom 4 (LR4).  You can do a faux HDR (in CS6, Image/Adjustments/HDR Toning).  You can use Hue/Saturation Adjustment Layers (Layers/New Adjustment Layer/"Hue/Saturation").  You can "paint" over an area and change the Blend Mode to Color.  But, today's image is done in LR4 with a small assist from CS6.  About 90% of what's been done was done in LR4.  To find out what was done, hit the "Read More".
Read more!

Friday, November 16, 2012

Photoshop's CTRL/ALT/SHIFT/E Debunked


It happened again on Thursday.  I watched an online tutorial and the person was pushing the fact that whenever you got to a place using Adobe Photoshop CS6 to retouch a photograph that you wanted to have a place you could go back to you should use the keyboard shortcut CTRL/ALT/SHIFT/E (CASE) to create a composite of all the work you'd already done.  What CASE does is Merge all the Layers and put the result on its own Layer.  The tutorialist (is that a word?  It is now.  Somebody's got to make up new words.) said this would save all your Layers so you could go back and make any changes at a later time.  Bullsh**.  What CASE does is put a line in the sand that says "you can't go back further than this point without scrapping all the work you did above".   If you've done five Layers of work and made the CASE move, then another nine and CASE, then seventeen and another CASE and found out you had to make a change on Layer three, you're screwed.  You'd have to dump twenty six Layers worth of work to make that change.  Depending on what you were doing, that could be hours of work down the drain.  I can think of one way to go back to Layer three and fix the mistake/error/oversight/whatever.  Eliminate each of the composite Layers.  If that's the case, why would you bother creating them in the first place?  Dumb!  There is a way to have your cake (make a composite) and eat it (make changes to any Layer at any time) too.  To find out what this magic trick is, hit the "Read More".
Read more!

Wednesday, November 14, 2012

Wednesday Q&A: Removing Objects with Photoshop CS6


A couple of photographers I know asked recently about "clearing the decks" as one of them put it.  He had an assignment to shoot a public place, but the editor said he didn't want to bother with any people being in the scene.  Since this was not a photojournalism gig, where there are harsh penalties for "altering" the content of an image, I figured he had a couple options.  He could go through the people in charge of the public space and get an off hours shoot, or barge in and start telling folks to get out of the area.  The first case would take weeks to go through all the paperwork and the second would be just downright rude.  There was a timeline to get the image in and this guy isn't the rude type, so a "perfect storm" of circumstance was coming together to have Adobe Photoshop CS6 (or earlier versions) come to the rescue.  To find out what "magic" happened to today's image to have clear sailing on the highway, hit the "Read More".
Read more!

Monday, November 12, 2012

Going Artsy With Photoshop CS6


I've got a website/e-store/tutorial site you've got to checkout.  It's Woody Walters DigitalPhoto Candy site.  Today's image is a first attempt to do something similar to what woody does so masterfully.  He's out of Cedar Falls, Iowa, so I'd don't think my emulation of his (and many others) technique here in Connecticut will do him harm.  If you don't know how to make brushes.  If you don't have a folder full of smoke images.  If you don't shoot clouds every time the sky is full of big puffy, well lit clouds.  If you've never done on OOB (Out Of the Box) image (my first was about ten years ago).  Well, head on over to Woody's website.  He has brushes for sale.  He has backgrounds and textures and masks and all manner of things for sales.  His site could be your one stop shopping experience for setting up your own "Senior Portrait" digital studio.  He should create a franchise situation out of his talent.  Today's image, being a first attempt, meant I had to either create or gather up the components to be able take a shot at trying it myself.  To find out about the components, where I got them and how i used them, hit the "read More".
Read more!

Friday, November 9, 2012

The River Is Wide - Thanks To Photoshop Content Aware Scaling


Today's image is another from out recent road trip to Maine and New Hampshire.  The covered bridge in the shot is just south of Conway NH along Route 16.  As you cross a bridge, if you look to the northwest you'll see the covered bridge.  As we drove by we saw several photographers standing on the Route 16 bridge shooting the scene.  Every one of them was standing on the bridge and shooting the "tourist" version.  I knew there had to be "something" better.  The west side of the bridge was a straight drop down about sixteen feet.  The east side offered a more gentle slope with a weathered "trail" to the water.  I walked down and it was pretty obvious that the underside of the bridge was being used as shelter for some (or more than one) person.  I made sure I didn't disturb anything and really didn't dare move anything.  At the water's edge I got down to almost water level and shot the scene.  It was an alright shot but needed more drama.  It got the needed "drama" in Adobe Photoshop CS6.  To find out how the "drama" came about, hit the "Read More".
Read more!

Wednesday, November 7, 2012

Wednesday Q&A: how to put multiple copies of one picture photoshop


I've done a couple posts on using one image multiple times in Adobe Photoshop CS6.  The first was using the same image (enlarged and blurred) as a background to the mainimage.  That's one way to do it.  The title of today's Q&A comes directly from a search query that brought someone to The Gallery.  I don't think that first instance was what the seeker was looking for.  I believe today's image portrays what many questioners are looking for.  The most common use for this type of "putting multiple copies of a one shot on one printout page" is making a keepsake for Grandmother or selling sports cards.  Something having (as in today's image) one 5 x 7, two 2.5 x 3.5 and four 2 x 2.5 inch copies (or other variations) on one sheet.  In Adobe Photoshop CS4 it was easy.  The Picture Package app was built right in.  In Adobe Photoshop CS5 or CS6 it's not.  But don't worry.  Adobe hasn't completely abandoned us.  They have it available as a free download.  To find out where to get the elusive Picture Package, hit the "Read More".
Read more!

Monday, November 5, 2012

Photoshop Takes You Where No Man /Person Has Gone


One nice thing about Adobe Photoshop CS6 (and those versions before) is that you can go places in your mind and translate them to an image.  Today's image (the main portion at least) is at a parking area along the Kancamagus Highway in the White Mountains of New Hampshire, USA, looking west.  I'm pretty sure hot air ballooning isn't allowed in the White's.  The reason would be that hot air balloons go where the breezes take you for as long as you have gas in the cylinder.  Typically you have a "chase" crew that follows the route of the balloon as closely as possible.  That's so the crew can pick up the balloonist when he/she comes down.  That would be sort of a problem in the White Mountains.  There's kind of a lack of roads to do the chasing.  Imagine landing six or seven miles from the closest road.  I'd recommend a rather big, burly guy as (at least) one of the crew.  Somebody's going to have to lug that empty gas cylinder out to the nearest road, and those suckers aren't light. So, chances are hot air ballooning in the White Mountains is at least frowned upon.  But, with a little Photoshop magic, it's no problem.  Putting a balloon in the sky would be easy.  Heck, putting an Army tank in the sky would be easy.  Not believable, just easy.  To find out how easy it was to put the balloon in the sky, hit the "Read More".
Read more!

Friday, November 2, 2012

Post Sandy Thoughts


The lights came on last night.  We were without power from Monday through the day on Thursday.  Something like 30% of our little town is still without electricity.  Our next door neighbor had his first experience with a generator and thought it was necessary to run it twenty four hours a day to keep his frozen food frozen.  He's young, he didn't know any better.  The fact that the generator was just outside our bedroom window was not the best idea he had.   We just went to the guest bedroom at the opposite end of the house.  Far enough that we weren't bothered greatly by the sound.  His generator was still running when we got home last night.  I went over and tapped on his door to let him know he could probably turn the darn thing off now that power had been restored.  I asked him why he thought he needed to run the gen.  at 3:00 AM in the morning.  As expected, he said he thought he needed it to keep his food frozen.  I said "come with me young man" and brought him to our kitchen.  I opened the freezer and tossed him a piece of chicken, still frozen solid.  I asked "was this your objective?".  Shocked, he asked how I had kept it frozen.  Dry ice.  One of the things about dry ice is that it doesn't make noise.  He went home better educated and vowed to use dry ice a lot and the gen as little as possible if there was another outage. 

Another instance was while buying the dry ice.  The guy in line in front of me wanted to make small talk, so he started bitchin' about the utility company.  Boy, did he pick the wrong guy.  My Dad spent his adult life working for the local utility company and I know how hard those guys work.  We don't get a whole lot of thousand mile wide hurricanes coming through meeting up with storm out of Canada.  In our area the electric company has had a campaign to cut back the trees on the side of the road with overhead wires, based on pressure due to last year's storms.  That sounded like a plan to the governor.  Like so many people, he didn't think it through.  One of the benefits (to the hurricane) was it removed any protection those trees gave from preventing the trees on the opposite side from having a clear shot at taking down wires on the side of the street  with the wires.  The best, half laid, plans of mice and men ...
We didn't have power for four days.  Big whoop, it was four days out of a lifetime.  Don't get me wrong, people on the coast (we're about twenty miles inland) got ravaged.  Some won't have power for a year.  Before they can get power they have to build a house to put power to.  "They" said the storm "affected"  sixty million people.  Six million people lost power or more.  Because of the population density in the northeast 20% of the country's people got wacked by Sandy.  Nobody more so than the people on the coast of New Jersey.  My hope is that people will remain reasonable and no one who survived the hurricane will get killed in the aftermath.  That's a hope, but unfortunately, not an expectation. Read more!

Monday, October 29, 2012

Magic In The Camera Rather Than In Photoshop


It's true.  Sometimes the magic has to happen in the camera.  Or on the camera.  Today's image is of a small water fall along the Kancamagus Highway in New Hampshire, USA.  It was taken in late morning on a bright sunny day.  Everything that could go against the image was there, but then again, so were we.  It's great to be at the right spot at the right time (the golden hour), but that isn't always possible.  We were up shooting at a reasonable hour.  Sunrise wasn't until somewhat past 7:00 AM and we were in the field by 7:30 or so.  Not ideal light, but "good enough" light to get a few interesting shots.  By time we'd arrived at these falls it was almost 11:30.  We'd gotten to the Conway, NH start of the Kanc before 9:00 but stopped every fifty feet (or so it seemed) to try to get the flavor or the road.  Between Conway and Lincoln, NH the Kanc is only something like thirty four miles.  If you live in the area and your daily commute takes you from one end to the other you can probably do the whole thing in one hour.  If you're tourists (us) it could take you all day.  There's a reason why it's listed as one of America's most scenic drives.  So, would do you do when you arrive at one of the prettiest spots on one of the most scenic drives at something past 11:00 AM?  Hit the "Read More" to find out.
Read more!

Friday, October 26, 2012

The Fantasy Of Photoshop And Lightroom


Today's image is real.  No HDR, no trickery.  Just being at the right place at the right time.  That doesn't mean there was no burning, dodging, tweaking, pushing and pulling in Adobe Photoshop CS6 (CS6) and Adobe Photoshop Lightroom 4 (LR4).  The image is processed.  Since it was taken as a RAW file (an NEF Nikon image) it had to be developed.  I just finished watching a PBS show about Ansel Adams.  Part of it discussed the fact that he could spend an entire day in the darkroom working on a single print.  We have a luxury Adams didn't have but would certainly have used.  His first pass was probably a general print with no messing around.  He'd probably look at it and make an estimate of what needed to be done.  He'd translate it to the vision of what he saw, the emotion he felt, the soul of what was there.  What he didn't do was take the image as shot and print it.  Done.  Finished.  He worked at his post processing as much as at capturing the scene in the camera.  He was (still is) the master craftsman of photography.  Okay, I'm not the second coming of Ansel Adams.  I'm just one of the common ruck.  Taking pictures and having the great good fortune of living in the era of the digital darkroom.  Each pass at an image by Adams meant blindly doing all the work we can do in the light and starting over with each trial.  By the time he would have gotten to attempt four, or six, or eleven he would have developed a recipe.  Dodge this, burn that, double burn in that little spot, Hold back the sky, deepen the foreground and on and on.  All this and not being sure of what you'd get until the paper went into the developer and the image would blossom into its full glory.  Boy, do we have it easy.  We get to see what's going on as we develop the image.  Oh, that made it look better.  Opps, that made it look worse.  Hit CTRL Z and the misstep is gone.  No waiting twenty minutes (between going through other twists and turns and getting the paper into the developer) and then realizing you'd screwed up.  Adams would have loved Photoshop.  He was "photoshopping" images before Photoshop was ever thought of.  To find out about what was done to today's image, Hit the "Read More".
Read more!

Wednesday, October 24, 2012

A Long Trek Through The Woods With Photoshop


Sometimes you have to suffer for your craft.  A long hike over hill and dale on a hot day to get to just the right spot to get a unique image.  Then again, sometimes you stand on the side of the road and the shot is just there, as is the case in today's image.  Our recent trip to the Maine coast to shoot lighthouses we augmented the coast with a "return" trip through the White Mountains of New Hampshire.  We're sort of known for "creative" routes home.  We actually were leaving Lincoln NH on Route 93 south and saw an exit sign calling out Woodstock.  My razor sharp mind (obviously not) instantly flashed images of a farm scene down a road.  Of Main Street with some classic buildings.  Of covered bridges and mountain vistas all found in Woodstock ... Vermont.  Opps, wrong state.  It's not that Woodstock NH isn't a quaint little New England town, it's just that it isn't Woodstock VT.  As we were driving into town I saw today's image, pretty much the way you see it here (minus a fire hydrant by the door and a red flag out back).  Made a mental note to stop when we were headed back toward the highway.  Woodstock NH is kind of the Cinderella (per glass slippers) to Lincoln just to the north.  Where Lincoln has made an effort to be a tourist area, Woodstock is happy being the little, out of the way, sleepy town next door.  We wandered around town for a time, popped into a couple shops and found the local General Store (Lorri, you would have loved the HDR possibilities).  As we started out of town we saw a sign for Lost River.  We'd been there when our older son was still being carried on my arm.  That probably means to was close to forty years ago.  Had to go check it out.  It was closed for the season, but you could walk a couple of the trails.  Back to Woodstock and headed south out of town to get back to today's image.  Just a couple hand held shots and the rest was a little Adobe Photoshop Lightroom 4 (LR4) and Adobe Photoshop CS6 (CS6) work.  To find out what that work was, Hit the "Read More".
Read more!

Monday, October 22, 2012

Farewell To Fall, Except For Photoshop Lightroom


On Thursday it looked like it was going to be an exceptional weekend for shooting the foliage around here (Bethel, Connecticut, USA).  Then it rained on Friday.  Not a hard rain, just rain.  Well, that about killed it for the fall foliage.  By Saturday morning more than half the leaves that had been glowing in the sunlight were gone.  Instead of going anywhere (literally anywhere) and having great images jumping out at you a search was required to find something, anything to shoot.  Take today's image as an example.  Looks like peak color, right?  Turn around and it was almost leafless.  There were a few leaves here and there, but nothing to take a picture of.  Pointing the camera in the direction of today's image it was a cat and mouse game, with the sun darting in and out of the clouds.  Thirty seconds sooner and all you had was drabness.  Thirty seconds later than when the shutter was clicked and you were back to blah.  I must be getting either lazy or a little more skillful because this shot never left Adobe Photoshop Lightroom 4 (LR4).  That doesn't mean it wasn't developed.  Since there was no manipulation of the shot (no Cloning, no Healing, no adding or subtracting elements, nothing that could only be done in Adobe Photoshop CS6 (CS6) there was no reason for using CS6.  To find out what bits of LR4 were used, hit the "Read More".
Read more!

Friday, October 19, 2012

Sometimes Ya Just Don't Have To Leave Lightroom


Sometimes the stars align, everything goes right and the shot is just there.  Today's image is of the Albany Covered Bridge along the Kancamagus Highway in New Hampshire, USA.  (The first time we drove this road [in the early 70s] it was known as the Kancamagus Trail.  I guess some things do get upgraded.)  The KT (or I guess it would be the KH today) is listed as one of the best fall foliage drives in the US and the covered bridge is one of the highlights.  I'm not sure if the price of gas had anything to do with it, but the road wasn't bumper to bumper along its entire length.  It might have also had something to do with it being a Wednesday when we drove it.  ???  Once you get above 1000' (max elevation is listed as 2840') the sky gets bluer, the clouds puffier, and the air sweeter (maybe that last one is pushing it).  It was a cool, crisp fall day and we stopped at every legitimate turn off and several shoulders.  We had to laugh when we realized we'd been on the road for two hours and gone a total of about six miles.  We figured, at that rate, the sun would be setting as we drove into Lincoln, NH.  We did pick up the pace and rolled into town in time for a late (light) lunch.  To check out where (how) today's image was shot and processed, hit the "Read More".
Read more!

Wednesday, October 17, 2012

Wednesday Q&A: Using Photoshop Brushes To Make Believable Composites


The foliage isn't the only thing colorful at this time of the year in the northeast.  Sometimes graffiti artists can come up with some pretty colorful artwork.  Our town (Bethel, CT) is a fairly sleepy little burg and typically is kept clean, with no "tagging" of the buildings.  But, there is one little section , over by the new train station (about fifty yards to the south) where "artistic expression" is alive and kicking.  Take a look at the enlarged view (click on the image to see it "full size").  To the right of the image someone just got stupid and randomly sprayed paint haphazardly.  To the left of the two walkers there is some real talent.  You may have guessed (today's title should have been a hint) that the two guys walking in the grass weren't really there.  The "trick" to today's image comes from a question I was asked over the weekend.  We were having lunch after Scott Kelby's Worldwide Photowalk and one of the photographers said they were having all sorts of problems making composites look convincing.  To find out what was done to the background and how the guys were added realistically, hit the "Read More"
Read more!

Monday, October 15, 2012

Foliage Report For Acadia NP, October 15, 2012


We just got back from our annual (usually annual) fall foliage trip to Maine.  There were a couple shots I really wanted to get and today's image was one.  I think we've shot The Bubbles from the north parking lot beach at Jordon Pond just about every year, but the main parking has always been so full that we just abandoned any hope of getting in there.  Last week we were determined to wait it out and find a legit parking space.  I say "legit parking space" to differentiate us from the clod from New York (who da guess) parking on the brick sidewalk, blocking everyone else's path to the Pond House.  I digress.  (Sorry about the rant.)  We only had two days in Acadia National Park this year, so we could only hit the highlights (Jordon Pond, Sieur de Mont Spring, one circuit of Park Loop Road, Eagle Lake, the little harbor of Bernard, dinner in downtown Bar Harbor and not a whole lot more).  We wanted to search for foliage on the interior of western Maine for another couple days.  Today's image involved a little more finishing work than might be thought.  To find out about our opinion of the foliage conditions this year and where Adobe Photoshop CS6 and Adobe Photoshop Lightroom 4 came into play, hit the "Read More".
Read more!

Friday, October 5, 2012

Hartford Under The Influence Of Photoshop


If you're a follow of "The Kayview Gallery" this shot may look suspiciously familar.  Before going to the "Read More", slide down and take a look at Wednesday's post.  Both are shots of Hartford Connecticut, taken from within a hundred feet of each other.  One of the big differences between the shots (besides the leaves) is that Wednesday's is a four shot panorama and today's image is a single shot, cropped to a cinematic format.  Is one a better way to get the shot?  No, just different.  A couple facts about the difference between the two.  Neither has the original sky (but today's is closer to the way it was).  Wednesday's is more heavily "Photoshopped".  Today's was a bigger problem to get the sky right.  Take a look at the enlargement of today's image (click on the image).  See if you can see what was done to "improve" the sky.  To find out what was done, hit the "Read More".
Read more!

Thursday, October 4, 2012

Wednesday Q&A: HDR Lookalike


There's an old commercial in the US where the question is asked "is it real, or is it ...".  The debate that rages today is HDR.  Some people love it, some hate it and some are ambivalent.  I'm kind of in the third classification.  Some of it is really interesting.  My buddy Lorri does great HDR images, but if you look on any of the photo sharing sites you can find a lot of junk HDR.  Today's image is a four shot panorama, but not HDR.  It does have an HDR "look", but never went through any of the common HDR programs or Adobe Photoshop CS6's (CS6) HDR Toning (Image/Adjustments/HDR Toning).  It did include trips over to Nik Software's Color Efex Pro 4 and to CS6 to replace a really boring sky, but the major magic happened in LR4 (or it could have been done in Adobe Camera Raw [ACR]).  To find out about the "magic", hit the "Read More".
Read more!

Monday, October 1, 2012

Showing Off Western Connecticut With Photoshop


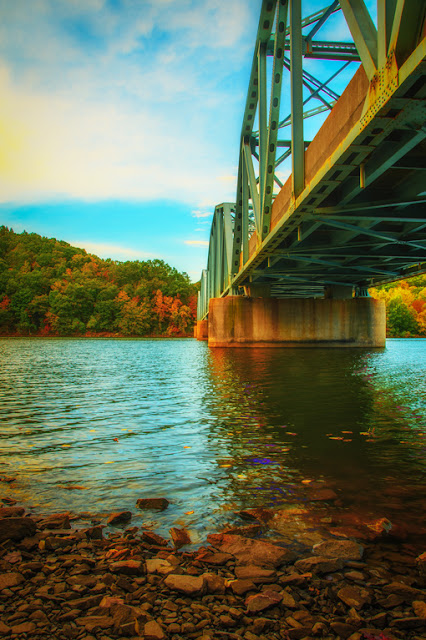
Lately I've been featuring a couple of Connecticut's larger cities.  Notably, Hartford and New Haven.  Coming up I have several more cities I think will make good subjects for images and probably discussions.  Today's post and image are geared more toward the quieter side of the state.  There is a part of Connecticut that's referred to as "The Quiet Corner", but that's the northeast piece of the state and almost as far as you can get and still be in Connecticut.  In past posts I've talked about Kent and western hills.  Today we're about on line (north/south) with mid-state and one town in from the New York State line.  The bridge in today's post spans Lake Lillinonah along Route 133.  It connects the small town of Brookfield and the smaller town of Bridgewater.  The lake is manmade and ends at the Shepaug Dam in Monroe (?).   There's a little parking area at the south side of the bridge.  An "informal" trail leads down under the bridge to the spot where today's shot was taken.  To find out about the processing of today's image, hit the "Read More".
Read more!

Wednesday, September 26, 2012

Wednesday Q&A: How Much Can You Crop Using Photoshop


Well, the simple answer to "how much can you crop an image" is as much as you're comfortable.  A couple of the big questions would be "what is the use of the shot" and "how was it shot"?  If you're using a DSLR, have a 2 GB memory card and can shoot a million images, the answer would probably be not much.  The camera would have to be set to the absolute maximum compression and lowest resolution.  Those images are meant to be used on your Facebook page or somewhere else on line.  You can probably get a reasonable 4 x 6 print out of it, but not much more.  If your camera is a new Nikon D800 and you shoot in Raw, you can probably print a billboard sized image that would look pretty good.  Today's question came from a friend (okay, a relative) new to photography.  He/she wasn't sure if she/he could print images the size I do with her camera, a Nikon D3200.  Again, well... that's a 24.2 Mega Pixel camera.  It's not quite a D800, but that's still a lot of pixels.  I print (have printed) images up to 24" x 36".  That's not often, but enough that I can offer it.  The "friend" said he/she had an 11" x 14" made from one image and it looked like crap.  I asked about the number of shots would typically be taken on a day of heavy shooting (undoubtedly the grandkids).  The answer was "oh, a lot.  Maybe as many as 60 or 70".  If you're a shooter, that a really light shooting day (hour).  The camera had been set to get the maximum number of images.  We reset it to get the best possible JPEG images.  There's no image improvement being done on any of this person's shots, so there's no point to shooting RAW.  (Maybe next year.)  Today's image is an example of about the maximum cropping I do.  Hit the "Read More" to find my thoughts on cropping.
Read more!

Monday, September 24, 2012

How To Clear A Room Using Photoshop


There's nothing like getting special, off hours, access to a building like the one in today's image.  Having the luxury of taking your time, setting up the shot without the hassle of seventeen people milling around, intruding on the shot.  Well, that's not exactly what happened with today's image.  There was, indeed, seventeen people wandering around, on the floor, on the stairs, on the balcony, in the other room, through the doorway, just about everywhere you can think of.  Thank goodness there's Adobe Photoshop (in this case) CS6.  Those of you who have played around with Photoshop probably know what a pain it would be to have to clone out seventeen of anything in an image.  Luckily, something was introduced in CS5 that made life easy when trying to do this type of "cleanup".  Some things were easy using the Healing Brush (J) with the Content Aware button checked.  The rope and stands blocking off the table and chair in the lower left were ideal for the Healing Brush (J).  One swipe and a portion of the rope was gone.  Another and the stand became history.  A little attention to detail and the part of the rope that fell along the arm of the chair was no more.  Things like that are easy.  Getting rid of seventeen people without a whistle, a gun or a whip and chair?  Not as much.  To find out what makes it easy, hit the "Read More".
Read more!

Wednesday, September 19, 2012

Wednesday Q & A Using Multiple Copies of the Same Image in Photoshop

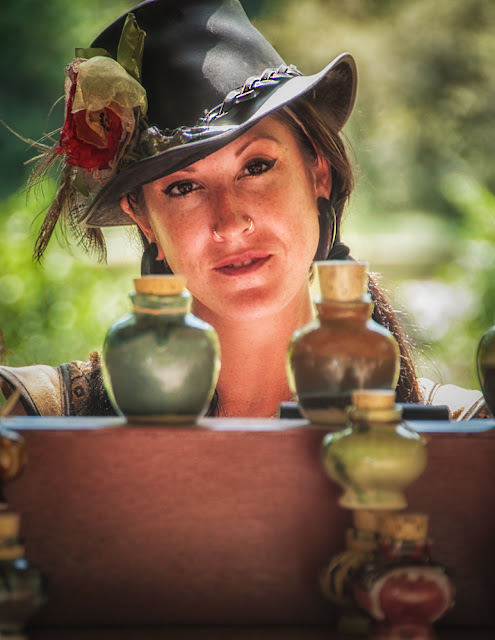
I'm always checking what search terms bring people to the Gallery.  Number one is questions about Smart Objects or Smart Filters.  Number two lately are questions about using multiple copies of same image in a Photoshop (Adobe Photoshop CS6) document.  There's two ways to go with this question and they're about polar opposites.  One would be using copies of the same image as elements in a composition.  Here's a post on The Gallery about that type of use.  The rose is the primary point of interest (only point of interest) and is repeated as the sole background elements.  It's enlarged and thrown out of focus, but it is recognizable.  I don't think that's what people are searching for.  I think they're looking for a way to layout a Picture Package.  Sort of like today's image.  I figured I had to really blur out the face of the person because I don't have her permission to use a recognizable image.  Trust me when I say she is a very lovely young woman.  Adobe didn't include Picture Package in CS5 or CS6.  It's available.  It can be used in either CS5 or CS6, but you have to jump through a couple of hoops (just once) to get it running on the newer versions of Photoshop.  To learn how to get Picture Package and get it going, hit the "Read More".
Read more!

Monday, September 17, 2012

Photoshop Puppet Warp and Adaptive Wide Angle


Today's image is a fifteen shot panorama of the Hudson River from Storm King Mountain.  If you just happen to be familiar with the Hudson, Bear Mountain Bridge is to the right and the Newburgh - Beacon Bridge would be to the left.  The tree on the left is in Griswold Connecticut, but I thought the image needed something to serve as an anchor opposing the hills on the west side of the river seen on the right.  I didn't feel too bad about adding the tree since there was a tree there anyway, just not as good looking a specimen as the one I put in.  The sky is actually real.  It was a bright sunny (partly cloudy) day and dropping the two stops due to a Circular Polarizer wasn't going to reduce the shutter speed by too much (shooting in Aperture Priority).  The biggest deal was the fact that it's a fifteen shot, hand held pano.  As you might think, it sort of looked like a smiley face when it was first stitched together.  With the tools available in Adobe Photoshop CS6 (CS6) it was possible to make the eastern shoreline look more acceptable and not lose the sky or river.  It find out how the image was straighten out, hit the "Read More"
Read more!

Friday, September 14, 2012

Creating Fantasy Images With Photoshop CS6


There's a starting point to every image.  It's not necessary that the final image look anything like the original.  Today's image is an example of just such a final image.  The title honors the space agency and their recent accomplishment of land a roving probe on Mars.  The image is called "Curiosity Approaching Mars".  As you may have guessed, I wasn't following along behind the craft, snapping pix as Curiosity neared the planet.  I also don't have a long enough lens to have taken the shot from my back yard.  (That would have been a really long lens.)  I do think it looks reasonably possible, but what was used to create the image and how were the pieces changed?  To find out, hit the "Read More".
Read more!

Wednesday, September 12, 2012

Another Day, Another Connecticut Skyline In Photoshop


Well, if you read the previous post I was supposed to be posting about calibrating my lenses using the Spyder Lenscal device.  I didn't get around to it because my tripod was in the trunk of the car and the car wasn't here.  Ya can't calibrate a lens hand held.  You can, however, make panoramas hand held.  In fact, most of the panos I do are hand held.  One reason is that "most" are done in the bright sunlight with a shutter speed of 1/500th or more and this particular image had an F-stop of F 14.  Lots of DOF (Depth of Field).  The big deal was the brilliant blue sky and the row after row of clouds.  Lately we've been seeking out the skylines of Connecticut cities.  So far, the best (read that as easiest)  have been the ones on the water.  Either the Connecticut River or along the Long Island shore.  We don't have a whole lot of access to boats, so we've had to find places with either established parks or outcroppings with views of the cities.  Today's image isn't exactly straight out of the camera (but then again, not many of my images are) and the use of Adobe Photoshop CS6 was liberally applied.  To find out what "tricks" were used to finish the image, hit the "Read More".
Read more!

Monday, September 10, 2012

Jazzing Things UP With Photoshop


Who says you can't fool around with your images.  If you're interested in making a record, if you're doing some photojournalism, you probably should keep you images pretty straight.  More than one photojournalist has been kicked to the curb because he/she played with an image.  But that's not what I do.  People don't pay me to record a scene.  They pay for my imagination.  One of my more successful images is a wildly colored image of the dock area in Antigua.  Does it look anything like reality?  Nope!  It does give a "feeling" of Antigua.  The sun is bright, the people are bright, the clothing is bright.  Everything points to being bright, so that's what my final image looked like.  Today's image isn't quite as bright as the Antigua image, but it's Hartford, in Connecticut, not in the Caribbean.  It has a different vibe, a different tempo.  It's a city coming back and getting brighter and more colorful every day.  So, I've presented it as being colorful.  There's a whole raft of techniques used to get to the final image.  Parts are highly messed with.  Others, almost nothing has been done and in still others where is a hint of fooling around with the image.  To find out about what went on where, hit the "Read More".
Read more!

Wednesday, August 29, 2012

Wednesday Q&A - Photoshop - Sharpening By A Nose


It's nice when a photo op walks right up to you.  That look on the face of the deer in today's image kind of says to all.  It was a stare down to see who would move first (and in which direction).  I had just dropped the missus off at work and was leaving the companies property when I saw this deer munching on some foliage.  I slowly stopped the car and even slower I turned my head.  Didn't want to spook her.  She looked up, turned her head and looked back at me.  I hit the button to lower the window and she just watched the window go down.  Still looking at me.  I reached into the back seat and grabbed my camera bag.  Fiddled around getting the camera out and changing to a longer lens and she was still just looking at me.  I took several shots out the driver's side window and she just stood there looking at me.  By now I was thinking this girl might be daring me.  "Come on out of that car and you'll get a deer hove up your a$$."  Not being the brightest photographer, that's exactly what I did.  Slowly pulled the handle on the door, equally slowly swung the door open and dropped one foot to the pavement.  She still just stood there looking at me.   I put the strap around my neck and rose out of the seat.  Finally was outside the car and she was still doing the stare down thing.  I looked down to make some adjustments to the camera.  That's when she started her charge.  Thankfully it was into the woods and not at me.  Pulled the camera up to my eye and snapped off a burst of shots of her white tail bouncing into the forest.  To find out how the shot was finished, hit the "Read More".
Read more!

Monday, August 27, 2012

In Camera Metering For Photoshop

We were running around the New York Renaissance Faire in Tuxedo, NY over the weekend and had some challenging shot opportunities.  Today's image is a good example of a tricky lighting situation.  Since we were just at the Faire to have a nice summer afternoon we hadn't brought any reflectors, speedlights or modifiers to try to tame the bright sunlight.  I find it's always a good idea to ask "the talent" for permission to shoot them.  In fact, one of the performers, when asked for his okay, said "sure, and thanks for asking".  These people are there, being paid to perform, sell and interact with the visitors.  I'm sure most (99%) are aware that part of the duty is being available for people wondering around with cameras.  The young lady in today's image was most gracious.  I asked and she offered to come around in front of her stand to pose.  I asked her to stay in back so I could include her wares in the shot.  She sold perfumes in interesting looking bottles.  To find out how the shot was setup and what was done in Adobe Photoshop Lightroom 4 (LR4) and Adobe Photoshop CS6 (CS6), hit the "Read More".
Read more!

Friday, August 24, 2012

Subtle and Not So Subtle Changes in Photoshop


Today's image has a little bit of everything.  Part of it is an HDR, but I didn't like the sky, so I switched it back to a non-HDR version.  There was an air conditioner in the upper left window, so I took it out.  There was scaffolding in front of the greenhouse and window to its left, so I took it out.  I pumped up some of the colors using Hue/Saturation Adjustment Layers in Adobe Photoshop CS6.  It's a cropped pano rather than a multi-shot.  And it took a trip over to Nik Software's Color Efex Pro 4 just to play with it.  To find out the air conditioner was removed, hit the "Read More".
Read more!

Wednesday, August 22, 2012

Wednesday Q&A Come On People, Adobe Photoshop Smart Objects Rock


I've said it before, but it continues on.  The number one keyword search bringing people to the Gallery concerns Adobe Photoshop Smart Objects.  It's probably closely followed by search asking how to get rid of Smart Objects.  My big question back to those folks is why do you want to get rid of Smart Objects?  For those who don't want to learn about Smart Objects and want to read as little as possible...  The way to get rid of a Smart Object is to Right Click on the Layer using the Smart Object (anywhere on the Layer ribbon other than the name or the thumbnail.  You'll get a dropdown menu.  Slide down to Rasterize Image and click.  That's it.  That's the way to get rid of that little Smart Object icon in the lower right of the thumbnail and revert whatever you had back to a plain old Layer.  TO learn more about using Smart Objects, hit the "Read More".
Read more!

Monday, August 20, 2012

Inspiration Interpreted In Photoshop


National Historic Sites in the US are typically places meant to inspire us.  There are 89 of these sites, only one in Connecticut and only one dedicated to American Painting.  It's Weir Farm NHS, located in the towns of Ridgefield and Wilton.  "It commemorates the life and work of J. Alden Weir, the American impressionist painter and member of the Cos Cob Art Colony."  It's only about ten miles from the gallery and we go there at least four times a year.  Today's image is a panorama of the back of the house from a lower garden.  One of the more interesting bits about Weir is the fact that he initially disliked impressionism, saying "I never in my life saw more horrible things" (Wikipedia).  This from a man who later championed impressionism and his fame came from that style of work.  (Ya never know, do ya.)
It is an peaceful place and one full of photographic potential.  The buildings, the rock walls, the orchard, grounds, pond, meadows and gardens all make good photographic fodder.  Walking around the grounds for as little as ten minutes can produce scores for images, different on each visit.  Today's image is an amalgam of a four shot pano and a set of clouds taken a couple weeks ago.  The sky was an overcast gray and pretty flat.  To find out how the sky was placed (it was really easy), hit the "Read More".

Read more!