
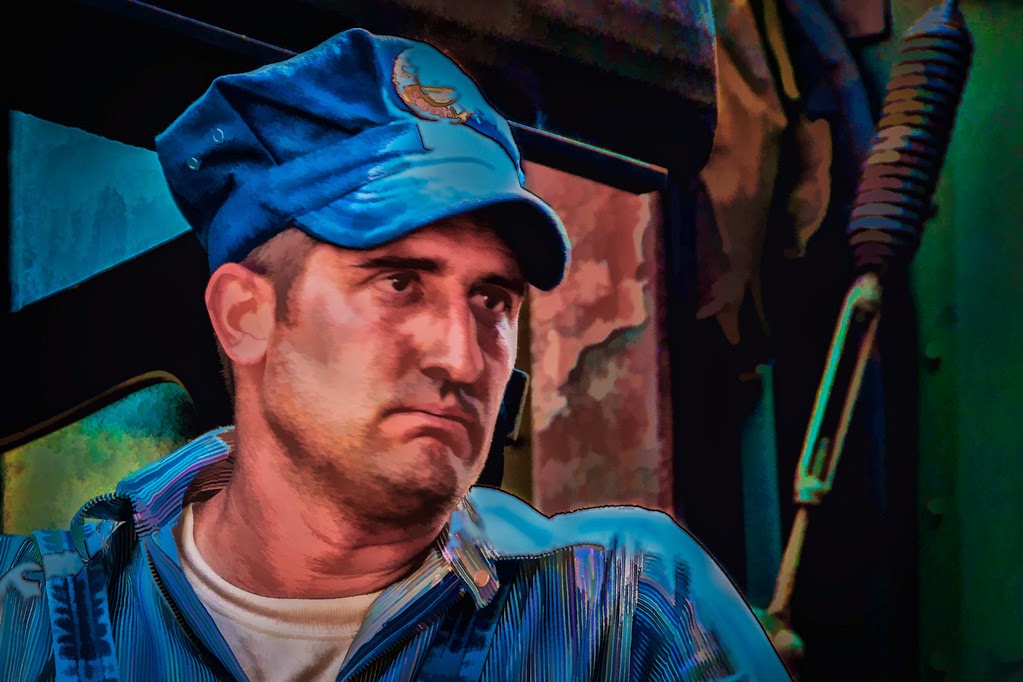
Today's image started out just screwing around with a properly exposed, lackluster image. A nice memory of a train engineer. I've used several other images from the same shoot, but the shot of the engineer was trivial. Just a grab shot as I walked down along the train. After my "experiment" with Topaz Labs' (TL) Simplify (previous post) I went looking for other sorts of images that might "benefit" from a trip through LR Simplify. The engineer always had a stern look him and I could see removing a lot of the detail might make it stand out. The route to today's image is Adobe Photoshop Lightroom (LR) to TL Simplify to LR to Adobe Photoshop (PS) to LR. Each step was necessary to achieve specific goals.
Everything starts in LR. I use it exclusively for all my DAM (Digital Asset Management) work. It's where I store and find every image. It's also where I make my basic adjustment before shipping an image out to anything. It's sort of like a yoyo. You let the string out to other plugins or applications and pull it back for storage. Once any basic tasks were taken care of the image went out to TL Simplify. (Photo/Edit In/Fusion Express 2 (64 bit)/Simplify 2). From there I went through several iterations of the defaults to find a good starting place. I ended up in Harsh Color Painting (?). Some of the sliders were played with to get the "right" amount of simplification versus detail. Once satisfied the yoyo was wound back up on the spool and the image returned to LR.
I felt the details weren't strong enough, so I let the yoyo out again and sent the image to PS (Photo/Edit in/Open in Photoshop as a Smart Object). Two Curves Adjustment Layers were added. One for the Shadows and one for the Highlights. (Do a Google search on Scott Kelby to find out how to use this Dodging and Burning method.) I actually used two sets. One for the shirt and another set for his face. Every highlight was brightened and every shadow was deepened. This produces an "almost" three dimensional effect to the image. Once that was done it was time to pull back the yoyo again and have the doctored image retract back to LR (File/Save - File/Close).
Back in LR the "details" were corrected and/or added. The left shoulder of the shirt was blown out. Using the Adjustment Brush a similar color was "painted" on both the shirt and the cap. Shadows were added to both. Color adjustments were made using the HSL tab, taking some of the red out of his face. A little bit a Sharpening and a slight Vignette finished off the image.


0 comments:
Post a Comment