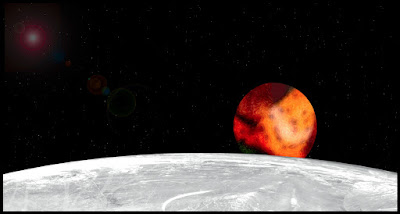
 Okay, anybody wanna guess what the elements in this image
started out as? Would you believe
(great, now I'm sounding like Maxwell Smart) a Tiger Lily, a glass of water
with ice and the bare branches of a bush.
Add in a couple of black Layers with a Fibers Filter
(Filters/Render/Fibers) and a Clouds Filter (Filters/Render/Clouds). And, before I forget, one more black Layer
with a Lens Flare Filter (Filters/Render/Lens Flare) to create the sun. Stir in a couple Blend Mode changes and you
have today's image. Any resemblance to what the pieces started out
as is pretty much a coincidence. Shows what can happen when you have too much
time on your hands. I sort of like the
way it came out. If you're interested in
learning how it was done, hit the "Read More".
The planet was made first and got the ball rolling. It is a Tiger Lily, in fact it's the flower
found in the post of July 19, 2010. The
first thing that was done was that it was brought into Adobe's Pixel Bender
plug-in. The Circle Splash effect was
applied and then the center removed for use.
The rest was discarded. It then
received a Gaussian Blur. It went
through another trip to Pixel Bender and the Oil Paint effect added. It ended up looking something like the planet
Jupiter.
The larger surface comes from a shot straight down on a
glass of water with ice in it. The glass
was masked using the Elliptical Marquee Tool (M). Free Transform (CRTL T) was used to enlarge
the component to give it the look of being the Jupiter Moon Europa. Europa is one of the largest objects in the
solar system, but it is a moon of Jupiter.
It's primary characteristic is that it's an ice planet (moon). To give part of the surface a fractured look
a shot of a bush in winter was used. The
bush had no leaves, so it became a jumble of intersecting lines. A Black & White Adjustment Layer was
added to take any color information out of the equation. A Blend Mode change resulted in the
"fractures" appearing to be organic in nature.
The start field is a black Layer with a Fibers Filter
applied. A Levels Adjustment Layer was
used and the black slider brought all the way over to the white slider
location. This dropped out 99% of the
fibers and left only a random scattering of pin points.
The sun and flare are a black Layer with a Lens Flare
Filter. It looks as though the
"photographer" pointed the camera to close to the sun.


0 comments:
Post a Comment