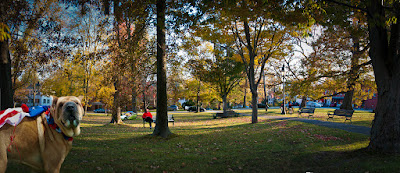
 I've done posts on panoramas and I've done posts on
compositing and I've done posts on flipping back and forth from Adobe Photoshop
Lightroom 3 to Adobe Photoshop CS5, so I figured I'd do one combining all
three. I thought the park scene had
possibilities when I was flipping through LR3 this morning and decided to do
the pano. CS5 makes it so easy and it's
so forgiving that you can practically put the camera on a very short interval
timer sequence, click the shutter and throw the camera in the air and still be
able to come up with a pretty good pano.
The days of needing to be on a tripod (doing daylight panos), with a
lens null point mount, in manual exposure, with manual focus are over. Photoshop CS5 stitches, aligns, blends and
spits out a 99.99% correct panorama, 100% of the time. About the only thing the photographer needs
to do is overlap one frame to the next.
Come to think of it, in the toss it up in the air scenario, you could
probably do the same setup multiple times and get enough shots so CS5 would be
able to sort them all out and build one coherent image. I'll put that on my "todo" list and
report back. To find out more about
today's image, hit the "Read More".
The first thing you probably noticed as being dropped in is
that big, old dog in the lower left hand corner. That one's a given. You get no "points" for that one. A little Quick Selection Tool (W) action
combined with some Smart Radius in the Refine Edge dialog box and I was 90%
there. As far as output from the dialog
box goes I typically pick Output To New Layer With A Layer Mask. I did have the dog stacked on the pano before
going to Refine Edge. By clicking
through the F key cycle I was able to put the dog on the background pano,
giving me a much better idea how good the selection had to be. After I had the new Layer and the Layer Mask
I turned on the Mask (ALT and click on the Mask) to be able to fine tune it a
little. With the Brush Tool (B) set to a
Brush Blend Mode of Overlay and the Brush Opacity down around 35% I was able to
go back and forth between cleaning the blacks and white by hitting the X
key. Because the Brush Blend Mode was in
Overlay, anything darker than 50% would darken to black using a black Brush and
anything lighter than 50% would lighten to white using a white Brush. With the Opacity turned down, getting to
either black or white took several passes.
Works great.
I basically did the same thing with the man on the bench
reading, the enclosed three wheel bike and (over to the right side) the cannoneers
about to fire on one of the town's buildings.
With all three the same steps were taken as the dog with the addition of
one step. The image would be easily seen
as doctored if everyone was in front of the trees. In each case I used the Quick Selection Tool
on the panorama Layer and picked out the tree or post that should have been in
front of the people's position. In each
case it was a simple task of putting a Layer Mask on the Layer with the person
(or people) in it and, on the Mask, filling the Selection with black,
Try it. Make up your
own party.


0 comments:
Post a Comment